While the 2D computer vision has seen tremendous progress, the 3D computer vision remains a hard task. We generate a huge amount of 2D data (images, videos) but 3D datasets are rare and expensive to create. This project will explore different methods of obtaining 3D human pose information starting from 2D data, obtained from a single image.
This work is based on two articles:
- A simple yet effective baseline for 3d human pose estimation by Julieta Martinez, Rayat Hossain, Javier Romero, and James J. Little
- Can 3D Pose be Learned from 2D Projections Alone? by Dylan Drover, Rohith MV, Ching-Hang Chen, Amit Agrawal, Ambrish Tyagi, and Cong Phuoc Huynh
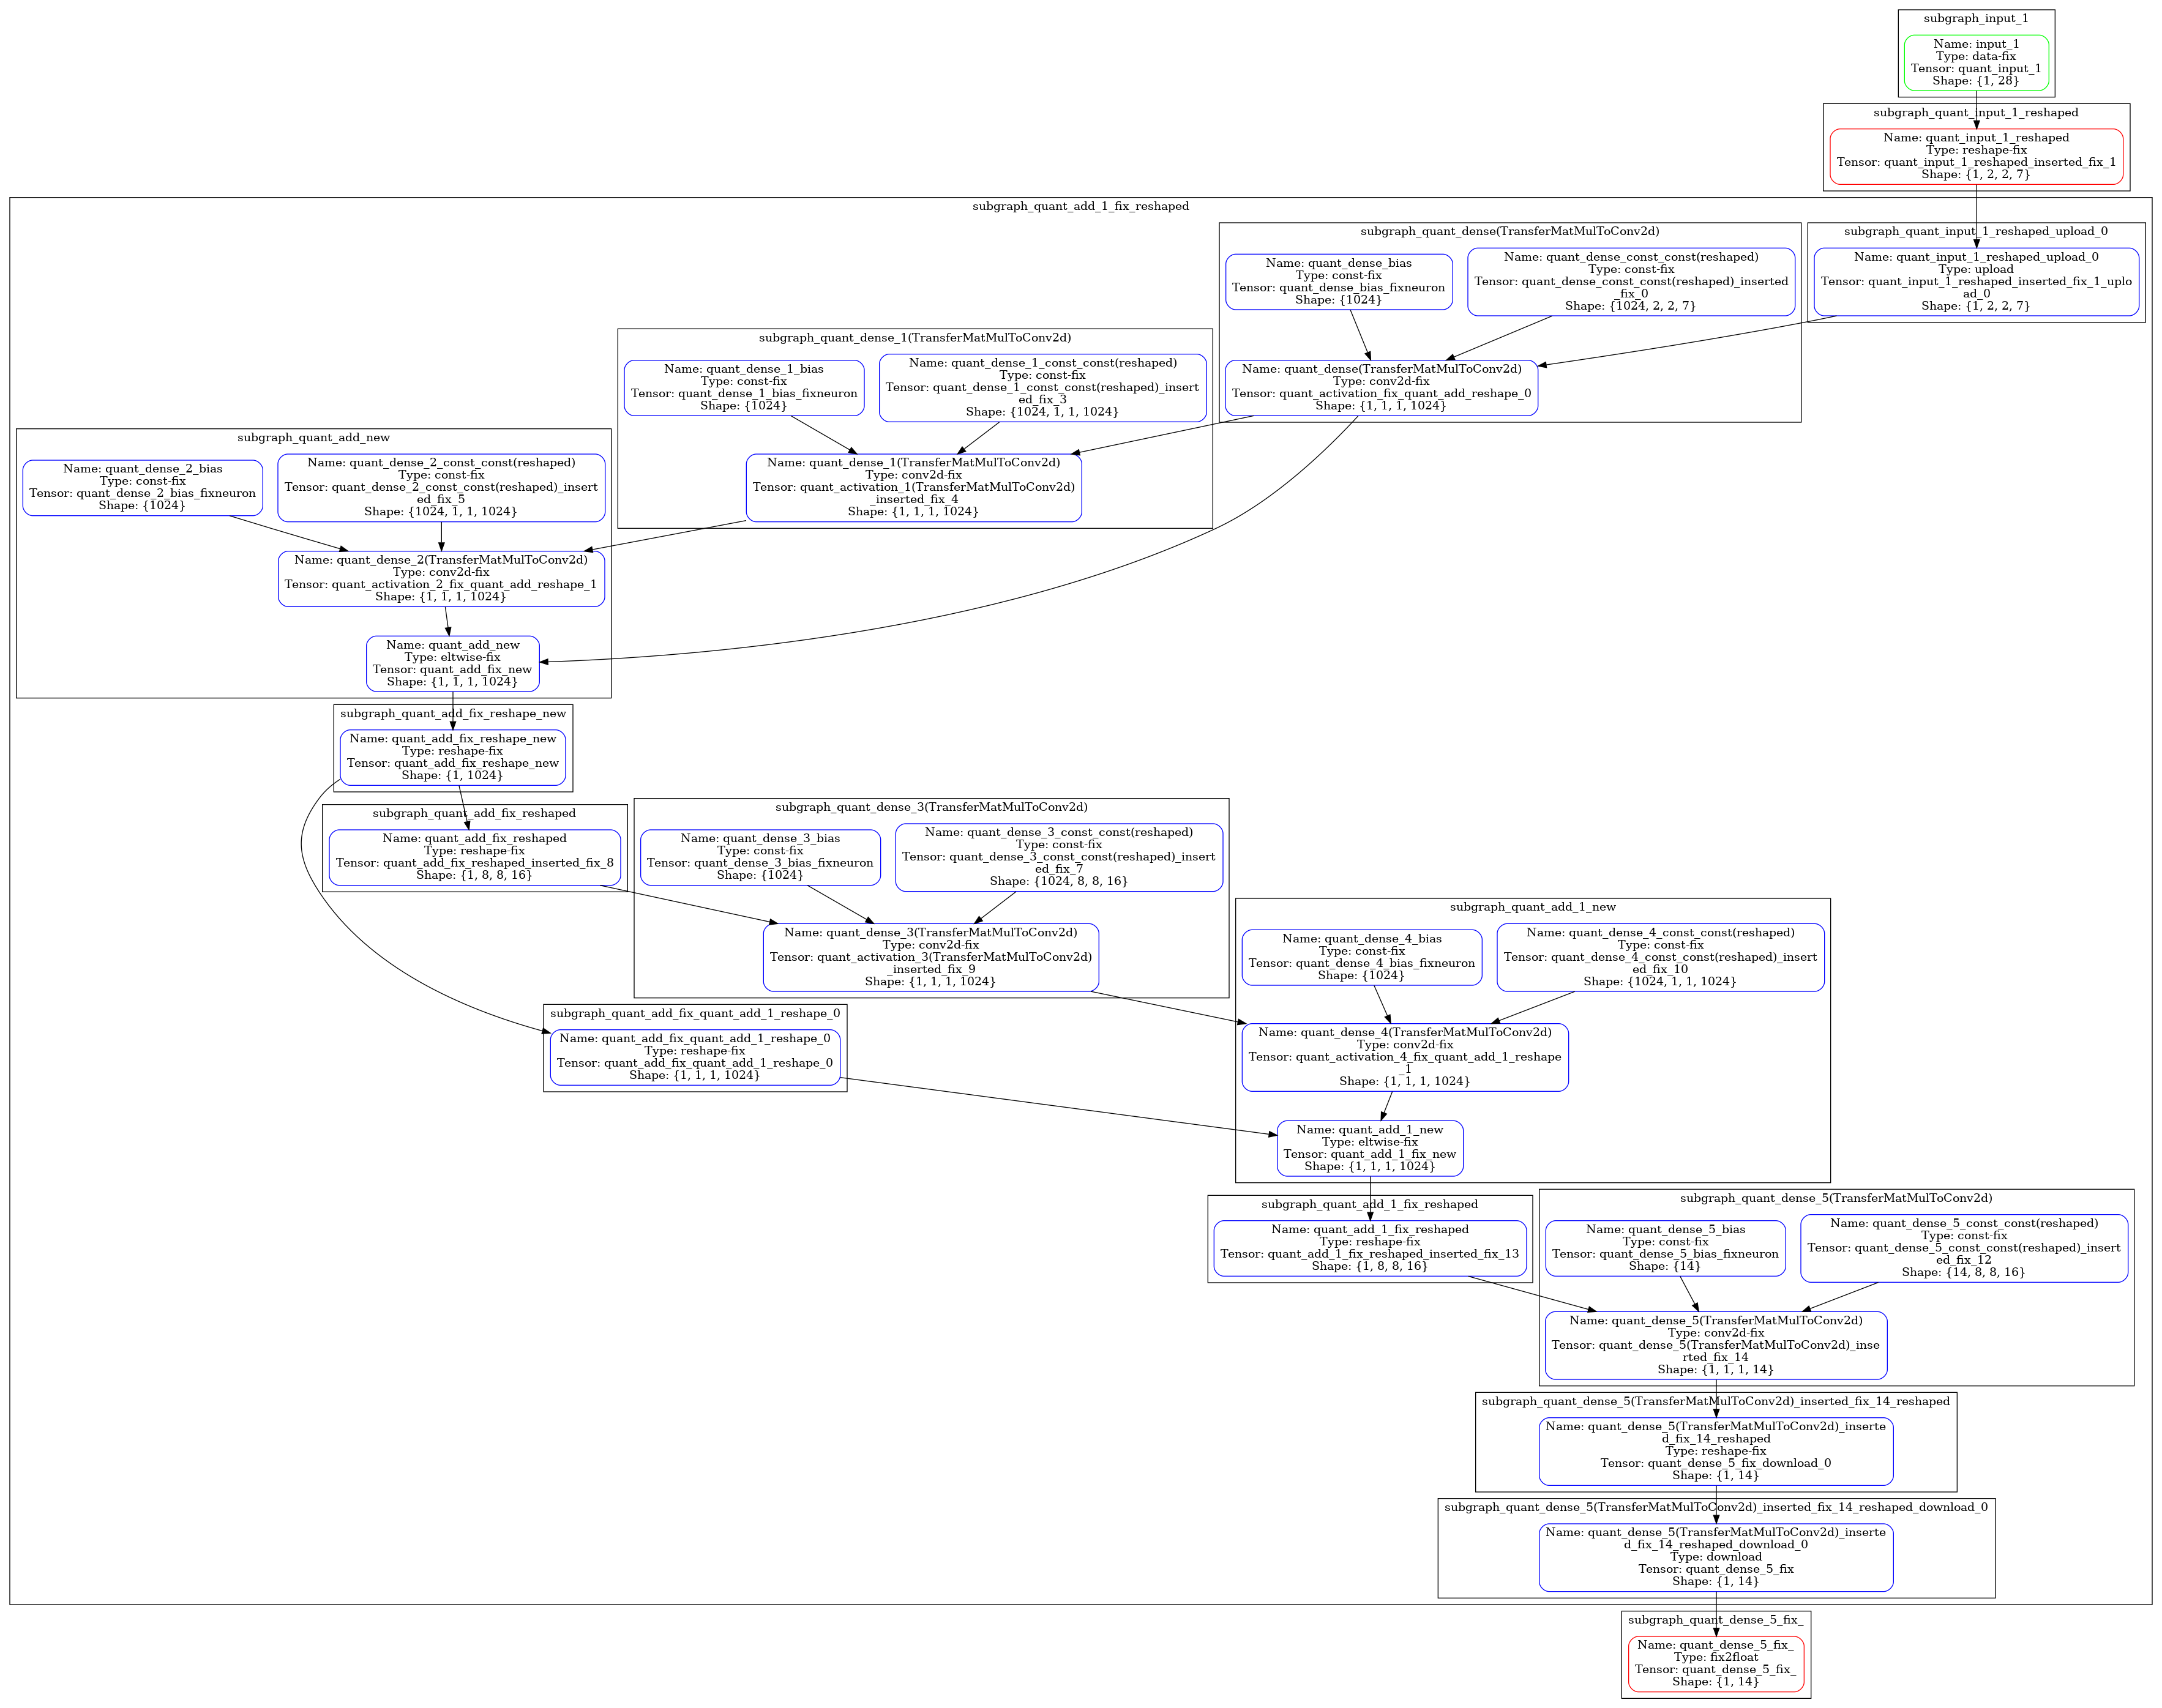
The first article explores a simple yet effective way to "lift" the 2D data to 3D by using a relatively simple DNN. The model proposed in this article will be referred further on as the "article model" or the article.xmodel (from the file name used to do inference on the VCK5000 card).
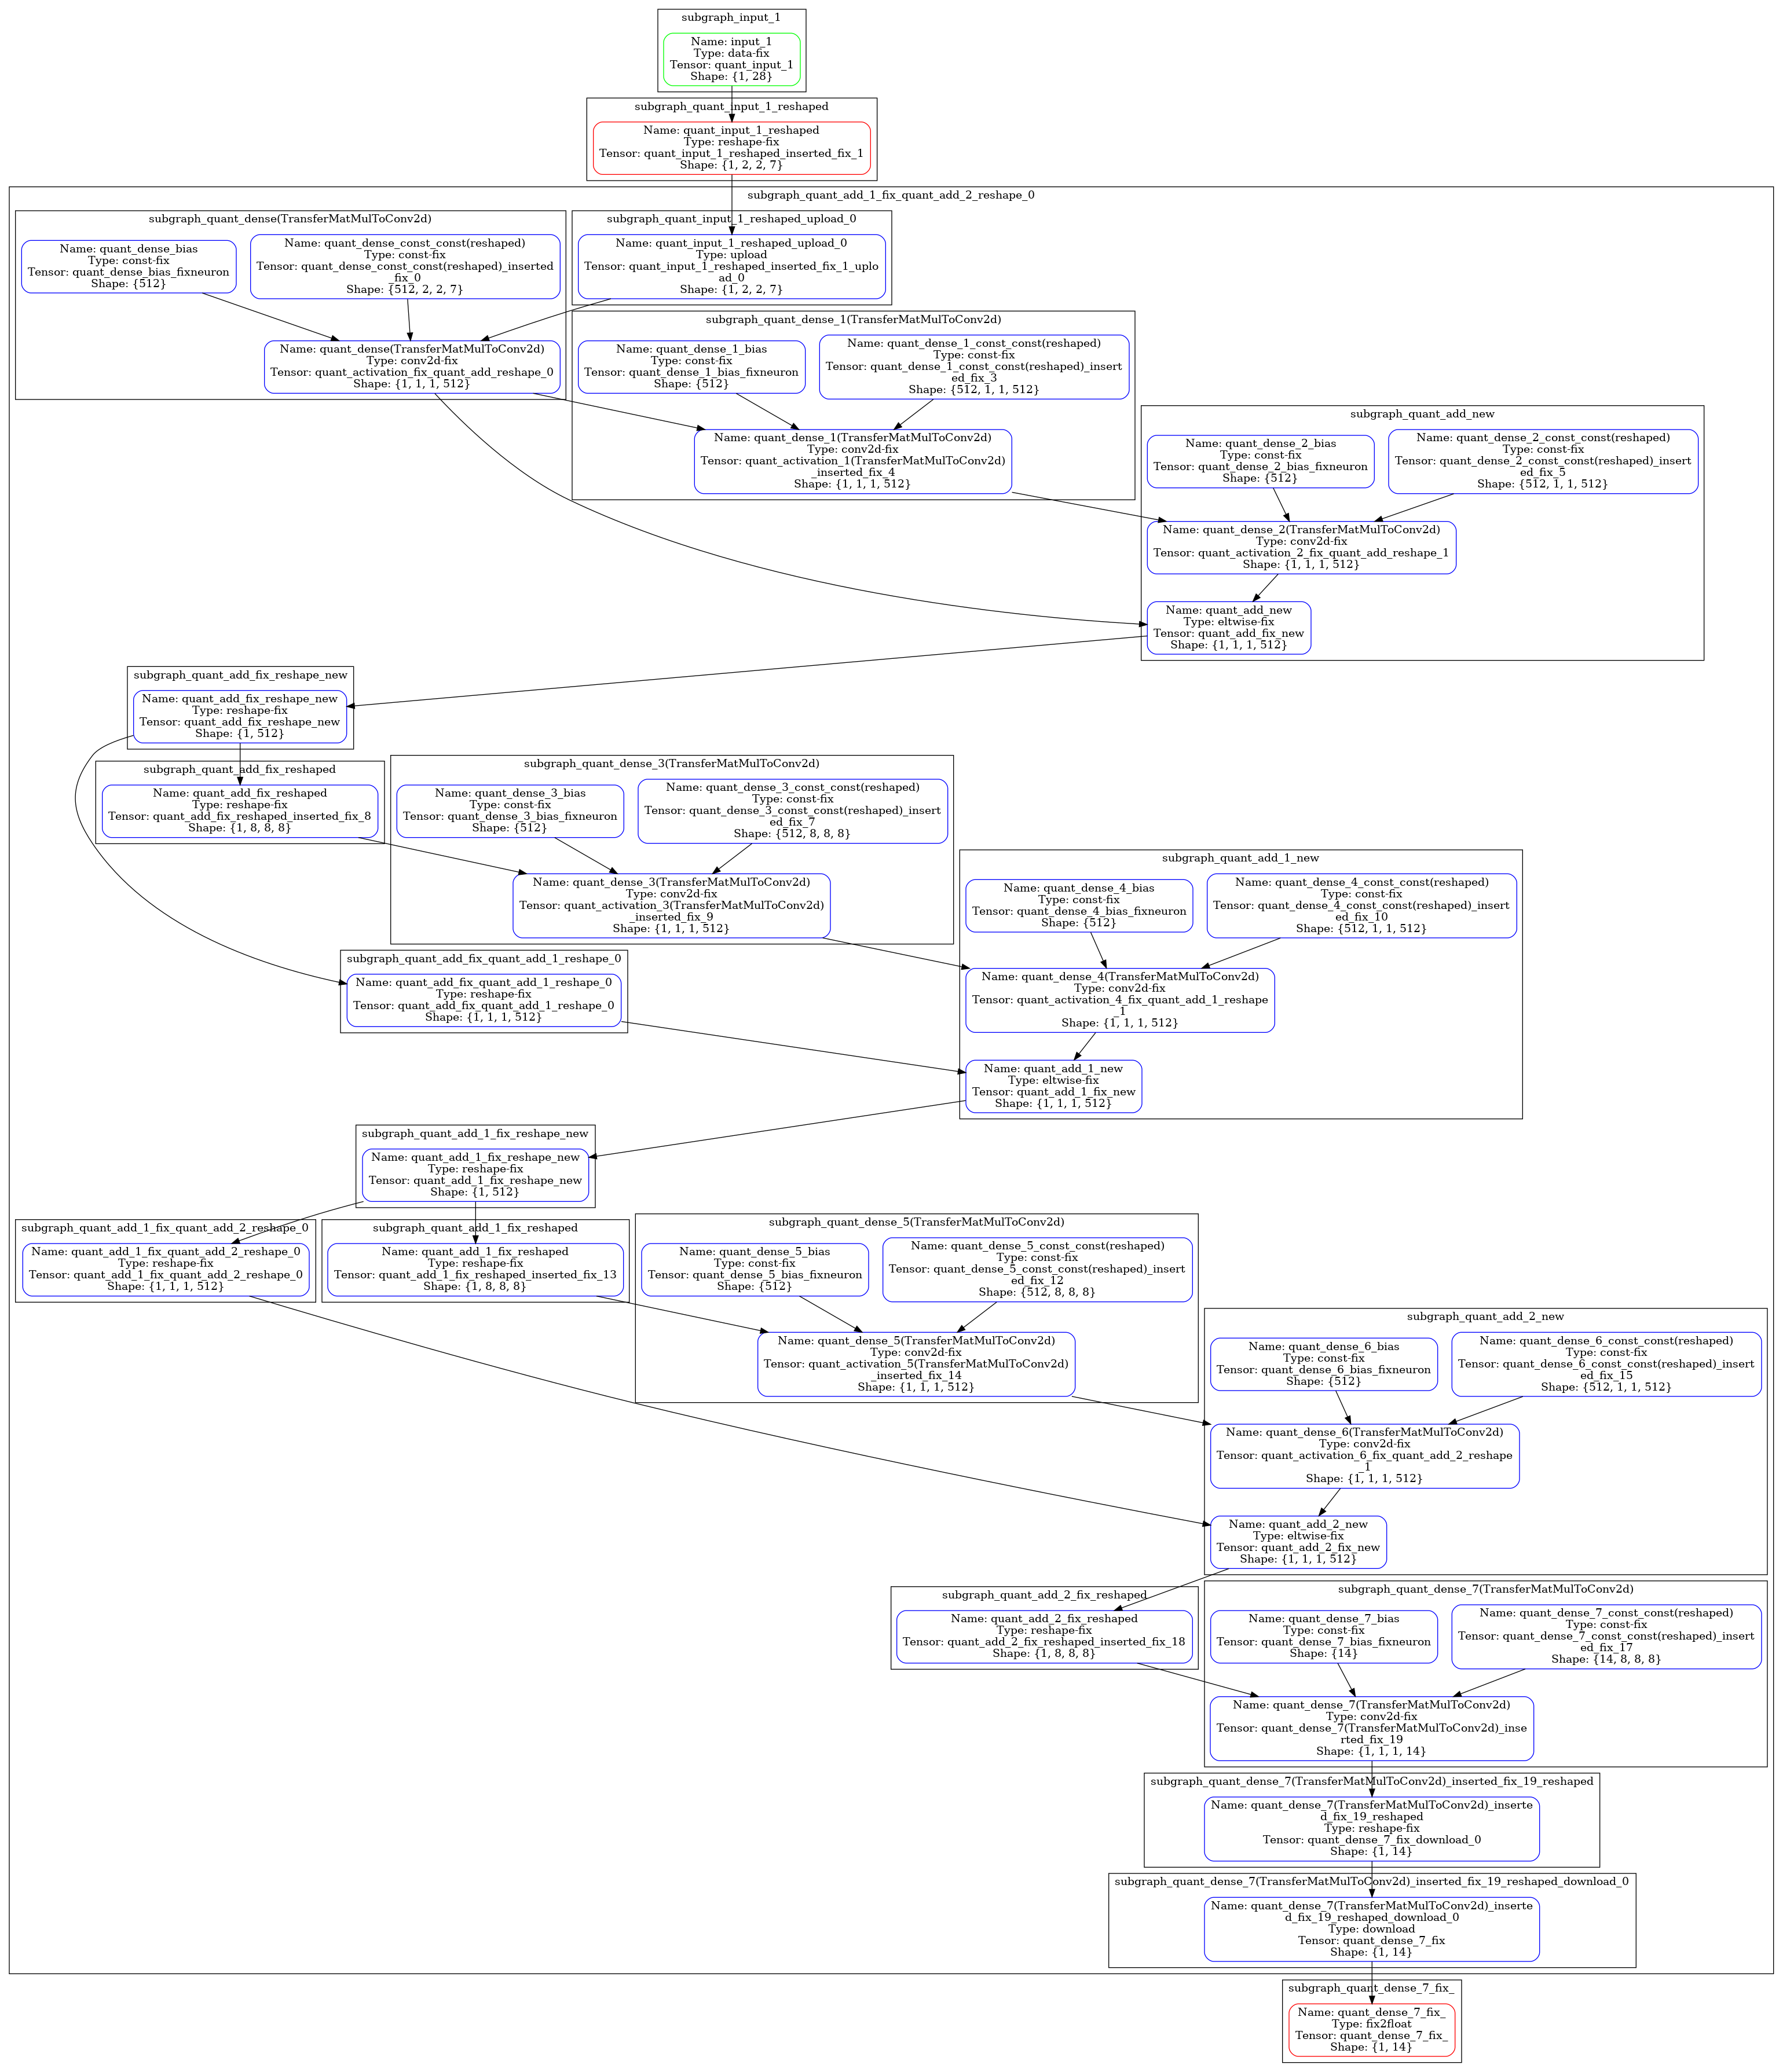
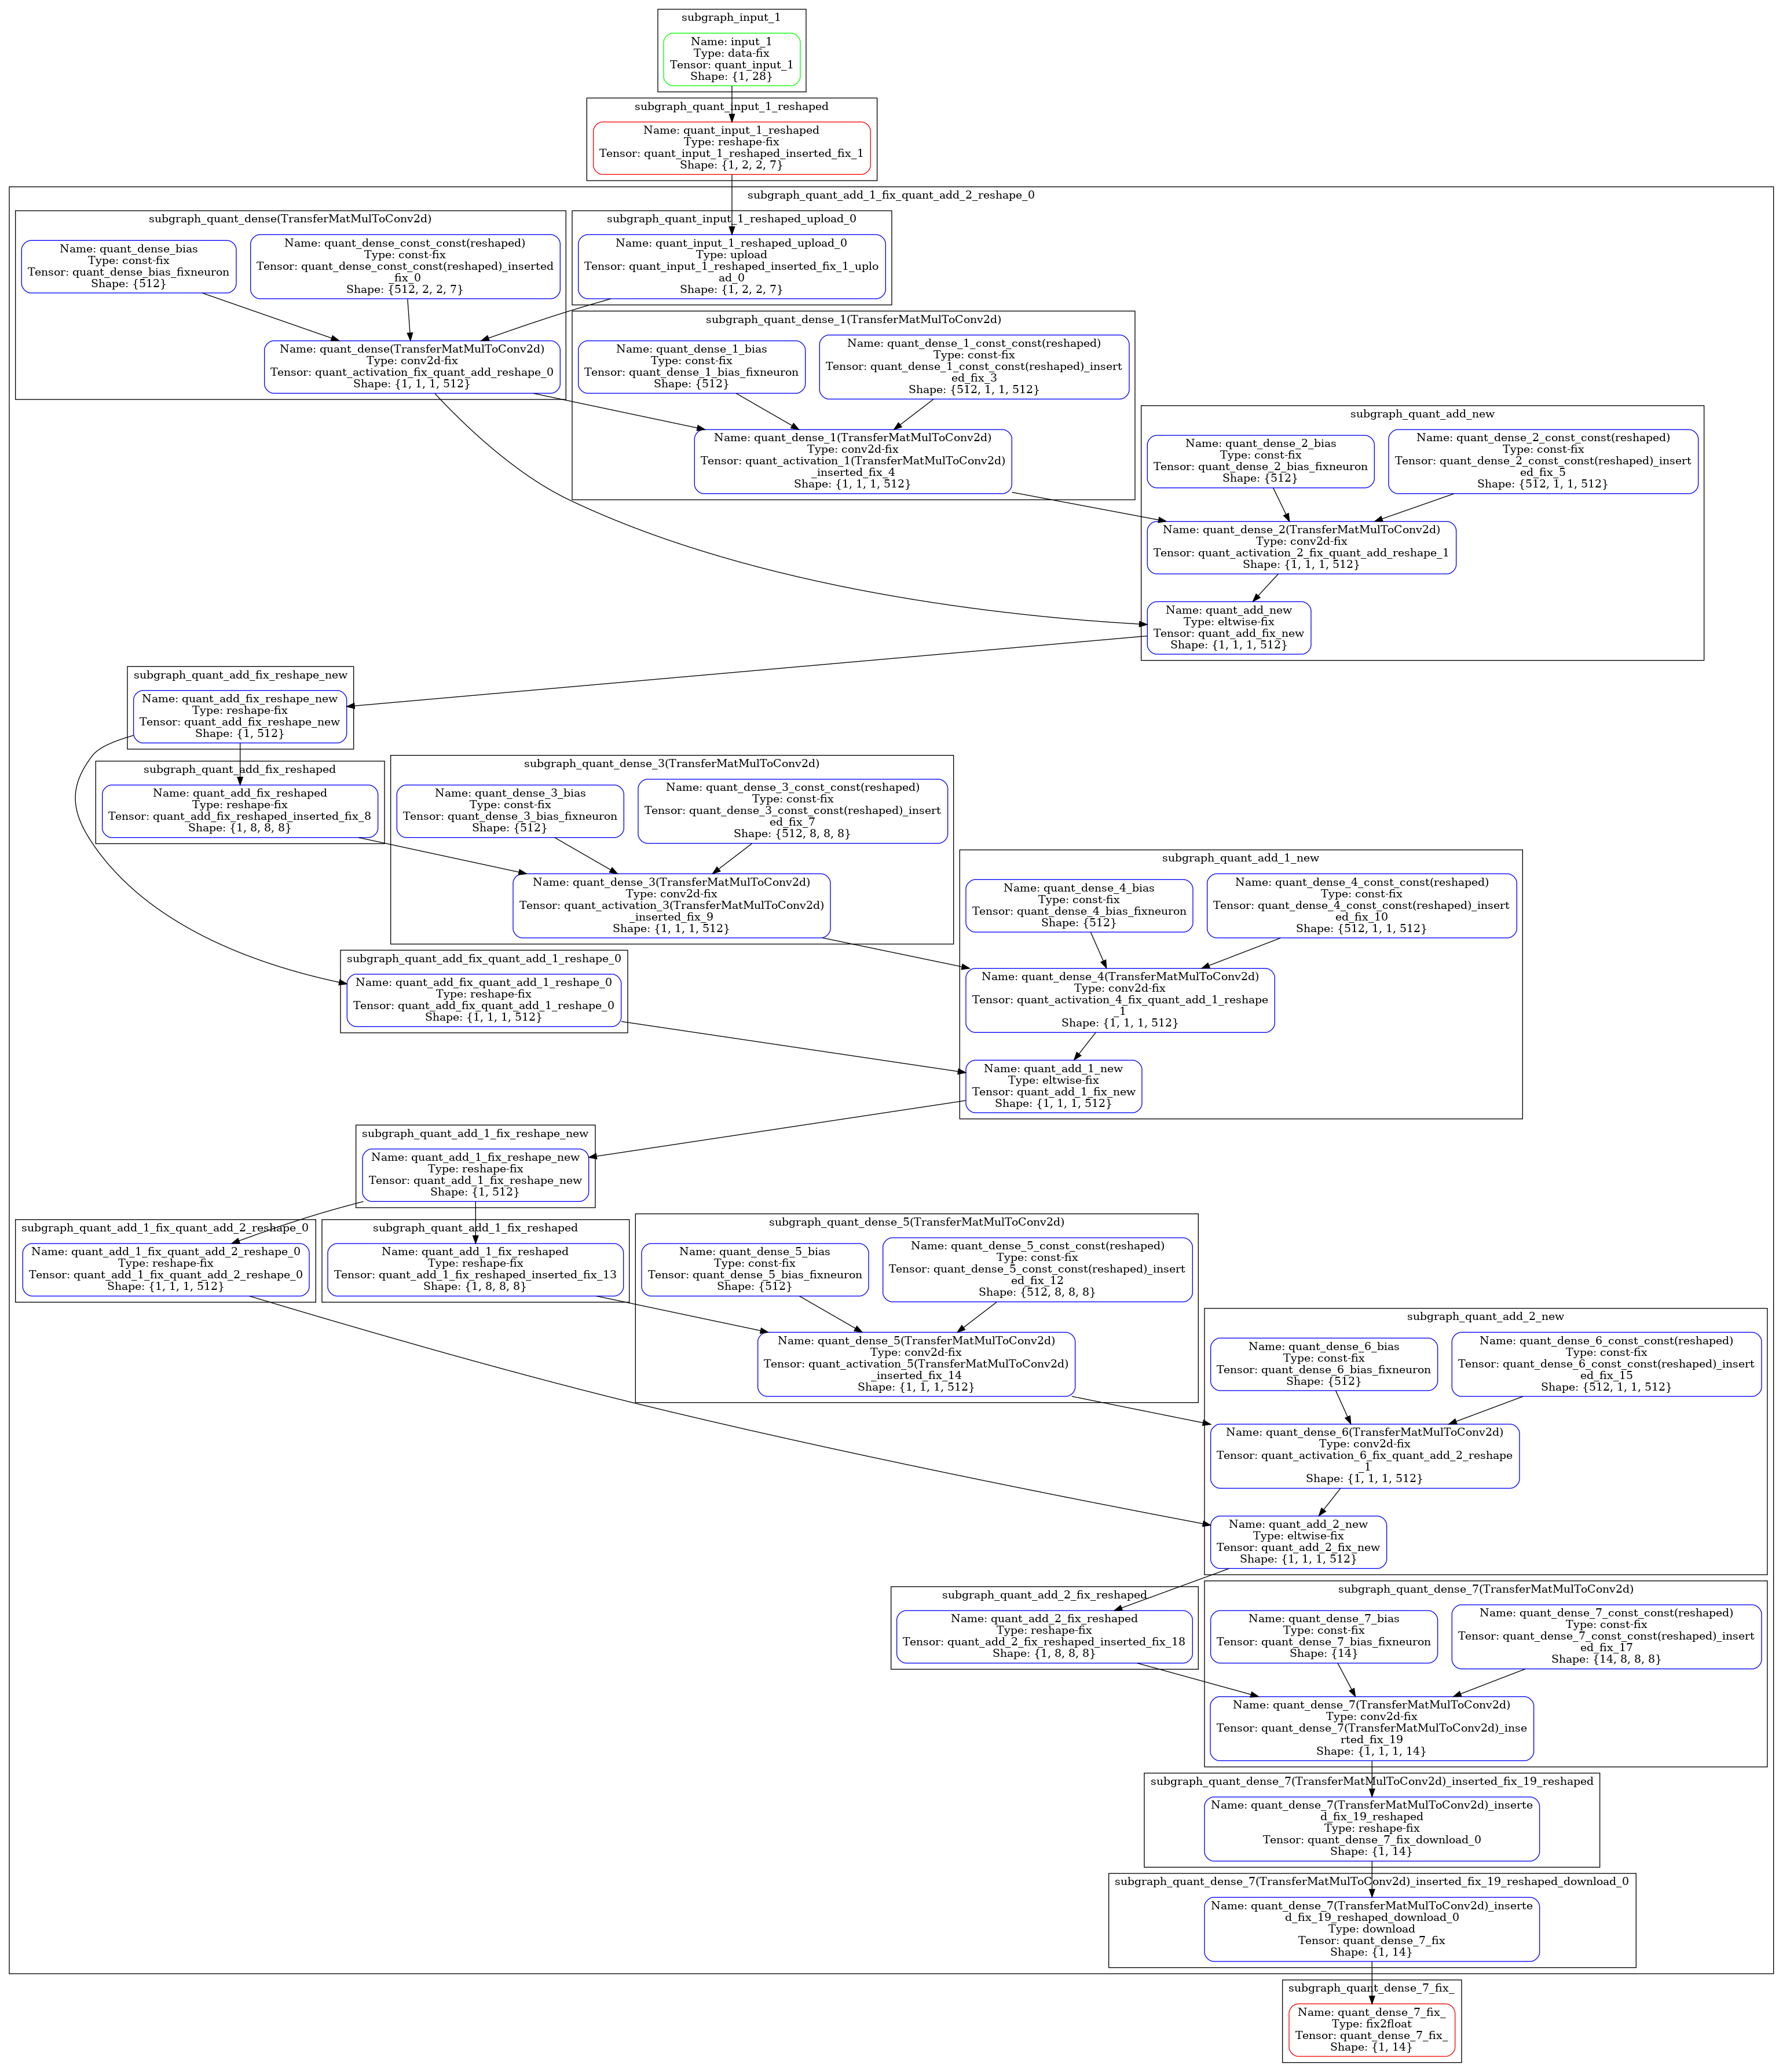
An alternative to the "article" model was tried, with fewer neurons on a layer but with more layers. This alternative model is referred further as "residual" or "res.xmodel".
The two models are trained on the Human3.6M dataset. This contains 3D data obtained from using expensive high resolution cameras setup in a studio, filming professional actors. As far as the author is aware this is the only dataset available with 3D data.
The third model, referred as gan (gan.xmodel) uses a novel idea: a generative adversarial network to generate 3D data only from 2D data. This model consists in a generator (the residual model was used) and a discriminator.
The generator's job is to take 2D poses and generate the depth for them, transforming them in 3D poses. The discriminator's job is to take 2D poses and return if they are real or fake (generated by the generator). The 3D poses generated by the generator are randomly rotated, transformed back to the camera's coordinates and projected back in 2D. They are then fed back to the discriminator. The main idea is that if the generator will be able to create good estimation of 3D poses then those 3D poses randomly rotated and projected back in 2D will look indistinguishable for the discriminator. Both the generator and the discriminator are trained together, one's goal being to create "fake" 2D poses while the other's is to detect the "fakes". The model was trained on images obtained from 35 videos found on YouTube about yoga poses. GANs are notoriously hard to train, the state where both the discriminator and the generator are producing good results being a fleeting state rather than a stable one.
- Install Vitis AI as described here. For training and model quantization the GPU Docker needs to be build as it will speed up the process considerably. (Tip: the GPU Docker build requires a lot of DRAM, if your build fails consider enabling swap)
- Setup VCK5000-ES1 Card as described here. If you have a VCK5000-PROD card then the latest Vitis AI library will have a similar page describing how to do it
- Run the openpose demo to verify everything is installed correctly
- Clone the Yoga AI repository in the Vitis AI directory
- Start the gpu docker image:
./docker_run.sh xilinx/vitis-ai-gpu:1.4.1.978The docker_run.sh file was modified to add support for X11 and USB webcams:
docker_run_params=$(cat <<-END
    -v /dev/shm:/dev/shm \
    -v /opt/xilinx/dsa:/opt/xilinx/dsa \
    -v /opt/xilinx/overlaybins:/opt/xilinx/overlaybins \
    -v /etc/xbutler:/etc/xbutler \
    -e USER=$user -e UID=$uid -e GID=$gid \
    -e VERSION=$VERSION \
    -e DISPLAY=$DISPLAY -v /tmp/.X11-unix:/tmp/.X11-unix -v $HOME/.Xauthority:/tmp/.Xauthority \
    -v $DOCKER_RUN_DIR:/vitis_ai_home \
    -v $HERE:/workspace \
    -w /workspace \
    --device /dev/video0 \
    --rm \
    --network=host \
    --ipc=host \
    ${DETACHED} \
    ${RUN_MODE} \
    $IMAGE_NAME \
    $DEFAULT_COMMAND
END
)
The full list of commands are described here.
2D pose estimationThis is done by using the Vitis AI Library as described here.
Before using the 2D pose estimator the model has to be downloaded:
cd /workspace/models/AI-Model-Zoo

wget https://www.xilinx.com/bin/public/openDownload?filename=openpose_pruned_0_3-vck5000-DPUCVDX8H-r1.4.1.tar.gz -O openpose_pruned_0_3-vck5000-DPUCVDX8H-r1.4.1.tar.gz

sudo mkdir /usr/share/vitis_ai_library/models

tar -xzvf openpose_pruned_0_3-vck5000-DPUCVDX8H-r1.4.1.tar.gz

sudo cp openpose_pruned_0_3 /usr/share/vitis_ai_library/models -rWhile there are good 2D pose estimators, the 3D problem remains open. There are two main approaches:
- training end-to-end by starting from images, using very large and complex CNNs
- using an existing 2D pose estimator and "lifting" the 2D result to 3D
This project will use the second approach and try to "lift" the 2D result to 3D by using the ideas from two articles:
- A simple yet effective baseline for 3d human pose estimation by Julieta Martinez, Rayat Hossain, Javier Romero, and James J. Little
- Can 3D Pose be Learned from 2D Projections Alone? by Dylan Drover, Rohith MV, Ching-Hang Chen, Amit Agrawal, Ambrish Tyagi, and Cong Phuoc Huynh
The first one is using a simple DNN to learn how to estimate the 3D position starting from 2D. This requires a large dataset of 3D poses. (the Human3.6M Dataset was used)
The resulting DNN performs well for the positions found in the Human3.6M Dataset but rather poorly for positions not found there (for example yoga positions). Another drawback is that creating 3D datasets is expensive so there are very few publicly available.
The second article is proposing a generative adversarial network and it doesn't require the ground truth for 3D data. This makes obtaining training data very easy as there are plenty of data (videos, images) available. The drawback is that training GANs is more of an art than science as it's relying on calibrating two unstable neural networks.
Simple DNN to regress 3D dataBefore using the Human3.6M dataset the data is preprocessed and then saved in.tfrecords files for easy training. Each 3D pose data is:
- scaled so that the distance between the head anchor point and hip anchor point will be of 1 unit length
- centered around the hip anchor point
- randomly rotated between 0 and 360 degrees around z-axis
- transformed in the camera coordinates
- split between 2D data (used as the input of the DNN) and a third "depth" value that will be the ouput of the DNN
This is done by the prepare_data.py script:
python prepare_data.py

ls -al ./data/Human36M_subject*
-rw-r--r-- 1 andrei andrei 12172996 mar 19 19:52 ./data/Human36M_subject11_joint_3d.tfrecords
-rw-r--r-- 1 andrei andrei 12977646 mar 19 19:47 ./data/Human36M_subject1_joint_3d.tfrecords
-rw-r--r-- 1 andrei andrei 20707511 mar 19 19:48 ./data/Human36M_subject5_joint_3d.tfrecords
-rw-r--r-- 1 andrei andrei 13055394 mar 19 19:49 ./data/Human36M_subject6_joint_3d.tfrecords
-rw-r--r-- 1 andrei andrei 21238789 mar 19 19:50 ./data/Human36M_subject7_joint_3d.tfrecords
-rw-r--r-- 1 andrei andrei 13517702 mar 19 19:51 ./data/Human36M_subject8_joint_3d.tfrecords
-rw-r--r-- 1 andrei andrei 16598153 mar 19 19:51 ./data/Human36M_subject9_joint_3d.tfrecords
There are three models proposed:
- the DNN described in the article (article.xmodel):
python train-article.py

python -u quantize.py --float_model model/article/article.h5 --quant_model model/article/quant_article.h5 --batchsize 64 --evaluate 2>&1 | tee quantize.log

vai_c_tensorflow2 --model model/article/quant_article.h5 --arch /opt/vitis_ai/compiler/arch/DPUCVDX8H/VCK5000/arch.json --output_dir model/article --net_name article- a DNN with fewer neurons on each layer but with more layers than the one described in the article (res.xmodel):
python train-res.py

python -u quantize.py --float_model model/residual/res.h5 --quant_model model/residual/quant_res.h5 --batchsize 64 --evaluate 2>&1 | tee quantize.log

vai_c_tensorflow2 --model model/residual/quant_res.h5 --arch /opt/vitis_ai/compiler/arch/DPUCVDX8H/VCK5000/arch.json --output_dir model/residual --net_name res- a GAN model (gan.xmodel)
The TensorFlow2 and Vitis AI design flow is described in this tutorial.
InferenceThis project uses two DNNs:
- cf_openpose_aichallenger_368_368_0.3_189.7G which can be found in Vitis AI Model Zoo
Doing inference with OpenPose is quite simple:
auto image = cv::imread("sample_openpose.jpg");
auto det = vitis::ai::OpenPose::create("openpose_pruned_0_3");
auto results = det->run(image);
This API takes care of any preprocessing the image needs (resizing, etc)
- custom DNN to lift poses from 2D to 3D
The code is a bit more complex and uses the VART API:
auto graph = Graph::deserialize(model);
auto subgraph = get_dpu_subgraph(graph.get());
auto runner = Runner::create_runner(subgraph[0],"run");
TensorShape inshapes[1];
TensorShape outshapes[1];
GraphInfo shapes;
shapes.inTensorList = inshapes;
shapes.outTensorList = outshapes;
getTensorShape(runner.get(), &shapes, 1, 1);
auto inTensors = cloneTensorBuffer(runner->get_input_tensors());
auto outTensors = cloneTensorBuffer(runner->get_output_tensors());
int batchSize = inTensors[0]->get_shape().at(0);
int inSize = inshapes[0].size;
int outSize = outshapes[0].size;
auto input_scale = get_input_scale(runner->get_input_tensors()[0]);
auto output_scale = get_output_scale (runner->get_output_tensors()[0]);
int8_t *datain = new int8_t[inSize * batchSize];
int8_t *dataresult = new int8_t[outSize * batchSize];
/* Copy the data in datain buffer.
Don't forget to scale it by multiplying it with input_scale*/
vector<unique_ptr<vart::TensorBuffer>> inputs, outputs;
inputs.push_back(make_unique<CpuFlatTensorBuffer>(datain, inTensors[0].ge()));
outputs.push_back(make_unique<CpuFlatTensorBuffer>(dataresult, outTensors[0].get()));
vector<vart::TensorBuffer *> inputsPtr, outputsPtr;
inputsPtr.push_back(inputs[0].get());
outputsPtr.push_back(outputs[0].get());
auto job_id = runner->execute_async(inputsPtr, outputsPtr);
runner->wait(job_id.first, -1);
/* Copy the result from dataresult
Don't forget to scale it by mupliplying with output_scale*/
delete[] datain;
delete[] dataresult;First the demo programs have to be compiled and the system setup. After starting the docker gpu image run the following commands inside the docker terminal:
cp /tmp/.Xauthority ~/
sudo chown vitis-ai-user:vitis-ai-group ~/.Xauthority
sudo usermod -a -G video $(whoami)
sudo su $(whoami)
cd /workspace/setup/vck5000/
source setup.sh
cd /workspace/models/AI-Model-Zoo
wget https://www.xilinx.com/bin/public/openDownload?filename=openpose_pruned_0_3-vck5000-DPUCVDX8H-r1.4.1.tar.gz -O openpose_pruned_0_3-vck5000-DPUCVDX8H-r1.4.1.tar.gz
sudo mkdir /usr/share/vitis_ai_library/models
tar -xzvf openpose_pruned_0_3-vck5000-DPUCVDX8H-r1.4.1.tar.gz
sudo cp openpose_pruned_0_3 /usr/share/vitis_ai_library/models -r
sudo usermod -a -G video vitis-ai-user
/usr/bin/pip3 install matplotlib
conda activate vitis-ai-tensorflow2
cd /workspace/yoga-ai/
sh build.sh
To run the 3D estimator with the model from the article for a single picture run this command: (if running first time after a cold reboot it will take around 30s to program the card)
./build/yoga-ai-picture ./model/article/article.xmodel ./data/temp/emily-sea-coiWR0gT8Cw-unsplash.jpg
generated ./data/temp/emily-sea-coiWR0gT8Cw-unsplash_result.jpg
generated ./data/temp/emily-sea-coiWR0gT8Cw-unsplash_1_plot.jpg
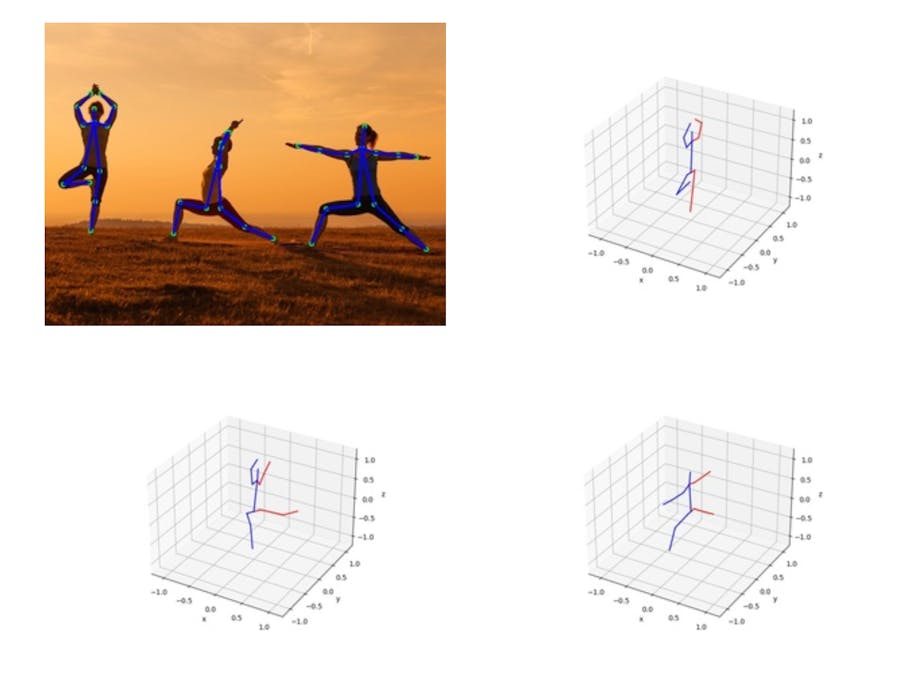
Running the 3D pose estimator on this picture:
Will generate this 2D pose result:
And the following 3D result:
The deeper DNN (res.xmodel):
./build/yoga-ai-picture ./model/residual/res.xmodel ./data/temp/emily-sea-coiWR0gT8Cw-unsplash.jpg
generated ./data/temp/emily-sea-coiWR0gT8Cw-unsplash_result.jpg
generated ./data/temp/emily-sea-coiWR0gT8Cw-unsplash_1_plot.jpgFor multiple subjects:
./build/yoga-ai-picture ./model/article/article.xmodel ./data/temp/i-yunmai-BucQCjOvDyM-unsplash.jpg
generated ./data/temp/i-yunmai-BucQCjOvDyM-unsplash_result.jpg
generated ./data/temp/i-yunmai-BucQCjOvDyM-unsplash_1_plot.jpg
generated ./data/temp/i-yunmai-BucQCjOvDyM-unsplash_2_plot.jpg./build/yoga-ai-picture ./model/residual/res.xmodel ./data/temp/i-yunmai-BucQCjOvDyM-unsplash.jpg
generated ./data/temp/i-yunmai-BucQCjOvDyM-unsplash_result.jpg
generated ./data/temp/i-yunmai-BucQCjOvDyM-unsplash_1_plot.jpg
generated ./data/temp/i-yunmai-BucQCjOvDyM-unsplash_2_plot.jpgThere are three subjects in picture but only two of them have all the anchor points.
Running the 3D pose estimator in real time:./build/yoga-ai-mt ./model/article/article.xmodel
or
./build/yoga-ai-mt ./model/residual/res.xmodelThis will open the first webcam it finds and run the 3D pose estimator
The FPS is limited by the room lighting and not by the 2D estimator or the 2D-to-3D DNN, which are quite fast, especially when batched (in batches up to 8 frames).
Unfortunately I couldn't find a 3D plotting library native for c++ so I used the matplotlib library from python with a c++ wrapper. The speed at which it can create plots is around 2-3 FPS, much lower than the camera or the pose estimators.
GAN exampleFirst frames will be extracted from videos at a rate of 10 FPS:
mkdir -p ./data/video/frames
find ./data/video -maxdepth 1 -name '*.webm' -print0 | xargs -0 -i sh -c 'fullfile="{}"; filename=${fullfile##*/}; name=${filename%%.*}; ffmpeg -i "$fullfile" -r 10/1 ./data/video/frames/"$name"%010d.jpg'
Then the 2D estimator will be run over each image:
./build/yoga-ai-multiple ./data/video/frames > ./data/video/frames.jsonFinally the json with 2D pose will be preprocessed (scaled, centered) and saved as.tfrecords files:
python prepare_data_gan.py ./data/video/Training:
rm -rf ./logs/
rm -rf ./model/gan/*
python train-gan.py
Choosing a model:
tensorboard --logdir logs/ --bind_allBoth the generator and discriminator networks have to be kept in balance, the loss functions working towards different goals.
Ideally both loss functions for generator and discriminator should be as close as possible to 1, which means that the discriminator has a hard time distinguishing between solutions generated and real ones.
Epoch 100 - 12.01 sec, Gen Loss: 1.3215000629425049, Disc Loss: 1.0641013383865356
Epoch 101 - 12.04 sec, Gen Loss: 1.4143874645233154, Disc Loss: 1.0295127630233765
Epoch 102 - 12.00 sec, Gen Loss: 1.3275189399719238, Disc Loss: 1.0719201564788818
Epoch 103 - 12.00 sec, Gen Loss: 1.3471262454986572, Disc Loss: 1.0649248361587524
Epoch 104 - 12.03 sec, Gen Loss: 1.3648614883422852, Disc Loss: 1.0483965873718262
Epoch 105 - 12.00 sec, Gen Loss: 1.387969732284546, Disc Loss: 1.0464917421340942
Epoch 106 - 12.01 sec, Gen Loss: 1.369732141494751, Disc Loss: 1.0375384092330933
Epoch 107 - 12.01 sec, Gen Loss: 1.3962113857269287, Disc Loss: 1.0418665409088135
Epoch 108 - 12.03 sec, Gen Loss: 1.391349196434021, Disc Loss: 1.0387295484542847
Epoch 109 - 12.02 sec, Gen Loss: 1.4321180582046509, Disc Loss: 1.0043883323669434
Epoch 110 - 12.02 sec, Gen Loss: 1.4454706907272339, Disc Loss: 1.0133466720581055
The train-gan.py script is saving the generator network at each epoch and I chose the network from the epoch 102:
cp ./model/gan/gan_102.h5 ./model/gan/gan.h5Quantization and compiling:
python -u quantize.py --float_model model/gan/gan.h5 --quant_model model/gan/quant_gan.h5 --batchsize 64 --evaluate 2>&1 | tee quantize.log

vai_c_tensorflow2 --model model/gan/quant_gan.h5 --arch /opt/vitis_ai/compiler/arch/DPUCVDX8H/VCK5000/arch.json --output_dir model/gan --net_name gan
Results:
./build/yoga-ai-mt ./model/gan/gan.xmodelAll models were trained for 200 epochs, with a batch_size of 64.
Both article.xmodel and res.xmodel are using the Human3.6M dataset.
The gan.xmodel was trained on a database of 35 videos about yoga from YouTube. From these videos 859812 images were extracted using ffmpeg and then using build/yoga-ai-multiple utility program (running 2D open_pose) 112210 poses extracted (having all the anchor points present).
More resultsScripts used to preprocess the datasets:
https://github.com/andrei-ace/yoga-ai/blob/master/prepare_data.py
https://github.com/andrei-ace/yoga-ai/blob/master/prepare_data_gan.py
https://github.com/andrei-ace/yoga-ai/blob/master/src/yoga-ai-multiple.cpp
Scripts used to train neural networks:
https://github.com/andrei-ace/yoga-ai/blob/master/train-article.py
https://github.com/andrei-ace/yoga-ai/blob/master/train-res.py
https://github.com/andrei-ace/yoga-ai/blob/master/train-gan.py
Demo programs:
https://github.com/andrei-ace/yoga-ai/blob/master/src/yoga-ai-picture.cpp
https://github.com/andrei-ace/yoga-ai/blob/master/src/yoga-ai-mt.cpp
ConclusionThe results for poses found in the Human3.6M dataset are quite good while they are not very accurate for unseen ones. This dataset doesn't contain any yoga poses so the accuracy is somewhat low. Creating more datasets will greatly improve the accuracy of the predictions but the biggest problem is that they will require expensive gear to produce.
The GAN approach seems the most promising one as it only requires 2D data, which exists in abundance. One simple improvement would be to have the same poses filmed from different angles, the YouTube videos used had mostly the same angles. This won't require any expensive gear in a professional studio, any consumer camera could be used and there is no need to synchronize them or even having the same actor filmed.


Comments
Please log in or sign up to comment.