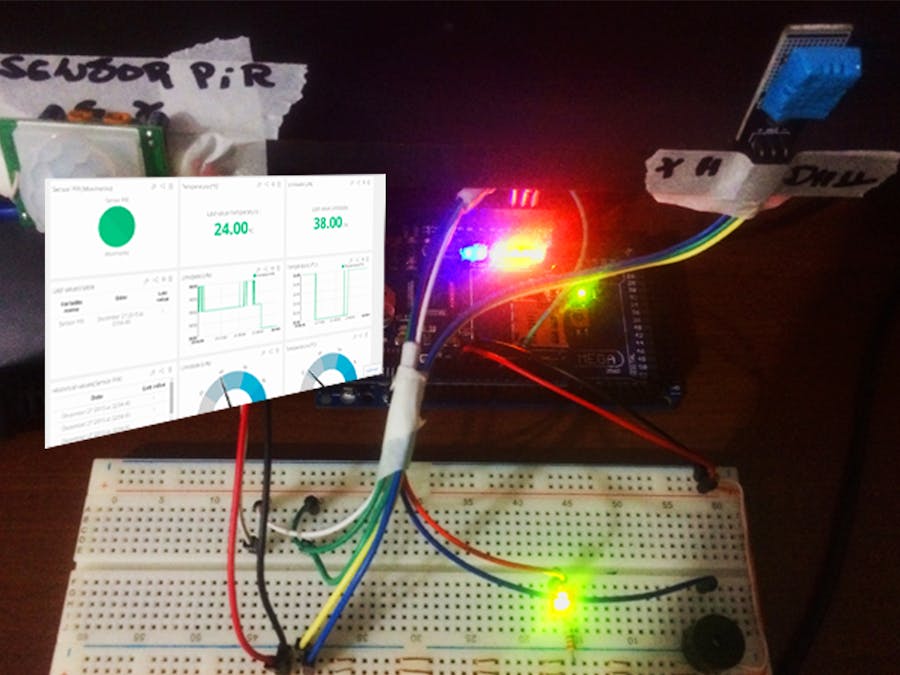
A few days ago , I became interested more for IoT technology and its facilities and possibilities.
Thinking about it and doing intensive research on the web, I found that there were no tutorials and simple designs, anyone with little or none experience with Arduino, API, JSON, WEB SERVER and a plurality of expertise could enjoy this feature ( IoT ).
This publication is simple to send variables sensors to clound ( Ubidots ) in a fast , direct and dynamic way. I will not describe in this tutorial step by step account setup , since the material of their own website is much better than what I could do. www.ubidots.com
Will need only one sensor, in my case I used a DHT11 sensor, but the Internet has several ways to make a transistor pick up ambient temperature information.
Well, comments of the DHT11 sensor is a device that collects temperature and humidity environment, almost everyone who bought a starter kit have this sensor.
This sensor has three terminals, one VCC to left, another in the center OUT(Data Signal) and GND (ground) right.
Identified there in your component?
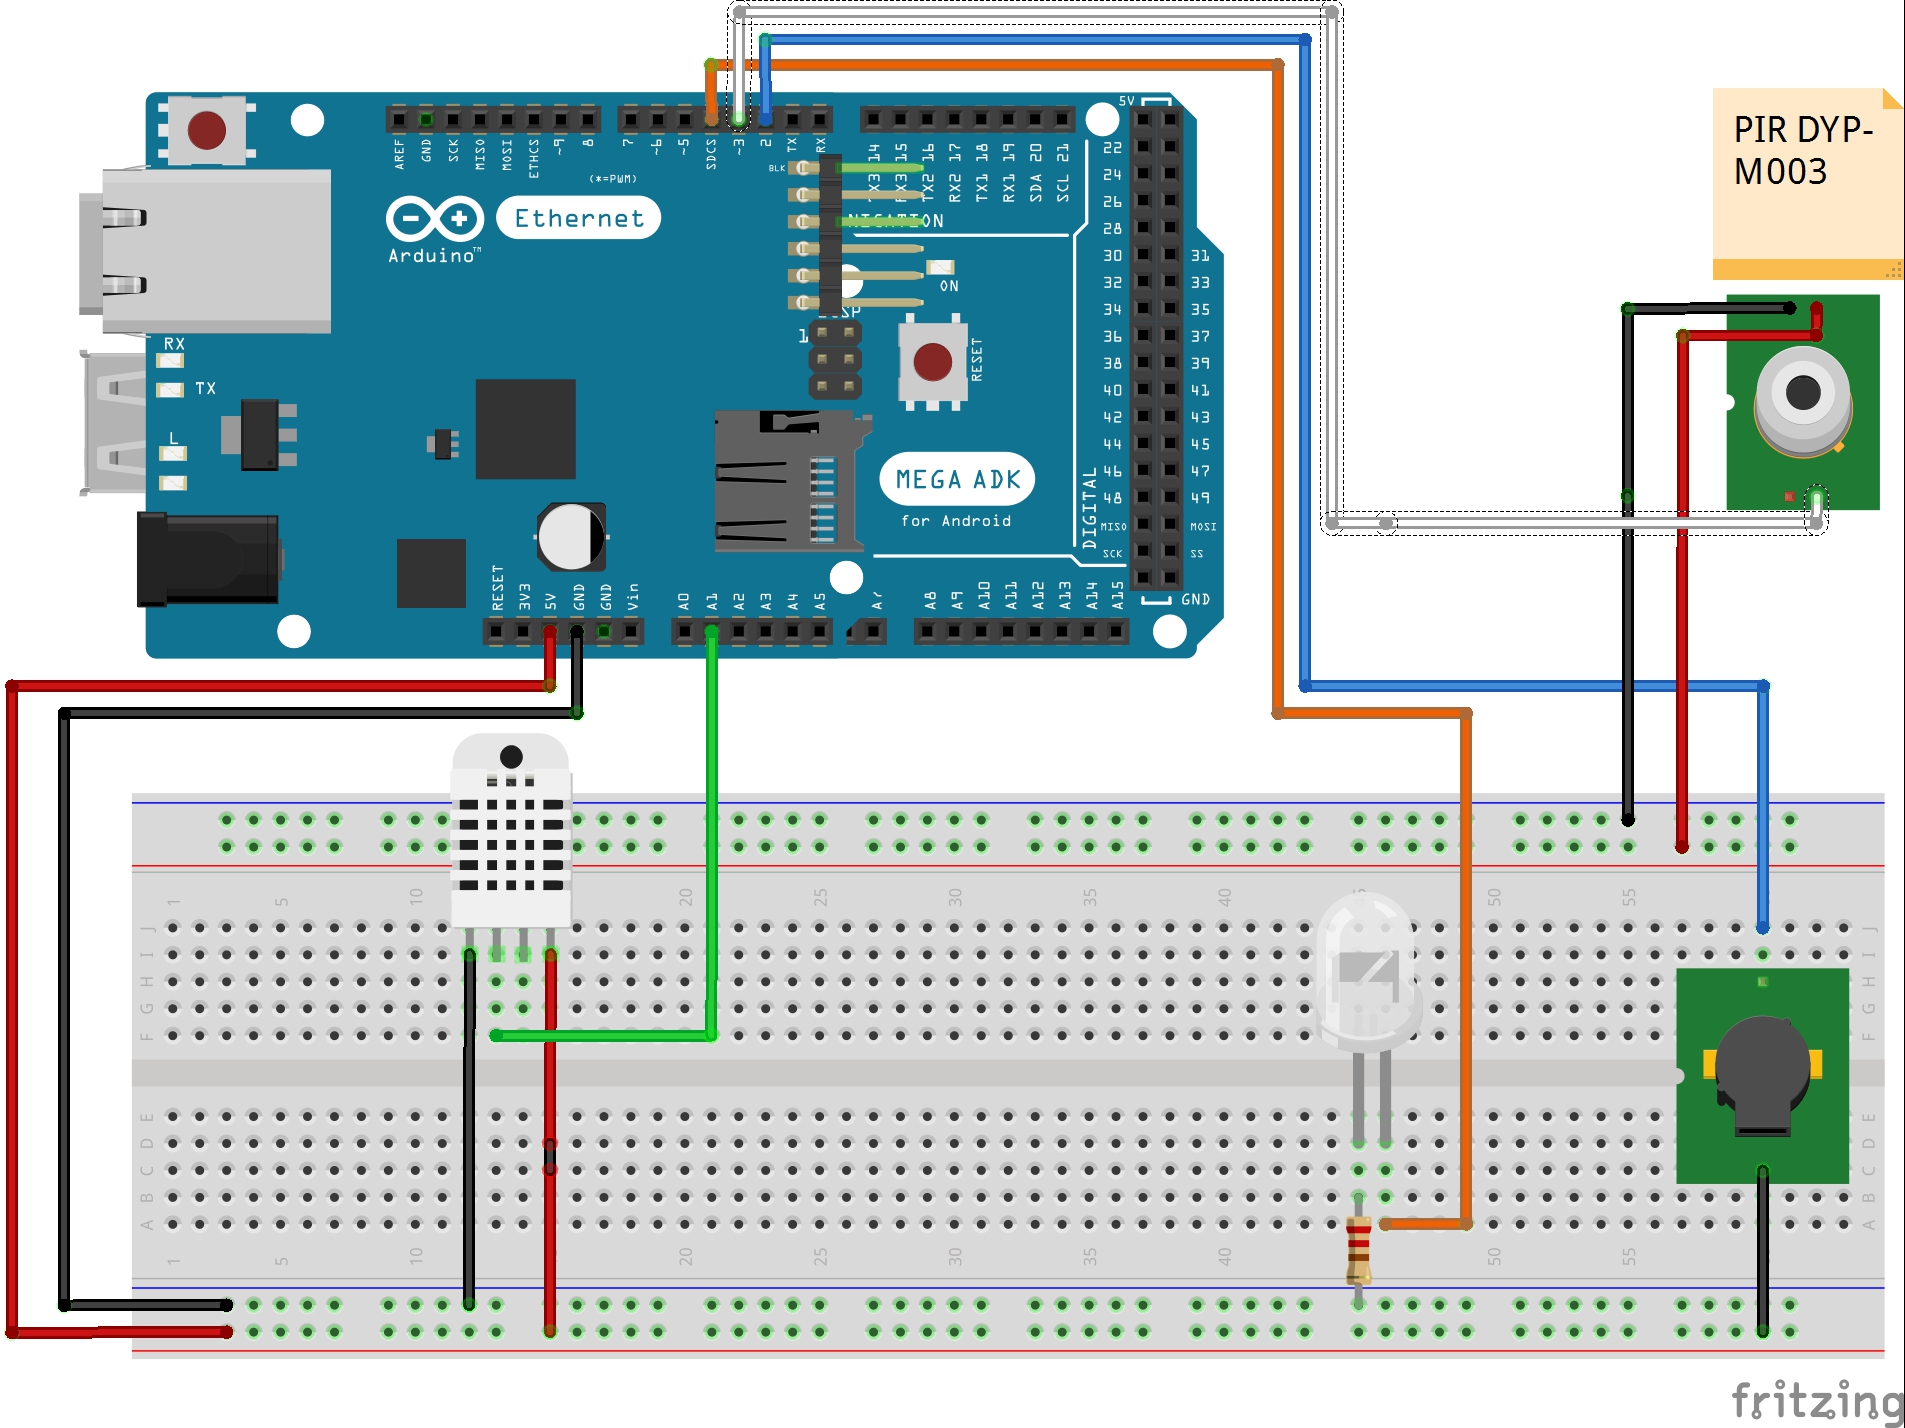
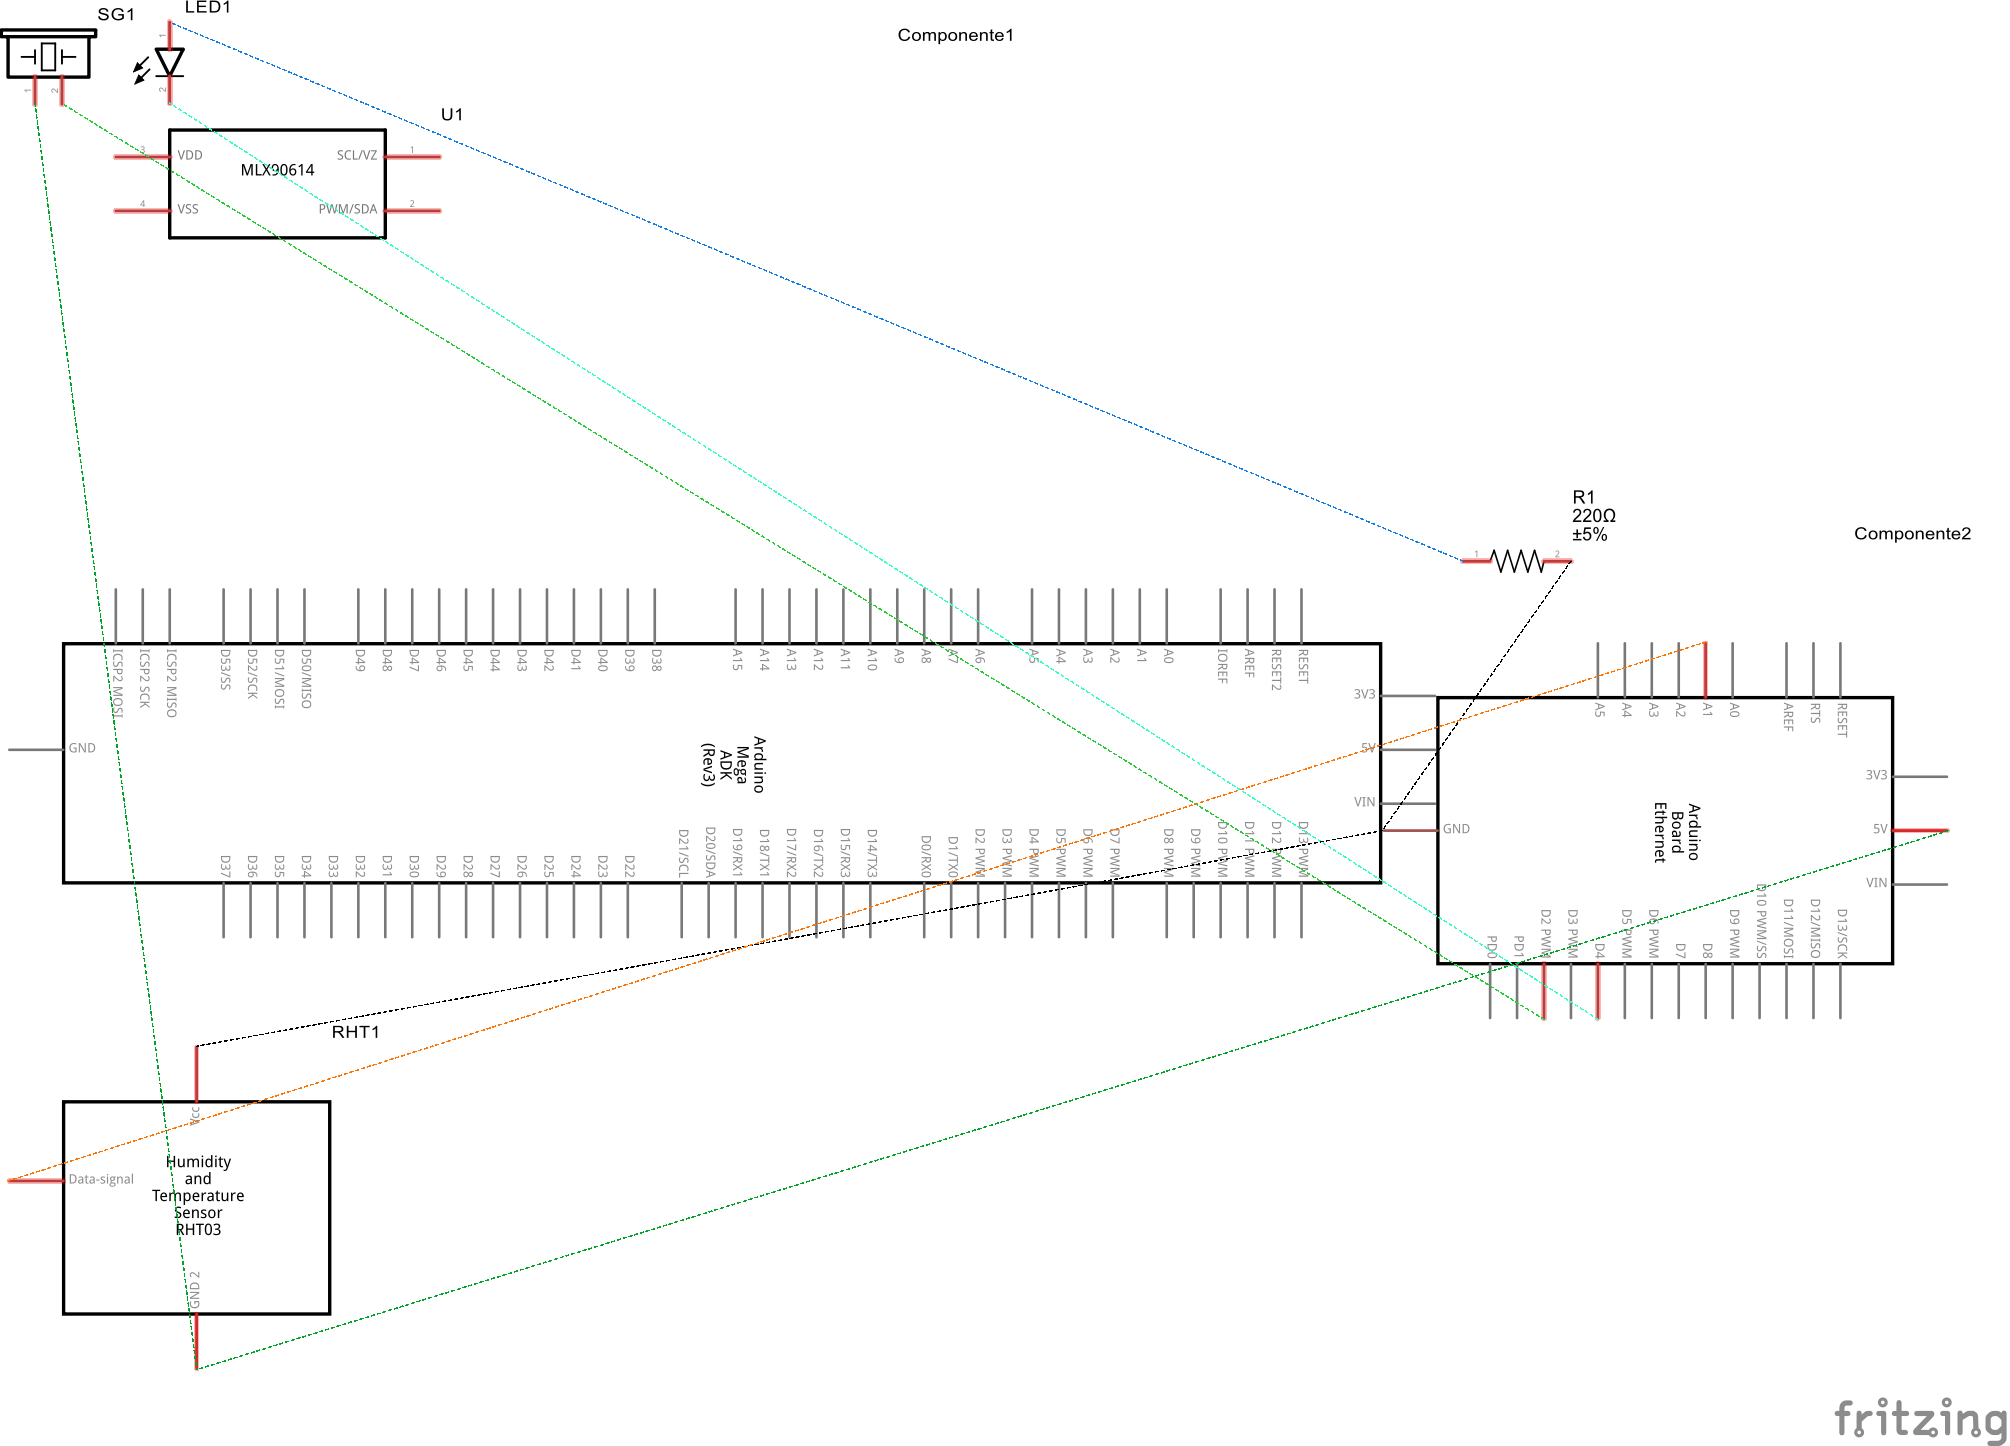
We need to connect it to breadboard it will connect to other more on sensor, you can follow the example we went through, so the wiring diagram had been clearer.
After that, we will connect the breadboard to Arduino, in my case I used the MEGA 2560, but nothing prevents you to use any model you have, because we use the total project only 3 Digital pins and 1 Analog pin.
Again nothing prevents you to modify and test in your project, for to understand better, but do it after mounting the way they explain, it will be easier after work, going for me.
Once connected to the terminals VCC and GND, the OUT (Data Signal) pin plug in the Digital pin 3 of your Arduino.
Ready your sensor DHT is already positioned.
Sensor 2 - PIR DYP-M003Let's go to another sensor, in my case I used a PIR sensor DYP-ME003 (Motion Sensor), this consists of three terminals, see the image, and the terminal left VCC (5V-12V), the central OUT and the right terminal GND (ground) .
Once identified terminals, connect them to breadboard, terminal OUT at pin A1 (Analog 1) of the Arduino.
The approach to the regulation of sensitivity and activation time, I'll leave as homework for you search the internet, material widely publicized in search websites.
Now that the sensors are positioned and properly connected, let the final part of the physical links of the project.
Others - LED (green)The design of the LED can be both appearing on pin 13 of the Arduino and an external LED, I opted for external LED only as a way to better display the drive motion sensor PIR DYP-M003.
Note that the scheme used, connect the cathode on GND (ground) and the anode in a 220 ohm resistor, +/- 5% and turn it to the Arduino pin 4.
We're almost there , the timer tah running there?
Others - BuzzerThe final link is the simplest , used a buzzer , which is triggered when the PIR sensor recognizes movement in the environment , therefore, beyond the LED warn visually , have a buzz that warns the presence of movement, this can be used to control access or as a primitive alarm, giving the idea of how to integrate all these features at once .
The buzzer has a positive pole , which usually in addition to their greater attachment terminal, a markup on top ( +) indicating the same and a negative pole, usually a lower leg GND (ground ) .
The connection is simple, the lower leg binds to the GND (ground ), and the greater leg (+) in Arduino pin 2 .
Ready, is mounted all the physical part of your Smart Home Mini system , now let's make the magic happen.
Download the available code , open the Arduino IDE and upload it to your Arduino and see the operation .
Remember that to send the data from the sensors , need to set in your account Ubidots the variables will be three variables , humidity , temperature and movement , once you have the data of these variables add fields the indicated code , set data LOCAL NETWORK of its Ethernet Shield and see how simple it is .
Take the opportunity to study the code, thus understood better than the coding is simple, so you could play with it !
Thank's for your Time, stopwatch! :))


_wzec989qrF.jpg?auto=compress%2Cformat&w=48&h=48&fit=fill&bg=ffffff)


_3u05Tpwasz.png?auto=compress%2Cformat&w=40&h=40&fit=fillmax&bg=fff&dpr=2)
Comments
Please log in or sign up to comment.