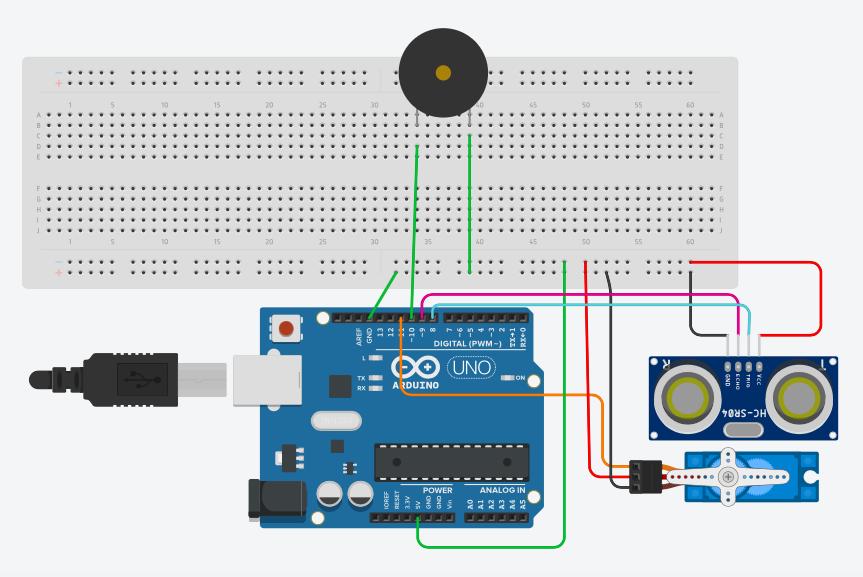
This project has something exciting inside this.You can use proximity to actually control some kind of mechanical work.I wanna you guys to look further in this project.I have written this project in accordance with the thought that we can make Motor to do some mechanical work.I'm using this setup to push down the handwash's top button like structure so that we can have the drop of handwash in our hand without even touching it.It is very hygiene.
For visually impaired persons it has the audio signal coming out i.e when something comes near the ultrasonic sensor buzzer will also buzz to inform that everything is going as designed.
Gentle note
Hot glue gun and some sort of thick thread is required to attach the handwash container's head to the blades of servo motor.So, that when we will be rotating motor by 180 degrees it will pull down the head using that thread.


_ztBMuBhMHo.jpg?auto=compress%2Cformat&w=48&h=48&fit=fill&bg=ffffff)


Comments
Please log in or sign up to comment.