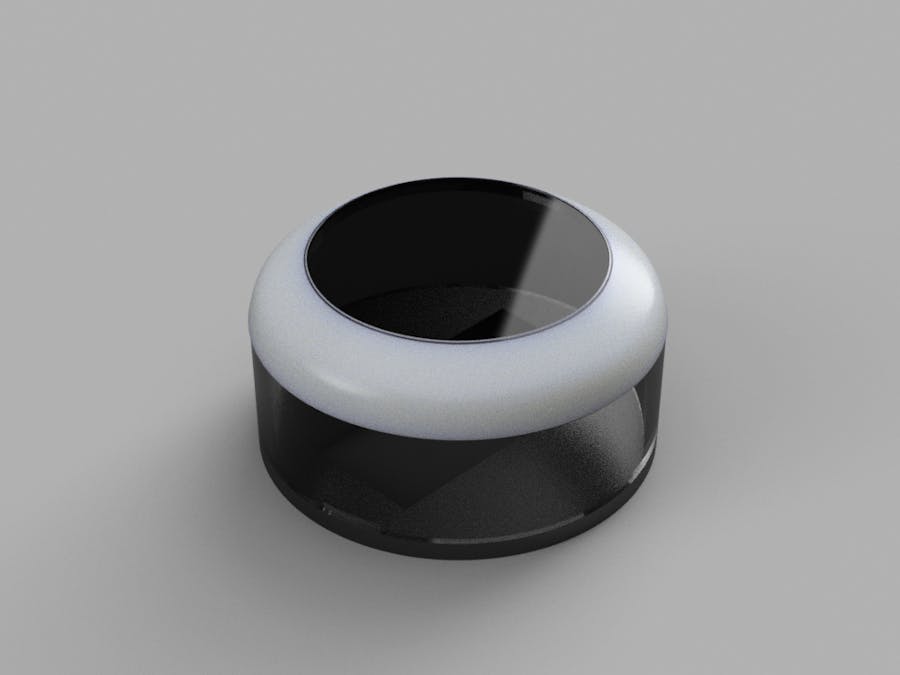
Ever wanted to create a project that uses wireless charging technology? Ever wanted to make a universal remote for your home that looks stylish and never needs to be plugged in?
Create this universal home button! It allows you to communicate with your lights, WeMo switches, a sound system, and other custom made devices at home!
Not too long ago I built voice integration into my smart home system using the Amazon Echo (check it out here). While this worked well for moments without ambient noise, it failed to work well during parties, while watching movies, or while listening to music on my sound system. Obviously I needed another way to interact with these smart home devices and the current method of pulling out a phone or tablet, unlocking it, then switching between apps just didn't appeal to me.
What I really wanted was a universal remote that could also talk to my smart home devices.
So I started designing and planning out the features that I would want in my smart home controller and it had to be wireless charged (because replacing batteries or being tethered to a wall is archaic). Here's the requirements I came up with:
- LED Screen to provide visual input (battery life, device selected, value selected, etc.)
- Neopixel Ring (because who doesn't love feedback through colors?)
- Wireless Charging
- Battery Powered
- Push Button + Rotational Input
- Microcontroller with WiFi (bluetooth is a plus) - Particle Photon
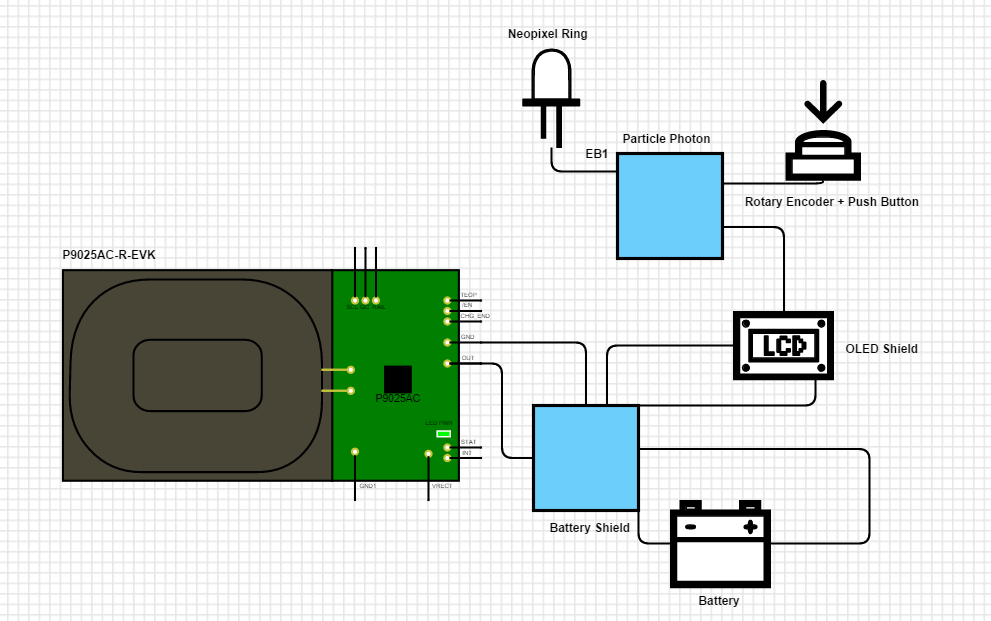
Here's the schematic diagram on Scheme-it:
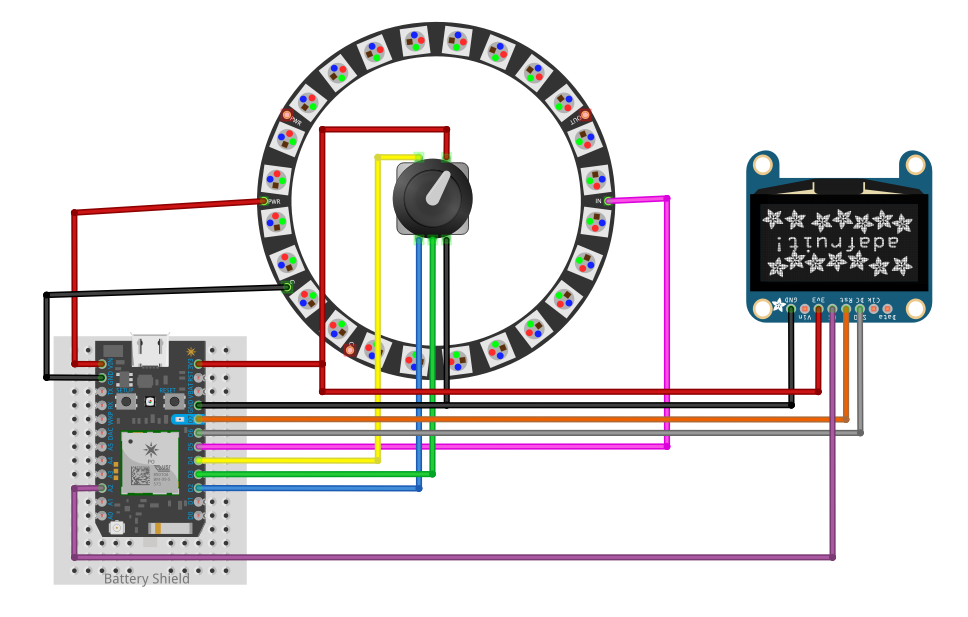
- Plug the Particle Photon into the OLED Shield (It uses SPI to communicate)
- Plug both of them on top of the Battery Shield.
- Plug the battery into the Battery Shield
- Plug the rotary encoder into the bottom of the Battery Shield.
- Plug the Neopixel Ring into the bottom of the Battery Shield as well.
- Cut an old micro-USB cable to get two wires (Power and Ground) and then solder these two wires into the Wireless Power Receiver board into the accompanying ports.
The pins being used by the code are:
- D2: Used by the Rotary Encoder
- D3: Used by the Rotary Encoder
- D4: Used by the Button on the Rotary Encoder
- D5: Used by the NeoPixel Ring Shield (hooked up to D6 on the shield side)
- D6: Used by the Battery Shield
Then Package it (for my prototype I used cardboard because I had a bunch laying around)
More info on how to hook up a rotary encoder:
- http://bildr.org/2012/08/rotary-encoder-arduino/
- http://hacks.ayars.org/2009/12/using-quadrature-encoder-rotary-switch.html
Wireless Transmitter & Receiver Spec sheets:
- https://www.idt.com/document/mar/p9025ac-r-evk-manual
- https://www.idt.com/document/mar/p9038-r-evk-manual
- Install Node.js (You'll want to use v 0.10.28 if you want to use the Wemo library)
- Download the repository containing the code and extract the contents
- Open a command prompt or terminal window and run
npm installin the extracted directory. - Rename the
template-config.jsonfile toconfig.jsonand complete its contents:
{
  "YAMAHA_IP":"",
  "PARTICLE_USER":"",
  "PARTICLE_PASSWORD":"",
  "PARTICLE_ID":"",
  "WEMO_DEVICE":""
}
- If you cloned it through git run these commands:
git submodule init
git submodule update
- Run
node app.js
- Create a new Particle project
- Include the following libraries in your new project:
NeoPixel
ClickButton
SparkFunMax17043  - (This is for the battery shield)
SparkFunMicroOLED
- Create a new file called
menuItem.h - Copy the contents of the
universal-button.inoandmenuItem.hfiles from the extracted directory into the respective files in your new Particle project. - Deploy it!


_3u05Tpwasz.png?auto=compress%2Cformat&w=40&h=40&fit=fillmax&bg=fff&dpr=2)
Comments
Please log in or sign up to comment.