


Hardware components | ||||||
 |
| × | 1 | |||
 |
| × | 1 | |||
 |
| × | 1 | |||
 |
| × | 1 | |||
 |
| × | 1 | |||
 |
| × | 1 | |||
 |
| × | 1 | |||
Software apps and online services | ||||||
 |
| |||||
 |
| |||||
 |
| |||||
| ||||||
Welcome everyone to my project. First of all, I want o say that we are living in the world of internet where developing and practicing new ideas becomes easier than previous times. We can easily develop any models that can provide us better standard of living and can also help the society and bring great impacts on the world.
Nowadays, Security systems are heavily being used by many industries as well as many peoples to have a better security. Because of increasing demands in highly stable security systems, many companies are ready to invest in this market to increase reliability and scalability. Here, my project is to create a security system that contains primarily two different modules based on which system works:
- Image Recognition
- Sound Recognition (Both text and speech recognition)
These two modules will be controlled by BOLT IoT and Arduino device and when both the modules correctly identifies a person then it allows them to lock or unlock any device. Here I am developing a prototype in general which can be implemented on any devices, i.e. locking or unlocking any door or folder on desktop or anything whichever the user or customer want it for their purpose. Since our security system contains locking and unlocking part; for unlocking part, I will be using a LED which glows when both modules perfectly identifies a person which means the system is unlocked else will be remained off. And for showing the locking part, when the system is unlocked, i.e. when the led is glowing the system again identifies the person and if all the modules identifies the person the system will be locked and it can shown with Led, i.e. it will be turned off. Here, we will also create a GUI for the user to decide whether they want to lock or unlock the system. There will be two buttons in GUI for user to select whether he/she wants to unlock the system or lock the system. In place of LED there can be anything but the code and implementation remains same. Also, if the user trying to unlock an already open device, then system will prompt that device already unlocked and same holds for locking mechanism.
Here, many people will be having a question that why we need to again identify the person for locking the system. So, here I am doing this to provide some extra security so that on whichever device this system is implemented, the user can feel safe throughout and can have belief that no-one can unlock or lock any device without his permission.
Seems to be an exciting project, Right!! So let's get started.
Note:- There is no servo motor currently available with me, so I am making use of an LED to justify the opening and closing purpose.
2. Essential Software Setup:2.1 Windows:
Since, we are performing all our operations on windows, we need to set it up before proceeding forward. Firstly, we should have python working on our system, if not then you can visit this link (https://www.python.org/) to download and install python in your system. After that, we need to install bolt iot package to access bolt devices in windows using pip command.
pip install boltiotOnce this is done, we need to install other packages also for working of our codes, i.e. dlib package, face recognition package, termcolor, matplotlib, opencv and sklearn package. All the packages can be installed using the pip command followed by install and package name. Eg:
pip install dlibThe user must also have pyqt tool installed in your system. This pyqt tool supports python and will be used for creating GUI for the user.
2.2 Bolt-IoTAPI Key
Here, Bolt-IoT is used to manage all the task and in case of any intruder, send an sms to the user or owner. It also has its own cloud platform.
To get Bolt API key, click on API in the menu and you will find your API key. You can also regenerate the API-key or copy the generated one and keep it safe for later use. Also save the unique Bolt id that you will see on the main window. These two data can be later used for sending an sms to user or accessing your bolt device over internet.
2.3 TWILIO:
Twilio is used for sending sms to the owner from the remote server. Thus, we will use this service to notify the owner of the security system when any intruder is trying to access the security system. We can make use of python to program the device with the help of API-keys of both bolt device and Twilio account to send an sms to the user. You can open Twilio account by visiting https://www.twilio.com/
You can use the Twilio contents like account SID and account token to send an sms over internet through the mobile number displaying on your dashboard.
The above figure - 2 represents the Twilio dashboard from where you can get required information for sending an sms to the desired person over internet.
3. Developing Software:As our software is too big, we will be breaking it into different modules to understand step by step how each module is build and how they works.
3.1 Face Recognition module:
Here, for face recognition, I will be using opencv, deep learning and python. Here, instead of trying to output a single label of image, we are instead outputting a real-valued feature vector. For the dlib facial recognition module we are creating, the output feature vector is 128-d, i.e., a list of 128 real-valued numbers which are used to quantify the face. Training the network is done using triplets. So here, we require large number of datasets which contains images of person who will be allowed to access the security system. The images in these datasets will then be trained using SVM method. These trained datasets will be used by us in the main part of project to recognize faces. Let's look at an example image:
Facial recognition via deep metric learning involves a “triplet training step.” The triplet consists of 3 unique face images — 2 of the 3 are the same person. The Neural network generates a 128-d vector for each of the 3 face images. For the 2 face images of the same person, we tweak the neural network weights to make the vector closer via distance metric.
Here we provide three images to the network:
- Two of these images are example faces of the same person.
- The third image is a random face from our datasets and is not the same person as the other two images.
As an example, let’s again consider above figure -3 where we provided three images: one of Chad Smith and two of Will Ferrell. Our network quantifies the faces, constructing the 128-d embedding (quantification) for each. From there, the general idea is that we’ll tweak the weights of our neural network so that the 128-d measurements of the two Will Ferrel will be closer to each other and farther from the measurements for Chad Smith.
Our face recognition module is based on CNN (Convolutional neural network).
As in above picture you can see the datasets I have created which contains three folders. Each folder containing some images of those persons which will be then trained.
The above figure - 5 shows the files used for creating a face recognition system. The encodes_faces python file contain code for training the datasets. Once the datasets are trained properly, it will create an encodings.pickle file which contains the face structure and key values of each faces which will be used to verify with real time faces and provide grant access and all. The recognize_faces_image python file will run every-time whenever a we want to recognize a new face for granting permission. It will create 128 dimensional vector of the new verifying face and matches it with the trained datasets files to grant permissions. Complete code for training data set is provided below.
# import the necessary packages
from imutils import paths
import face_recognition
import argparse
import pickle
import cv2
import os

# construct the argument parser and parse the arguments
ap = argparse.ArgumentParser()
ap.add_argument("-i", "--dataset", required=True,
	help="path to input directory of faces + images")
ap.add_argument("-e", "--encodings", required=True,
	help="path to serialized db of facial encodings")
ap.add_argument("-d", "--detection-method", type=str, default="cnn",
	help="face detection model to use: either `hog` or `cnn`")
args = vars(ap.parse_args())

# grab the paths to the input images in our dataset
print("[INFO] quantifying faces...")
imagePaths = list(paths.list_images(args["dataset"]))

# initialize the list of known encodings and known names
knownEncodings = []
knownNames = []

# loop over the image paths
for (i, imagePath) in enumerate(imagePaths):
	# extract the person name from the image path
	print("[INFO] processing image {}/{}".format(i + 1,
		len(imagePaths)))
	name = imagePath.split(os.path.sep)[-2]

	# load the input image and convert it from RGB (OpenCV ordering)
	# to dlib ordering (RGB)
	image = cv2.imread(imagePath)
	rgb = cv2.cvtColor(image, cv2.COLOR_BGR2RGB)

	# detect the (x, y)-coordinates of the bounding boxes
	# corresponding to each face in the input image
	boxes = face_recognition.face_locations(rgb,
		model=args["detection_method"])

	# compute the facial embedding for the face
	encodings = face_recognition.face_encodings(rgb, boxes)

	# loop over the encodings
	for encoding in encodings:
		# add each encoding + name to our set of known names and
		# encodings
		knownEncodings.append(encoding)
		knownNames.append(name)

# dump the facial encodings + names to disk
print("[INFO] serializing encodings...")
data = {"encodings": knownEncodings, "names": knownNames}
f = open(args["encodings"], "wb")
f.write(pickle.dumps(data))
f.close()
Once we trained our data set it will create.pickle file as explained above. The comment given in the code will guide us for what purposes we have used what part of code or statement.
The above fig - 6 shows the process for training image. It will take long time depending on your data set images size and also on total number of images in your data set. Next we will run recognize face code to recognizes faces in python.
# import the necessary packages
import face_recognition
import argparse
import pickle
import cv2

# construct the argument parser and parse the arguments
ap = argparse.ArgumentParser()
ap.add_argument("-e", "--encodings", required=True,
	help="path to serialized db of facial encodings")
ap.add_argument("-i", "--image", required=True,
	help="path to input image")
ap.add_argument("-d", "--detection-method", type=str, default="cnn",
	help="face detection model to use: either `hog` or `cnn`")
args = vars(ap.parse_args())

# load the known faces and embeddings
print("[INFO] loading encodings...")
data = pickle.loads(open(args["encodings"], "rb").read())

# load the input image and convert it from BGR to RGB
image = cv2.imread(args["image"])
rgb = cv2.cvtColor(image, cv2.COLOR_BGR2RGB)

# detect the (x, y)-coordinates of the bounding boxes corresponding
# to each face in the input image, then compute the facial embeddings
# for each face
print("[INFO] recognizing faces...")
boxes = face_recognition.face_locations(rgb,
	model=args["detection_method"])
encodings = face_recognition.face_encodings(rgb, boxes)

# initialize the list of names for each face detected
names = []

# loop over the facial embeddings
for encoding in encodings:
	# attempt to match each face in the input image to our known
	# encodings
	matches = face_recognition.compare_faces(data["encodings"],
		encoding)
	name = "Unknown"

	# check to see if we have found a match
	if True in matches:
		# find the indexes of all matched faces then initialize a
		# dictionary to count the total number of times each face
		# was matched
		matchedIdxs = [i for (i, b) in enumerate(matches) if b]
		counts = {}
		# loop over the matched indexes and maintain a count for
		# each recognized face face
		for i in matchedIdxs:
			name = data["names"][i]
			counts[name] = counts.get(name, 0) + 1
			print (counts)
		key_max = max(counts.keys(), key=(lambda k: counts[k]))
		print (counts[key_max])

		# determine the recognized face with the largest number of
		# votes (note: in the event of an unlikely tie Python will
		# select first entry in the dictionary)

		a = counts[key_max]-8 #adjust this number 8 as per ur dataset
		if (a==0):
			name = max(counts, key=counts.get)
		else:
			name = "Unknown"

	# update the list of names
	names.append(name)

# loop over the recognized faces
for ((top, right, bottom, left), name) in zip(boxes, names):
	# draw the predicted face name on the image
	cv2.rectangle(image, (left, top), (right, bottom), (0, 255, 0), 2)
	y = top - 15 if top - 15 > 15 else top + 15
	cv2.putText(image, name, (left, y), cv2.FONT_HERSHEY_SIMPLEX,
		0.75, (0, 255, 0), 2)

# show the output image
cv2.imshow("Image", image)
cv2.waitKey(0)
Once data is trained, we will be only using.pickle file and the recognize face python file in our project for further use. Comments given in the code will help us to understand the code in the better way.
3.2 Audio Recognition:
Here, in audio recognition we followed somewhat same concept as Shazam. Here also we will store some mp3 of users whom audio we want to verify. We will then train these mp3 files to store some fingerprint of mp3 files like pitch, tones and all. Here, we are following Fourier transform algorithm to achieve the task. Once we have trained and recorder some fingerprint of data set for matching purpose, we will run our main code for recognizing the audio from microphone and matching it with our trained data set, if matches we will provide grant access.
Firstly, we will create and store some mp3 file of users whom voice has to be matched.
Then we will use sort of code provided below to identify or collect some important fingerprint from each audio files.
import os
from termcolor import colored
import libs.fingerprint as fingerprint
from libs.config import get_config
from libs.db_sqlite import SqliteDatabase
from libs.reader_file import FileReader

if __name__ == '__main__':
    config = get_config()
    db = SqliteDatabase()
    path = "mp3/"
    # fingerprint all files in a directory
    for filename in os.listdir(path):
        if filename.endswith(".mp3"):
            reader = FileReader(path + filename)
            audio = reader.parse_audio()

            song = db.get_song_by_filehash(audio['file_hash'])
            song_id = db.add_song(filename, audio['file_hash'])

            msg = ' * %s %s: %s' % (
                colored('id=%s', 'white', attrs=['dark']),  # id
                colored('channels=%d', 'white', attrs=['dark']),  # channels
                colored('%s', 'white', attrs=['bold'])  # filename
            )
            print(msg % (song_id, len(audio['channels']), filename))

            if song:
                hash_count = db.get_song_hashes_count(song_id)

                if hash_count > 0:
                    msg = '   already exists (%d hashes), skip' % hash_count
                    print(colored(msg, 'red'))

                    continue

            print(colored('   new song, going to analyze..', 'green'))

            hashes = set()
            channel_amount = len(audio['channels'])

            for channeln, channel in enumerate(audio['channels']):
                msg = '   fingerprinting channel %d/%d'
                print(colored(msg, attrs=['dark']) % (channeln + 1, channel_amount))

                channel_hashes = fingerprint.fingerprint(channel, Fs=audio['Fs'],
                                                         plots=config['fingerprint.show_plots'])
                channel_hashes = set(channel_hashes)

                msg = '   finished channel %d/%d, got %d hashes'
                print(colored(msg, attrs=['dark']) % (channeln + 1, channel_amount, len(channel_hashes)))

                hashes |= channel_hashes

            msg = '   finished fingerprinting, got %d unique hashes'

            values = []
            for hash, offset in hashes:
                values.append((song_id, hash, offset))

            msg = '   storing %d hashes in db' % len(values)
            print(colored(msg, 'green'))

            db.store_fingerprints(values)

    print('end')
Once the fingerprint of all files are collected, it will create a config.json file which contain all the fingerprints for all audios.
Note:- Comments helps to understand the different parts of code in a better way.
The above fig - 7 shows the snippet of collecting fingerprint from each audio stored in our data set. Next, we will run another python code to identify real time sounds inputted through microphone. Below snippet illustrates the code for that purpose.
import argparse
import sys
from argparse import RawTextHelpFormatter
from itertools import zip_longest as izip_longest
from termcolor import colored
import libs.fingerprint as fingerprint
from libs.config import get_config
from libs.db_sqlite import SqliteDatabase
from libs.reader_microphone import MicrophoneReader
from libs.visualiser_console import VisualiserConsole as visual_peak
from libs.visualiser_plot import VisualiserPlot as visual_plot

def align_matches(matches):
    diff_counter = {}
    largest = 0
    largest_count = 0
    song_id = -1

    for tup in matches:
        sid, diff = tup

        if diff not in diff_counter:
            diff_counter[diff] = {}

        if sid not in diff_counter[diff]:
            diff_counter[diff][sid] = 0

        diff_counter[diff][sid] += 1

        if diff_counter[diff][sid] > largest_count:
            largest = diff
            largest_count = diff_counter[diff][sid]
            song_id = sid

    songM = db.get_song_by_id(song_id)

    nseconds = round(float(largest) / fingerprint.DEFAULT_FS *
                     fingerprint.DEFAULT_WINDOW_SIZE *
                     fingerprint.DEFAULT_OVERLAP_RATIO, 5)

    return {
        "SONG_ID": song_id,
        "SONG_NAME": songM[1],
        "CONFIDENCE": largest_count,
        "OFFSET": int(largest),
        "OFFSET_SECS": nseconds
    }


def grouper(iterable, n, fillvalue=None):
    args = [iter(iterable)] * n
    return (filter(None, values)
            for values in izip_longest(fillvalue=fillvalue, *args))


def find_matches(samples, Fs=fingerprint.DEFAULT_FS):
    hashes = fingerprint.fingerprint(samples, Fs=Fs)
    return return_matches(hashes)


def return_matches(hashes):
    mapper = {}
    for hash, offset in hashes:
        mapper[hash.upper()] = offset
    values = mapper.keys()

    for split_values in map(list, grouper(values, 1000)):
        # @todo move to db related files
        query = """
    SELECT upper(hash), song_fk, offset
    FROM fingerprints
    WHERE upper(hash) IN (%s)
  """
        query = query % ', '.join('?' * len(split_values))

        x = db.executeAll(query, split_values)
        matches_found = len(x)
        print(x)

        if matches_found > 0:
            msg = '   ** found %d hash matches (step %d/%d)'
            print(colored(msg, 'green') % (
                matches_found,
                len(split_values),
                len(values)
            ))
        else:
            msg = '   ** not matches found (step %d/%d)'
            print(colored(msg, 'red') % (len(split_values), len(values)))

        for hash_code, sid, offset in x:
            # (sid, db_offset - song_sampled_offset)
            print(sid)
            print(sum(list(offset)))
            print(offset)
            print(mapper[hash_code])
            print(-(list(offset)-mapper[hash_code]))
            yield (sid, sum(list(offset)) - mapper[hash_code])


if __name__ == '__main__':
    config = get_config()

    db = SqliteDatabase()

    parser = argparse.ArgumentParser(formatter_class=RawTextHelpFormatter)
    parser.add_argument('-s', '--seconds', nargs='?')
    args = parser.parse_args()

    if not args.seconds:
        parser.print_help()
        sys.exit(0)

    seconds = int(args.seconds)

    chunksize = 2 ** 12  # 4096
    channels = 2  # int(config['channels']) # 1=mono, 2=stereo

    record_forever = False
    visualise_console = bool(config['mic.visualise_console'])
    visualise_plot = bool(config['mic.visualise_plot'])

    reader = MicrophoneReader(None)

    reader.start_recording(seconds=seconds,
                           chunksize=chunksize,
                           channels=channels)

    msg = ' * started recording..'
    print(colored(msg, attrs=['dark']))

    while True:
        bufferSize = int(reader.rate / reader.chunksize * seconds)

        for i in range(0, bufferSize):
            nums = reader.process_recording()

            if visualise_console:
                msg = colored('   %05d', attrs=['dark']) + colored(' %s', 'green')
                print(msg % visual_peak.calc(nums))
            else:
                msg = '   processing %d of %d..' % (i, bufferSize)
                print(colored(msg, attrs=['dark']))

        if not record_forever:
            break

    if visualise_plot:
        data = reader.get_recorded_data()[0]
        visual_plot.show(data)

    reader.stop_recording()

    msg = ' * recording has been stopped'
    print(colored(msg, attrs=['dark']))

    data = reader.get_recorded_data()

    msg = ' * recorded %d samples'
    print(colored(msg, attrs=['dark']) % len(data[0]))

    # reader.save_recorded('test.wav')

    Fs = fingerprint.DEFAULT_FS
    channel_amount = len(data)

    result = set()
    matches = []

    for channeln, channel in enumerate(data):
        # TODO: Remove prints or change them into optional logging.
        msg = '   fingerprinting channel %d/%d'
        print(colored(msg, attrs=['dark']) % (channeln + 1, channel_amount))

        matches.extend(find_matches(channel))

        msg = '   finished channel %d/%d, got %d hashes'
        print(colored(msg, attrs=['dark']) % (channeln + 1,
                                              channel_amount, len(matches)))

    total_matches_found = len(matches)
    print(matches)
    print('')

    if total_matches_found > 0:
        msg = ' ** totally found %d hash matches'
        print(colored(msg, 'green') % total_matches_found)

        song = align_matches(matches)

        msg = ' => song: %s (id=%d)\n'
        msg += '    offset: %d (%d secs)\n'
        msg += '    confidence: %d'

        print(colored(msg, 'green') % (song['SONG_NAME'], song['SONG_ID'],
                                       song['OFFSET'], song['OFFSET_SECS'],
                                       song['CONFIDENCE']))
    else:
        msg = ' ** not matches found at all'
        print(colored(msg, 'red'))
Once our conf.json file is build, we will be using that and recognizing audio from microphone file for our main purpose.
So totally for audio and image recognition, we will be using only four file.pickle file containing (128 -d vector)image information,.json file (containing audio fingerprint), recognize image and audio python files.
3.3 Creating a UIUser interface plays an important role too have a better look as well as for better understanding. So, for a better interface we will be creating a user interface with the help of pyqt tool in python that will help us recognize image and sound. In the sense, we can say that this user interface handles image and sound recognition file. When our system runs, it will call this user interface which first ask the user whether they want to lock or unlock the device. As per user's choice, the actions are performed. But if the system is already locked and if user press lock button again then it will display a prompt that device or system already locked and same case holds for unlocking part also. But if the system is not locked and the user wants to lock the system, then it will capture user image first and verifies it. If it matches then it will identify user sound over microphone and then make a judgement whether a user is authorized or not. If any on the module fails, there only it will notify the bolt module to send an alert sms to the owner indicating that an intruder is trying to access the security system.
The above fig - 8 shows the UI first page which will be called when security system runs through bolt device python file. It will be prompted, asking the user whether he/she wants to lock or unlock the device. Based on the user choice, the action will be performed and the UI will be re-directed to next page whether further processing will be handled.
The above fig - 9 shows the UI created for handling image and audio recognition. When the bolt iot will call this python file, it will display the user live image on right blank space and user live audio spectrum on bottom blank space. When these two verifies properly and if access granted, it will send a confirmation back to bolt device for further processing or else send a alert to send alert sms to the owner of security system.
Note:- The code for UI and rest all other code along with custom built-in libraries will be provided at the end of the project section. Comments given in code to understand different parts in a better way.
3.4 Configuration Files:
Now since our all modules are ready, we will also make our configuration files ready for calling Bolt-IoT device over internet and also for sending sms when any intruders are detected. So for this purpose we need to create a python file containing following information's:
SID = "Your TWILIO SSID"
AUTH_TOKEN = "Your Twilio Authentication Token"
FROM_NUMBER = "Your TWILIO Generated Number"
TO_NUMBER = "Number to which you want to send sms with +91"
API_KEY = "Your Bolt Cloud API"
Device_ID = "Your Bolt Device ID"
Finally all our modules are build separately, now we need to integrate them together for use. We will now create one single python file for BOLT_IoT device, where all these modules will be integrated and called one by one to achieve the desired purpose.
4. Integrating ALL Modules:Now, we will start integrating all modules together. We will now create a main python file (Eg: - bolt.py) which will control all the operations. This python file will import the configuration file created above and with the help of OS module of python, it will call the first UI page. This UI page will handle further processing by calling both face and audio modules one by one and identifies the person. If identification completes successfully then the UI page pass the control back to main python file (bolt.py) indicating that the identification succeed and ask the bolt module to successfully lock or unlock the system. This can be shown by switching on or off the Led, i.e. when a positive control is received from UI page, we will send a signal to bolt module to make a particular pin high or Low depending on the choice user selected from first UI page, i.e. whether to lock or unlock and place a led there which will glow or switched off. People can replace this LED and also place servo motor in that bolt-IoT pin there or any other thing to show the physical working of code, as everything inside remains same.
Suppose, if the modules fails to identify the person, i.e. if identification fails then the UI page will send negative control back to the main python file (bolt.py). Once the main python file receives negative control from UI page, it will request the Twilio to send an alert sms to the user alerting them about the intruder and finally a buzzer will make sound to notify the nearby persons.
import os
import conf,json,time
from boltiot import Sms, Bolt
mybolt = Bolt(conf.API_Key, conf.Device_ID)
sms = Sms(conf.SID,conf.AUTH_Token,conf.TO_Number,conf.FROM_Number)
os.system('python 1st_page.py')
f = open("del.txt", "r")
res = []
for x in f:
	res.append(x)
f.close()
if int(res[0])==0:
	print("Unlocking device")
	mybolt.digitalWrite('0','HIGH')
	os.remove("del.txt")
elif int(res[0])==1:
	print("Locking device")
	mybolt.digitalWrite('0','LOW')
	os.remove("del.txt")
elif int(res[0])==2:
	print("Making request to Twilio to send an sms")
	response = sms.send_sms("Intruder detected, Someone trying to access security system")
	print("Response received from twilio = " + str(response))
	print("Status of sms = " +str(response.status))
	os.remove("del.txt")
The above code demonstrates the main code file (bolt.py) which acts as driver class and does the necessary jobs as described above.
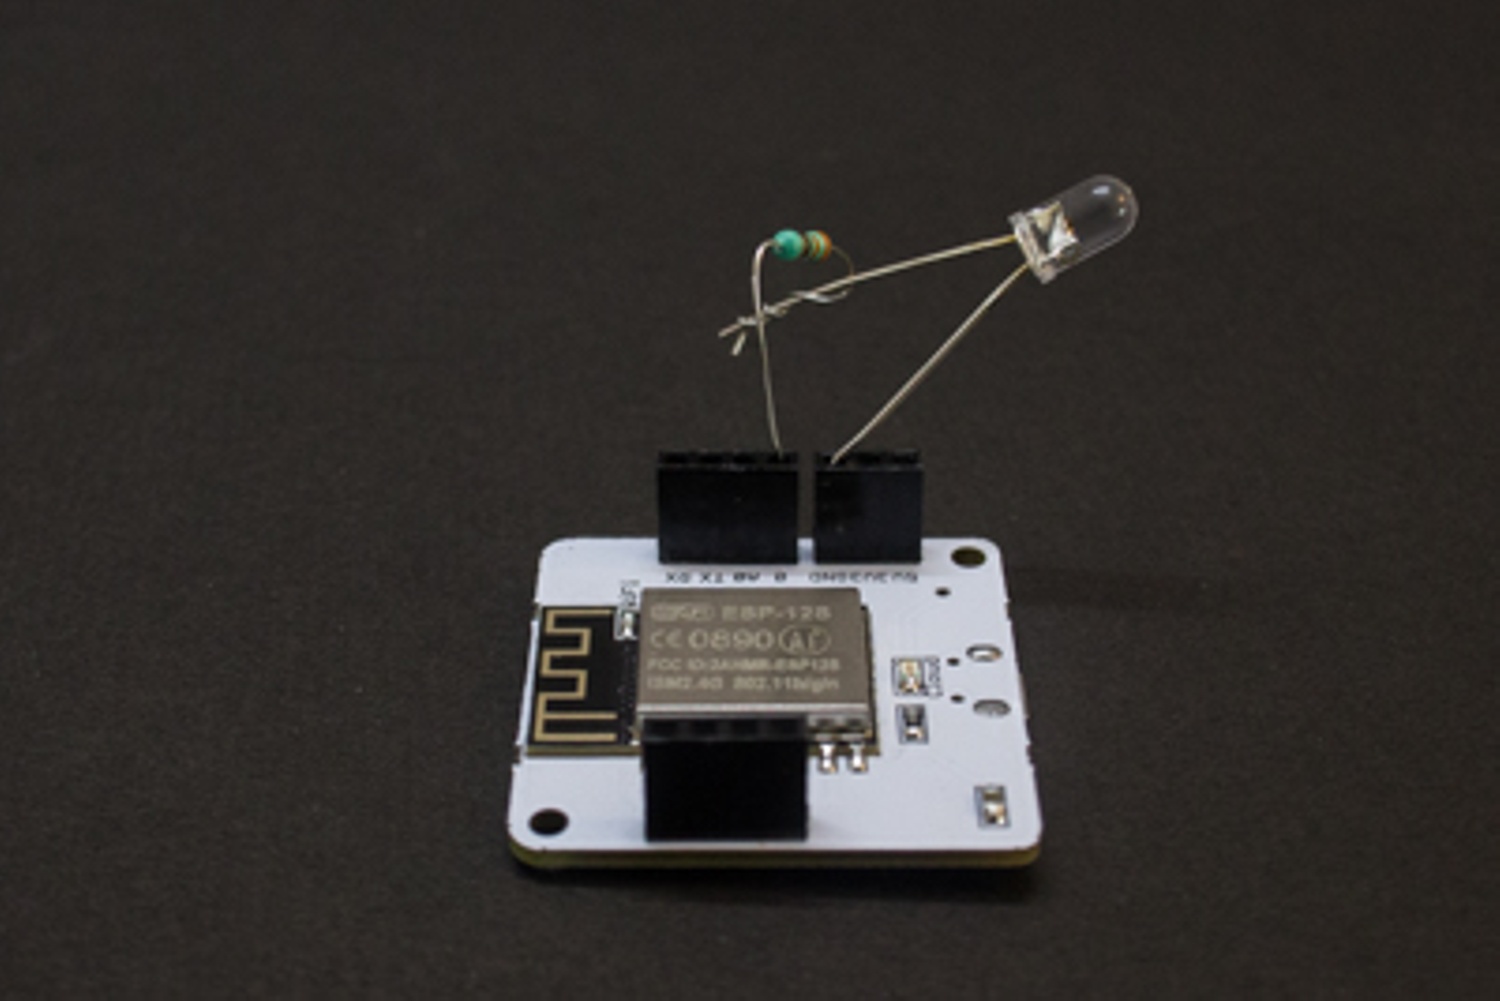
Simple circuit diagram
The above figure - 10 displays the circuit diagram. As all our work depends on code there is small circuit setup. Again mentioning, people can also setup any device or any other thing in place of led which will work when access is granted by security system for a particular user.
Note:- Our bolt module must be connected to network and we have to run only our drive python file for execution, i.e. bolt.py and rest file will be called internally one by one. All the files should also be in same directory.
5. DemonstrationAs already explained theoretically how the code works in the above sections, now let's see whether it happens practically happens or not. The below results screenshots demonstrates complete working of the project implementing all modules and showing whether project works as descried above or not. Now for better understanding, let's also divide our demonstration into different parts.
We have also talked about the buzzer which will make sound during intruder detection. Bu due to some problem my buzzer destroyed so I have not added it in the circuit. One can add it to the circuit with a small changes in the bolt.py file.- Part - 1 - Demonstrating Locking or Unlocking of system if access is granted
Note :- We can place anything instead of LED. Suppose we connect the door control with the BOLT IOT then when the system identifies the user it performs locking or unlocking of door based on his choice selected on the first page.
Due to lack of equipment's I just used an LED to demonstrate the working.- Part - 2 - Demonstrating what happens when any modules fails to identify a person
- Part - 3 - Demonstrating what happens when a user tries to lock an already locked system or unlock an already opened system.
Note:- All the codes are provided while explanation. Remaining two GUI codes will be provided at the end of the sections.
The project demonstrates the securitysystem using image and sound processing. One can also add biometric sensors to the given project to make it more secure. In order to keep the project short I have removed the biometric part. Once we add the biometric sensor then we can achieve a higher security which consist of image, sound and fingerprint and it will be difficult for the intruder to bypass the system.


Comments
Please log in or sign up to comment.