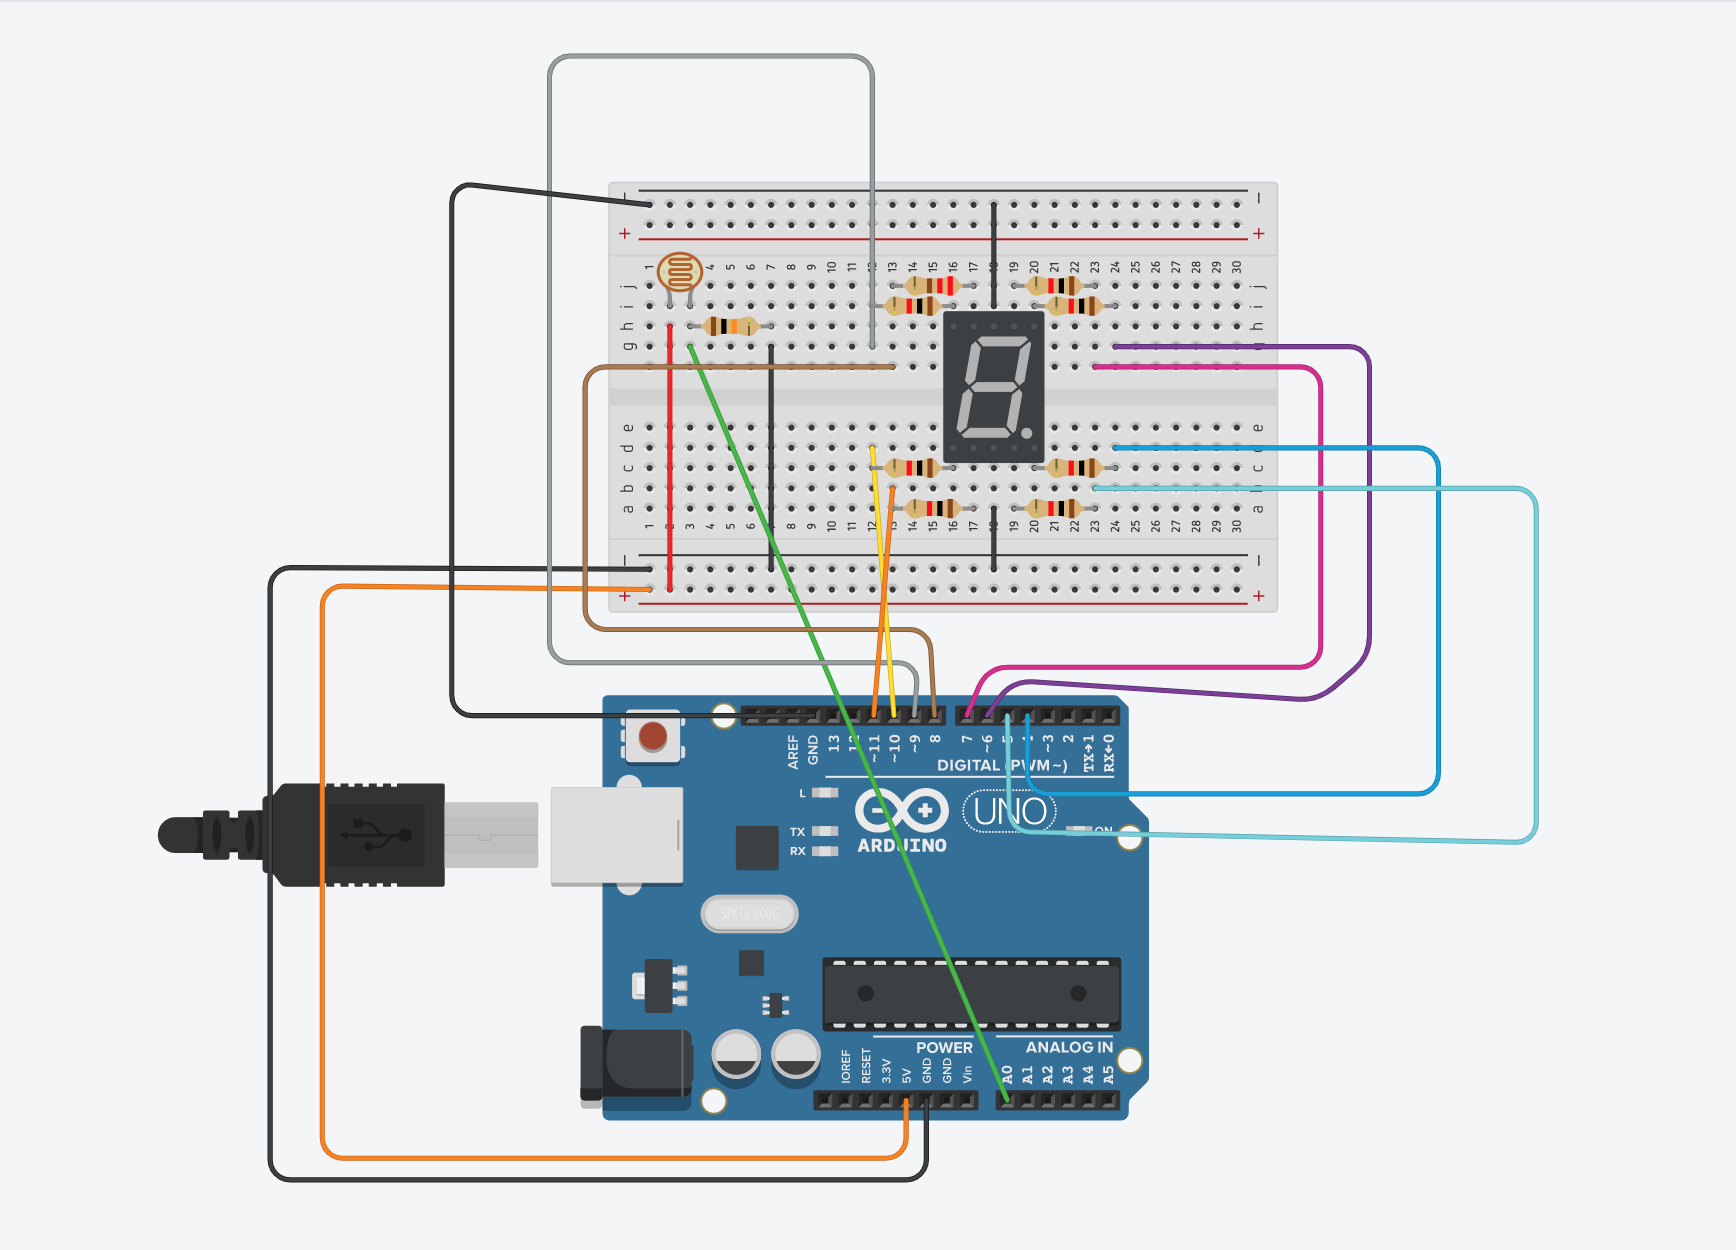
About this project:
This is an easy Digital Dice project using a one-digit 7 segment display. It is so simple because all you need to do is touch the top of the photoresistor (LDR).
If you would like to see how it works, go ahead and click on this link!
1-digit 7 segment display breakdown:
Each pin is labeled a different letter and connected to light up a different LED in the display. I will be referencing this to explain the connections. (ex. C goes to Pin 5).
Connections:- Photoresistor/LDR first pin is connected to 5V
- Photoresistor/LDR second pin is connected by a 10 KΩ resistor to GND, also the same pin is connected to A0 on the Arduino Uno
- The1digit7segmentdisplay is connected by multiple 220Ω resistors to various pins.
- Those are the specific connections. Refer above to see what the letter pins on the display refer to.
NOTE: You can configure the lighting in the code to the lighting in your room. Just use this link to figure out your photoresistor readings.
NOTE #2: If you do not want to use 8 220 Ω resistors, you can change all of the HIGHs in the digitalWrite(_, HIGH); to a DEFAULT: digitalWrite(_, DEFAULT);. These will be in the if statements and will set the LEDs in the segments to a medium level so the display won't burn out. :)


_ztBMuBhMHo.jpg?auto=compress%2Cformat&w=48&h=48&fit=fill&bg=ffffff)


Comments
Please log in or sign up to comment.