
Hardware components | ||||||
 |
| × | 1 | |||
 |
| × | 1 | |||
 |
| × | 1 | |||
Software apps and online services | ||||||
 |
| |||||
 |
| |||||
Light-emitting diode (LED) is a semiconductor device that emits light when an electric current is passed through it. Light is produced when the particles that carry the current (known as electrons and holes) combine together within the semiconductor material.
Step1: Open the website and sign in.
Step2: Under the channels bar click on New Channels and give it any name
you want
Step3:Then click the API tab and then click on generate new write API key
and copy the (selected) link as shown in the image.
Step4:Open the MIT a2 website and complete the sign in process.
Step5:After signing in click on create apps and thrn create new projects.
Step6: Under the properties section you can edit the background color, image etc.
Insert 2 buttons(from left column) and give them a suitable title width height.
Step7:Under the pallete search for web and place the globe anywhere inside.
Step8:On the top left corner click on blocks.
Step9::On the bottom-left corner click on buttons and add the block as shown in image. Similarly do it for button 2 as well. (Note:Observe the cursor in the image below for better clarification)
Step10:Paste the link from step 3 into the pink block(text).
In button 1 set the last value as 1 (for on) and similarly for button 2 set it to
0(for off).
Note: Copy the channel ID and API key(Under write API key) in the code below
Step11:Download the app you just made!!!!
Click the built tab and download the apk.
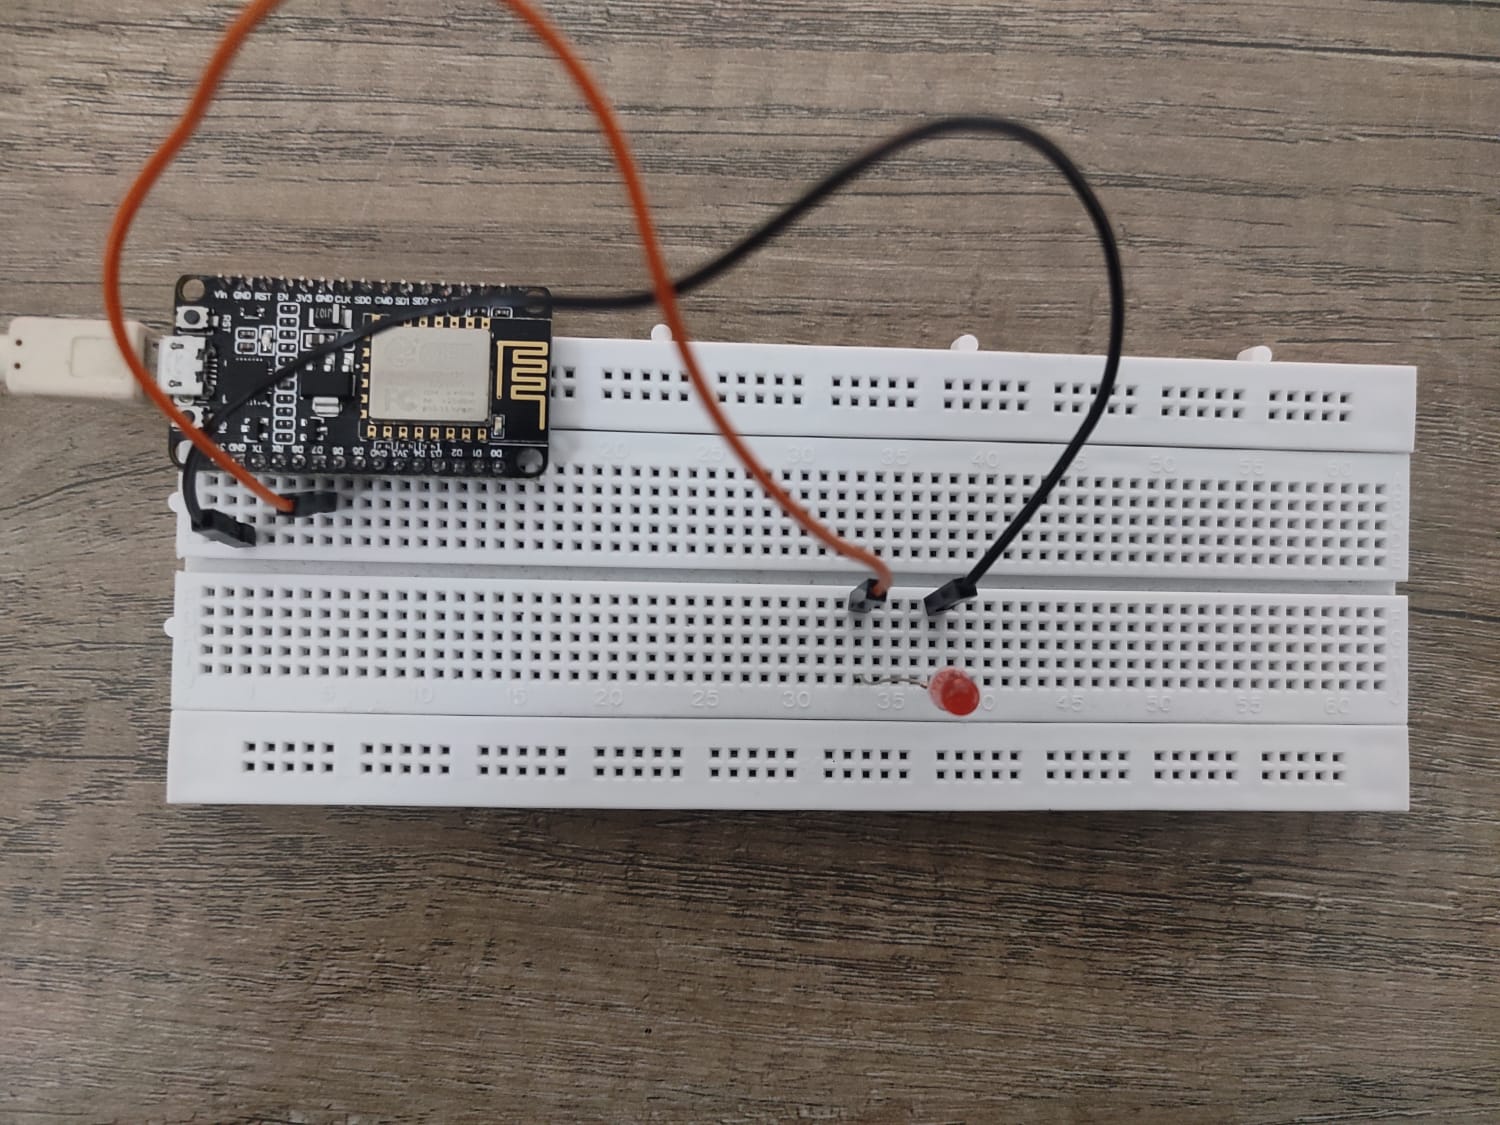
In the circuit, Black wire is coonnected to ground of the esp8266 and orange wire to the pin d7.


Comments