

Hardware components | ||||||
 |
| × | 1 | |||
| × | 1 | ||||
| × | 1 | ||||
| × | 1 | ||||
| × | 1 | ||||
 |
| × | 1 | |||
| × | 1 | ||||
Software apps and online services | ||||||
 |
| |||||
| ||||||
| ||||||
| ||||||
| ||||||
| ||||||
I was looking for an alarm system for my motorbike but was so disappointed by the available options that I decided to build my own. So I built TRACKSi - a smart and portable multi-network alarm & notifications system. It uses a mix of the SiPy 3 networks - SigFox, WiFi and BLE - to function both online and offline, and an app to control it and to get push notifications when triggered.
How does it work?- Place the box inside your motorbike.
- Use the app to lock it (using WiFi if possible, or Bluetooth if not)
- If it detects any movement while locked - it triggers a "warning beep".
- If it's triggered again - it fires the alarm and sends a notification (using WiFi if available, or SigFox if not).
- Use the app to unlock it.
Ok, and how does it really work?
The SiPy sleeps for most of the time. The accelerometer on the Pytrack is used as an interrupt that wakes the system up when movement is detected. A configurations object, which holds the current state, is then synced from the backend (if WiFi is available) or read from a file (if not), the system runs the actions, updates the configurations and goes back to sleep.
The online backend is built using a Parse Server. It's an open source instant server that you can deploy with 1-click on Heroku and host for free. We'll only be adding a few lines of code, so this part is straightforward and simple.
The app is built with Ionic 3, and it's based on a boilerplate that has a Parse integration builtin and an Angular front. It uses OneSignal for free push notifications. You will need some experience with app building to get in installed on your phone, but if you just want to test and play with it, you can also use the browser-based version of the app instead of building the actual app for a mobile device.
By using SigFox for outgoing notification, WiFi for syncing (when available), and Bluetooth BLE for close-range control, TRACKSi becomes fully operational with and without a WiFi connection. For redundancy and fallback, a local copy is always saved to a file on the SD card and is read upon startup of the system.
It's not complete, and definitely not secure, but it does fulfill its purpose quite well - to act as an additional line of defense and help sleep better at night.
How to build your ownThis hack is split into 4 sections:
- Wiring TRACKSi - SiPy, Pytrack, Piezo speaker, SD card, Antenna and Battery.
- Setting up a Parse Server as a backend.
- Coding the logic of the system into the SiPy.
- Building an app to communicate with TRACKSi
The full source code is available and you can build this project with basic coding skills. You'll need a few hours of play to set it all up. To build the app for iOS, you'll need an Apple Developer subscription. All other services used are open-source and/or free.
1. Wiring the hardwareThis part is fairly straightforward - we connect the antenna directly to the SiPy, and the battery, SD card and speaker to the Pyboard. The only "tricky" part is connecting the speaker:
- Make sure you get a battery with a JST connector to fit the Pytrack (and that you have a charger that fits)
- Make sure you get an antenna that is compatible with your SigFox region and band, and that you connect it to the SigFox external antenna connector and not the WiFi U.FL connector (as i did) - see the spec to double verify (you want the one next to the LED).
The only "tricky" part is connecting the speaker to the SiPy through the Pytrack. Here's the Pinout diagram of the Pytrack:
The Pytrack has an External IO Header which we'll use to connect the speaker. We'll connect it to G17, Pin 10 (P10) of the SiPy, through EXT_I02, and to Ground (GND). The means one wire goes into position number 1 and the other to number 7 (doesn't matter which goes where).
I didn't want to solder anything, so I hacked wires and used a couple of alligator clips. Hack as needed to fit your speakers (and find a better way to connect to the Pyboard...)
Together, it should look something like this:
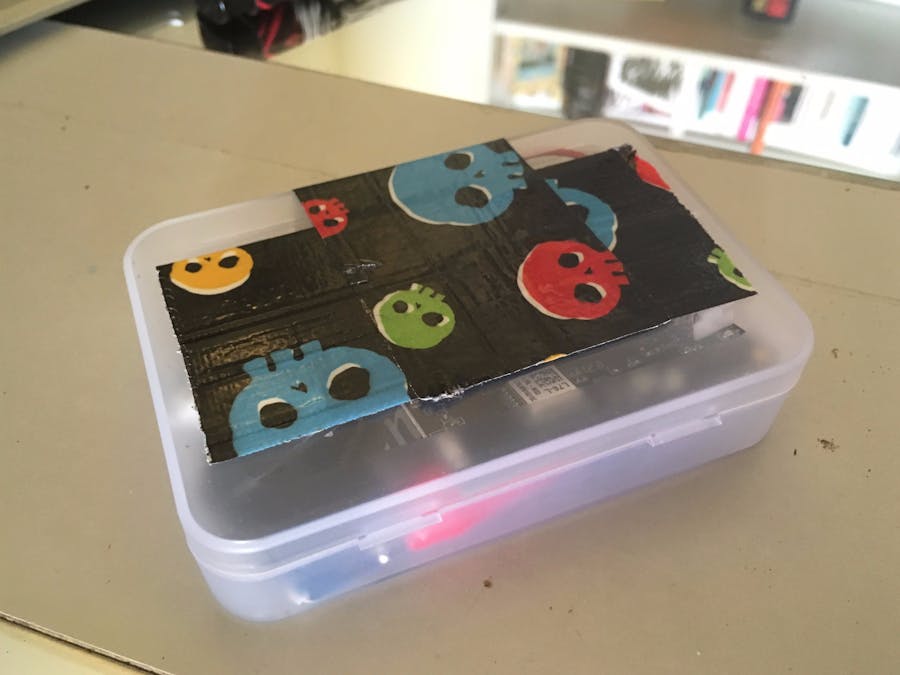
The end result, after connecting all hardware, looks like this:
This part is quick and easy, so let's get it out of the way. Before you start, you'll need to setup accounts on GitHub, Heroku and OneSignal. You can use the free versions of all, but you'll need to verify a payment method on Heroku to connect a MongoDB from mLab.
Some background: Parse Server is an Open Source Node.js REST API backend. It's an instant and dynamic API that we'll use as a bridge between our app and TRACKSi. We'll also use it to enable push notifications when TRACKSi is offline, by setting a Cloud Job as the callback of a SigFox message:
Heroku Deploy Button!
Luckily for us - we can deploy the server with the "Deploy to Heroku" button that will set everything up with 1 click!
This repo is forked from the "Parse Community Example" repo and adds application variables for OneSignal and the code for the Cloud Jobs - you don't need to edit any files at all - all variables are configured as "Config Variables" on Heroku.
2.1 Visit the repo page on GitHub and click the Deploy to Heroku button:
https://github.com/asaphko/tracksi-parse-server
2.2. On the next screen, configure the variables as you wise.
Done! To test the server, visit the test URL (replace with app url!):
https://tracksi-parse-api.herokuapp.com/public/test.html
3. Coding the SiPyFirst, you'll need to setup the SiPy and prepare a development environment. If you've already done this step, including upgrading the Firmware, setting up a REPL and registering on SigFox - skip the next 3 steps.
Otherwise - follow these:
- 3.1. Upgrade the Firmware of your SiPy. Follow this guide step by step: https://docs.pycom.io/chapter/gettingstarted/installation/firmwaretool.html
- 3.2. Install and configure Atom with the Pymaker plugin. Follow this: https://docs.pycom.io/chapter/gettingstarted/installation/pymakr.html
- 3.3. Now that SiPy said "Hello world!", Register it on the SigFox backend. Follow this: https://docs.pycom.io/chapter/tutorials/sipy/register.html
Nice! Your SiPy is ready for action.
Now we want to get the TRACKSi code onto the SiPy. The full code is available in the linked GitHub repo, but here's a quick overview of how the code works.
The SiPy boots from a file called boot.py, which then calls main.py. The rest of the files, inside the /lib folder, are libraries we load from those 2 files.
(following code is shortened - the repo has the full code!)
Here's boot.py:
#first - beep!
import audiovisual
from audiovisual import AV
av = AV()
av.beep()
#WiFi - setup known nets:
known_nets = [('MEO-D9555F', '2F8811E281')]
...
#WiFi setup
if machine.reset_cause() != machine.SOFT_RESET: #needed to avoid losing connection after a soft reboot
	from network import WLAN
	wl = WLAN()
	wl.mode(WLAN.STA)
	available_nets = wl.scan()
	...
#initiates the UART (USB) connection
uart = UART(0, baudrate=115200)
os.dupterm(uart)
#continue
machine.main('main.py')
Which continues to main.py:
...
def main():
   #state 0 = unlocked
   #state 1 = locked
   #state 2+ = triggered
   config = state.getState()
   if config['state'] >= 1:
       if config['state'] == 1:
           av.warning()
           state.trigger()
       else:
           if config['state'] == 2:
               state.notify()
               av.alarm()
           else:
               state.upone()
               av.alarm()
   #check BLE
   state.bt_check()
   #go to sleep
   py.setup_sleep(7200)
   py.go_to_sleep()
py.setup_int_wake_up(True, True)
acc = LIS2HH12()
# set accelereation threshold to 40mG and the min duration to 20ms
acc.enable_activity_interrupt(40, 20)
# check if we were awaken due to activity
if acc.activity():
   main()
To use all of those handy functions, we use a few Pycom MicroPython libraries and 2 custom libraries. The first is "audiovisual" (remember P10?) and it makes noise and blinks lights - Here's the code:
from machine import PWM
import time
import pycom
class AV:
   def do(self, freq=2000, duty=0.1, duration=0.1, pause=0.1, repeat=1, color=0x0000ff):
       pycom.heartbeat(False)
       for i in range(repeat):
           pycom.rgbled(color)
           pwm = PWM(0, freq)
           pin = pwm.channel(0, pin='P10', duty_cycle=duty)
           time.sleep(duration)
           pycom.heartbeat(False)
           pin.duty_cycle(0)
           time.sleep(pause)
   def beep(self):
       self.do()
   def longbeep(self):
       self.do(2000,0.1,0.3,0,1,0x007f00)
   def warning(self):
       self.do(2000,0.7,0.2,1,2,0x7f0000)
   def alarm(self):
       self.do(2000,0.8,0.4,0.2,7,0x7f0000)
   def locked(self):
       self.do(2000,0.1,0.1,0.1,2,0x007f00)
   def unlocked(self):
       self.do(2000,0.1,0.1,0.1,3,0x007f00)
   def blue(self):
       pycom.heartbeat(False)
       pycom.rgbled(0x0000FF)
   def off(self):
       pycom.heartbeat(False)
And the last one is "state", which holds the majority of the logic of the system. Here's state.py:
import machine
import os
import time
import ujson
import urequests
import network
import socket
import binascii
import audiovisual
#import pycom
from machine import SD
from network import WLAN
from network import Sigfox
from network import Bluetooth
from audiovisual import AV
#from L76GNSS import L76GNSS
#from pytrack import Pytrack
PARSE_BASE_URL = 'http://tracksi-parse-server.herokuapp.com'
PARSE_APPLICATION_ID = 'tracksiAppId'
PARSE_MASTER_KEY = 'tracksiMasterKey'
PARSE_REST_API_KEY = 'anykeyworks'
BLE_DEVICE_NAME = 'mytracksi'
BLE_SERVICE_LOCK = 0001
BLE_SERVICE_UNLOCK = 0002
BLE_SECRET_KEY = 'SECRET'
class State:
   def __init__(self):
       self.debug('doing state init')
       #load (or create) a local file
       sd = SD()
       os.mount(sd, '/sd')
       #sigfox setup
       sigfox = Sigfox(mode=Sigfox.SIGFOX, rcz=Sigfox.RCZ1)
       self.sig = socket.socket(socket.AF_SIGFOX, socket.SOCK_RAW)
       self.sig.setblocking(False)
       self.sig.setsockopt(socket.SOL_SIGFOX, socket.SO_RX, False)
       #py = Pytrack()
       #self.gps = L76GNSS(py)
       self.debug('trying to get state from net...')
       try:
           data = {}
           data["order"] = '-createdAt'
           data["limit"] = '1'
           headers = {'X-Parse-Application-Id': PARSE_APPLICATION_ID, 'X-Parse-REST-API-Key': PARSE_REST_API_KEY, 'Content-Type': 'application/json'}
           self.debug('sending request.')
           resp = urequests.get(PARSE_BASE_URL+'/classes/ConfigObject', headers=headers, data=ujson.dumps(data))
           config = resp.json()
           resp.close()
           self.debug('got state from net:')
           self.debug(ujson.dumps(config))
           self.write_config(config["results"][0])
       except:
           self.debug('could not get state from net.')
           try:
               f = open('/sd/config.json', 'r')
               config = f.read()
               f.close()
               if config == '':
                   self.debug('found invalid local json file, writing...')
                   config = {}
                   config["state"] = 0
                   self.write_config(config)
               else:
                   self.debug('found valid local json file:')
                   self.debug(config)
                   self.config = ujson.loads(config)
           except:
               self.debug('ERROR - could not get/create a valid config file!')
               self.update_config()
   def write_config(self, config):
       f = open('/sd/config.json', 'w+')
       f.write(ujson.dumps(config))
       f.close()
       self.config = config
       self.debug('wrote new config:')
       self.debug(ujson.dumps(config))
   def debug(self, string):
       print(string)
       #pass
   def update_config(self, state=0):
       #m_lat, m_lng = self.gps.coordinates()
       config = {}
       config["state"] = state
       #config["lat"] = m_lat
       #config["long"] = m_lng
       self.write_config(config)
   def parse_job(self, job):
       try:
           headers = {'X-Parse-Application-Id': PARSE_APPLICATION_ID, 'X-Parse-Master-Key': PARSE_MASTER_KEY}
           r = urequests.post(PARSE_BASE_URL+'/jobs/'+job, headers=headers)
           r.close()
       except:
           pass
   def unlock(self):
       self.update_config(state=0)
       self.parse_job('unlock')
   def lock(self):
       self.update_config(state=1)
       self.parse_job('lock')
   def trigger(self):
       self.update_config(state=2)
       self.parse_job('trigger')
   def notify(self):
       self.sig.send("TRACKSi")
       self.update_config(state=3)
   def upone(self):
       up = self.config["state"]+1
       self.update_config(state=up)
       try:
           data = {}
           data["state"] = up
           headers = {'X-Parse-Application-Id': PARSE_APPLICATION_ID, 'X-Parse-Master-Key': PARSE_MASTER_KEY, 'Content-Type': 'application/json'}
           rf = urequests.post(PARSE_BASE_URL+'/jobs/upone', headers=headers, data=ujson.dumps(data))
           self.debug(rf.json())
           rf.close()
           self.debug('updated job upone:' + up)
           return 'good'
       except:
           print('error with upone job')
   def getState(self):
       return self.config
   def bt_check(self):
       av = AV()
       av.blue()
       bluetooth = Bluetooth()
       bluetooth.set_advertisement(name=BLE_DEVICE_NAME, manufacturer_data=BLE_DEVICE_NAME, service_uuid=0001)
       bluetooth.advertise(True)
       srv1 = bluetooth.service(uuid=0001, isprimary=True)
       chr1 = srv1.characteristic(uuid=0002, value=5)
       if self.config["state"] == 0:
           lock_state = 0
       else:
           lock_state = 1
       def char1_cb_handler(chr):
           if chr.value() == bytes(BLE_SECRET_KEY, "utf-8"):
               if self.config["state"] == 0:
                   self.lock()
                   av.locked()
                   return 'good'
               else:
                   self.unlock()
                   av.unlocked()
                   return 'good'
       srv2 = bluetooth.service(uuid=0003, isprimary=True)
       chr2 = srv2.characteristic(uuid=0004, value=lock_state)
       char1_cb = chr2.callback(trigger=Bluetooth.CHAR_WRITE_EVENT, handler=char1_cb_handler)
       time.sleep(20)
       av.off()
       bluetooth.advertise(False)
So let's get it onto the SiPy:
- 3.4. Clone this repo locally: https://github.com/asaphko/tracksi-sipy-code
- 3.5. Load the directory in Atom, open /lib/boot.py, and replace with credentials for a WiFi network:
- 3.6. Replace all constants in /lib/state.py to match those set for the Parse Server + change the BLE key to a unique key (so that only you'll be able to lock and unlock tracksi!):
- 3.7. Now that we're done with editing, connect your TRACKSi by USB, and click on the "Connect" button in the console. you should get something like this, prompting for input:
- 3.8. Click the "Sync" button to copy all files to the SiPy, the result should show all files were copied (8/8), and the SiPy will restart and sound a first beep:
Done! The SiPy is ready.
4. Ionic 3 AppThe quickest way to get a basic app running is Ionic, and I found a cool Ionic 3 / Angular 2 boilerplate project that already integrated Parse as a backend and has all the API support we need prebuilt. I modified that app, and added some features to fit our needs:
4.1. First thing to do is to setup the Ionic CLI. Follow this: https://ionicframework.com/getting-started
(don't forget the Node.js installation!)
4.2. Once you got the demo app running, open a terminal, and clone the repo with the app code:
git clone https://github.com/asaphko/tracksi-ionic-app.git
4.3. Edit the variables in /src/app/app.constants.ts to match those of the SiPy, OneSignal and the Parse Server:
(you should also change the bluetoothSecretKey to a unique key!)
4.4. Run Ionic locally to install all dependencies and verify everything is working:
cd tracksi-ionic-app
ionic serve
(select "Yes" for installing project dependencies!)
Done! You should now see the app running locally in your browser.
Next step is to build the app for iOS. In order to do that you'll need an Apple Developer account, and I assume that if you have that you have Xcode installed and configured with your credentials.
4.5. To build the app for ios, run the following command:
ionic cordova platform add ios
4.6. Open /platforms/ios/TRACKSI.xcworkspace and set your Signing credentials and bundle information:
4.7. Connect your device, select it as the build target and click the play button.
Just one more step!
To enable the iOS Push Notification, you'll need to setup a OneSignal account, create a matching app and generate certificated.
4.8. Signup at https://onesignal.com
4.9. Follow these instructions (use the provisioning tool - it saves a lot of time!): https://documentation.onesignal.com/v3.0/docs/generate-an-ios-push-certificate
4.10. Update /src/app/app.constants.ts with the generated app ID and Key.
4.11. Update the Heroku Config Vars with the generated app ID and Key: Dashboard > Select your app > Select "Settings" > Click "Reveal Config Vars".
And that's that - all done!Disconnect TRACKSi and your iOS device from your computer, connect the battery and give it a try.
The only thing that isn't covered here is the BLE lock/unlock feature - here's how it works: After TRACKSi is done reading and updating the config, a blue LED will turn on for 20 seconds. During that time, TRACKSi is discoverable and waiting for connections. Open your app during that time - and you'll see a button to lock/unlock TRACKSi using Bluetooth in addition to the WiFi buttons.
(The app scans for 30 seconds, but if your devices didn't find each other just "pull to refresh" the app to re-scan.)
Future development- Enabling the GPS data - the code exists, but currently, the SiPy runs out of memory while running the coordinator function. This should be solved with new Firmware upgrades, and i'll update the code when it works.
- Enabling additional "modes" such as "silent mode" and "notify-on-first-trigger".
- Sending data from the accelerometer to determine changes in positioning (bike fell, bike is straight, etc).
Hope you enjoyed and found TRACKSi fun and useful. Improvements, comments, and ideas are more than welcome.


Comments