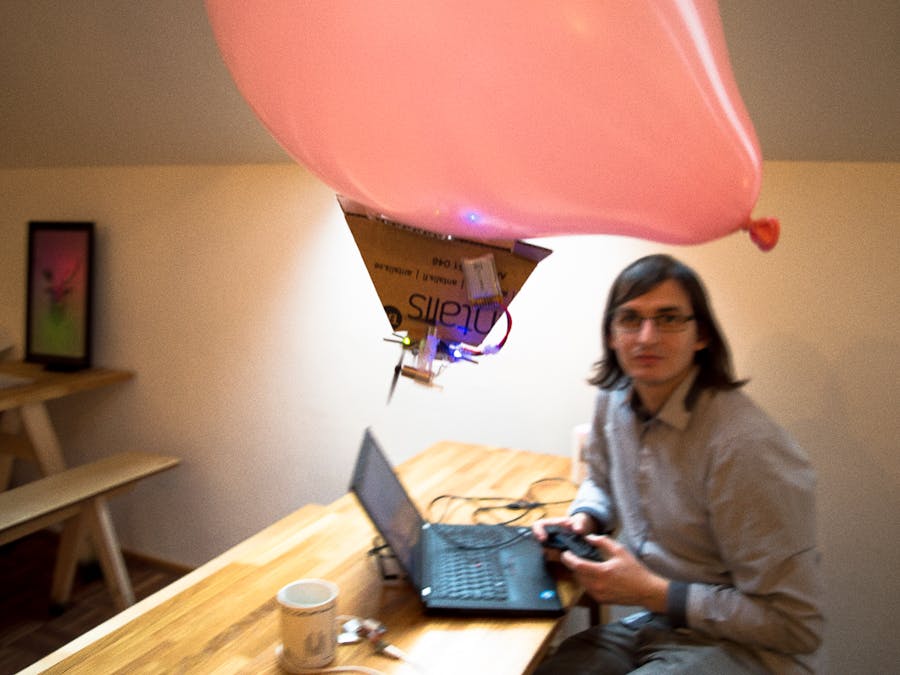
This project started at Minc the incubator where we has our office. They had some kind of conference/party and had hellium-filled party balloon everywhere. Since we where working with a Flying platform, the original Crazyflie, we stole ballons and started hacking together a blimp with a broken Crazyflie. The result was really fun to fly around and has been used a couple more times like at Arduino Day 2015:
In this project I will explain how to make a similar blimp but with Crazyflie 2.0 this time. As a bonus this can be done with a non-broken Crazyflie :-).
Making the hardwareThe basic idea is that the party ballons are attached to the copter and compensate most of its weight: the Crazyblimp should slightly fall down. Then two motors are setup to generate vertical lift to make it fly and two are oriented forward to make it go.
You should first start from a working Crazyflie:
Remove the motors with the motor mounts and install two motors facing front and two facing up. The motors are attached together by adding some hot-glue on the side:
Between the two motor mounts a small wood stick of about 30mm long is glued and the assembly is glued to the Crazyflies mounting holes:
Care should be taken to not put any glue in the deck expansion port. Also check that the motor wires are long enough to be connected to the motor connectors.
The connection are:
- M1 and M4: Up
- M2 and M3: Front
When the motors are installed and cabled, check that the propeller can turn freely and that they are turning in the right direction. If not, reorganize them.
Modifying the firmwareSince the motor position have been reorganized, the flight control software has to be changed accordingly. In the Crazyflie the commander received set-points from the PC client or gamepad/controller. Then the stabilizer uses these set-points to control the motors speed.
In quadcopter mode the stabilizer is using the controller setpoint in the following way:
- Thrust becomes mean-speed of all the motors.
- Pitch is controlling M1, M4 versus M2, M3 (ie. if the Crazyflie is too much inclined forward, M1, M4 will be accelerated and M2, M3 slowed down).
- Roll is controlling M1, M2 versus M3, M4
- Yaw is controlling M1, M3 versus M2, M4. These two pairs turns in opposite direction so increasing speed of one pair will make the quadcopter turn on its vertical axis.
For the blimp this will become:
- Thrust becomes mean-speed of the UP-facing motors, M1 and M4.
- Pitch becomes mean-speed of the Front-facing motors, M2 and M3
- Yaw is controlling M1 versus M4, they run in inverse direction and so their torque will help us turning (like the normal quadcopter configuration). Yaw is also controlling M2 versus M3, they are placed on the left and right side of the blimp and so changing there relative speed will make our blimp turns.
- Roll is ignored.
There is only one control loop left, for the yaw. This allows the blimp to keep a straight direction event with some wind or disturbances.
The code modified for the blimp can be found on my github dev-blimp branch.
First we have to modify the power distribution function from stabilizer.c. Originally it is:
static void distributePower(const uint16_t thrust, const int16_t roll,
                            const int16_t pitch, const int16_t yaw)
{
  int16_t r = roll >> 1;
  int16_t p = pitch >> 1;
  motorPowerM1 = limitThrust(thrust - r + p + yaw);
  motorPowerM2 = limitThrust(thrust - r - p - yaw);
  motorPowerM3 =  limitThrust(thrust + r - p + yaw);
  motorPowerM4 =  limitThrust(thrust + r + p - yaw);

  motorsSetRatio(MOTOR_M1, motorPowerM1);
  motorsSetRatio(MOTOR_M2, motorPowerM2);
  motorsSetRatio(MOTOR_M3, motorPowerM3);
  motorsSetRatio(MOTOR_M4, motorPowerM4);
}
We can recognized the distribution discussed earlier. So we can change it for our blimp:
static void distributePower(const uint16_t thrust, const int16_t roll,
                            const int16_t pitch, const int16_t yaw)
{
  // Facing UP
  motorPowerM1 = limitThrust(thrust + yaw);
  motorPowerM4 = limitThrust(thrust - yaw);
  // Facing FRONT
  motorPowerM2 = limitThrust( pitch - (yaw/1));
  motorPowerM3 = limitThrust( pitch + (yaw/1));
  motorsSetRatio(MOTOR_M1, motorPowerM1);
  motorsSetRatio(MOTOR_M2, motorPowerM2);
  motorsSetRatio(MOTOR_M3, motorPowerM3);
  motorsSetRatio(MOTOR_M4, motorPowerM4);
}
The last things to do is to "short" the pitch control loop: for the blimp to fly we do not need any pitch active control but we use the pitch setpoint to control the front motors. A bit higher in stabilizer.c we can pass the pitch directly to distributePower():
eulerPitchDesired = -eulerPitchDesired;
if (eulerPitchDesired<0) eulerPitchDesired = 0;
if (eulerPitchDesired>30) eulerPitchDesired = 30;
distributePower(actuatorThrust, actuatorRoll, 1000*eulerPitchDesired, -actuatorYaw);
The pitch setpoint is capped between 0 and 30 and then multiplied by 1000 to get an acceptable range for the front-facing motors.
Now the only thing left is to flash the new firmware in the Crazyflie. Since the branch can already be found on github the following commands will fetch it and flash it (I assume you are running in the Bitcraze virtual machine in the Projects/ folder and a Crazyradio is connected to the VM):
$ git clone https://github.com/ataffanel/crazyflie-firmware.git crazyflie-firmware-blimp
$ cd  crazyflie-firmware-blimp
$ git checkout dev-blimp
$ make
$ make cload
Restart your Crazyflie/Crazyblimp in bootloader mode and the new firmware is going to be flashed!
Flying!To fly the Crazyblimp connects to it with the client, or one of the mobile client, and slowly add some thrust until it takes off. The yaw is used to make it turn and pitch to make it go forward. Changing the control mode to put pitch and yaw on the same joystick helps a bit the control.
Now the mandatory video:


Comments
Please log in or sign up to comment.