


Hardware components | ||||||
_baVEVgguW1.jpg?auto=compress%2Cformat&w=48&h=48&fit=fill&bg=ffffff) |
| × | 1 | |||
 |
| × | 1 | |||
 |
| × | 2 | |||
 |
| × | 1 | |||
Software apps and online services | ||||||
 |
| |||||
This guide will demonstrate to beginners how to getting started with Arduino/Genuino 101 for the first time. This post will demonstrate the installation of Arduino/Genuino 101 board in Arduino IDE and then show the Blink LED example.
Below is the picture of things that we need to get started with Genuino/Arduino 101.
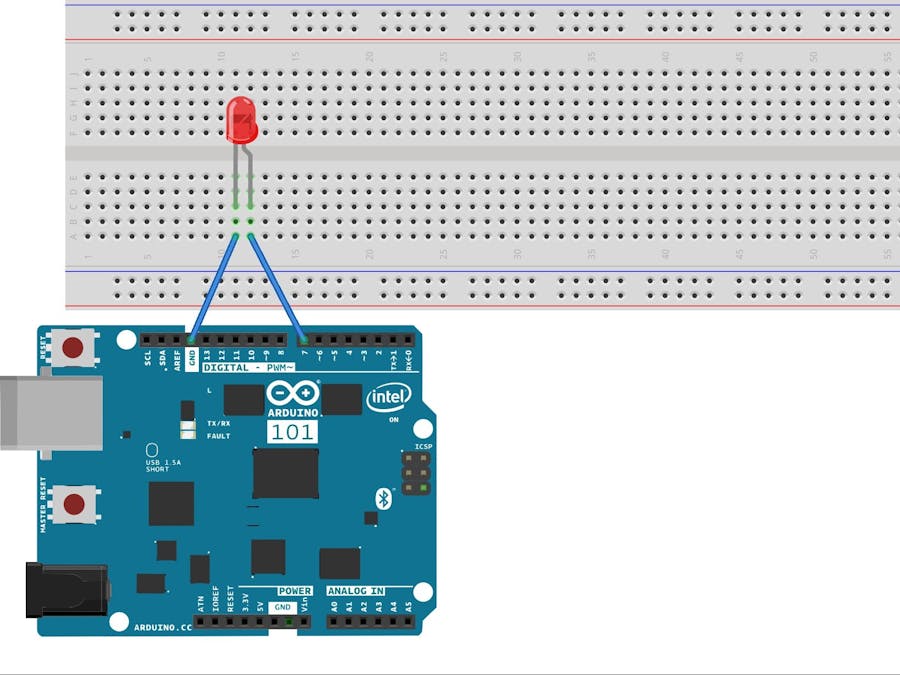
Now plug the jumper wire ground pin to LED cathode point and digital pin 7 to anode of LED.
Getting the Arduino IDEIf you have the Arduino IDE then it's OK, else download the Arduino IDE from here. Now open the Arduino IDE. Go to Tools->Board:->Board Manger:
Click on Board Manager.
Type "Genuino 101 " or "Arduino 101" or you can just type "101" and you will get the package for Arduino/Genuino 101 board. Click on install button.
Now Arduino IDE is ready to support Arduino/Genuino 101 board. Navigate to File->Examples->01. Basics->Blink
Change the Pin from 13 to 7 in a Code.
Review this Video it contains all the steps including output.


Comments
Please log in or sign up to comment.