This tutorial guides to making a digital clock at home and can run as long as it is powered by a power source. It uses internal registers of microcontrollers and does not requires external RTC.
Step 1:Install STM32CUBEMX and Keil With Packages for STM32L476.
Step 2:Make electronics Interfacing for Your Project. Electronics components needed for this project is:
- One laptop with windows installed
Connection of LCD and STM32L476 board are mentioned below:
- NA - 1K resistor connected to GND
Step 3: Selecting Microcontroller in STM32CUBEMXOpen cubemx and select nucleo64 board with microcontroller as STM32L476.
Step 4: Making Selections in Stm32cubemx.Make necessary selections in STM32cubemx according to images shown in this tutorial.
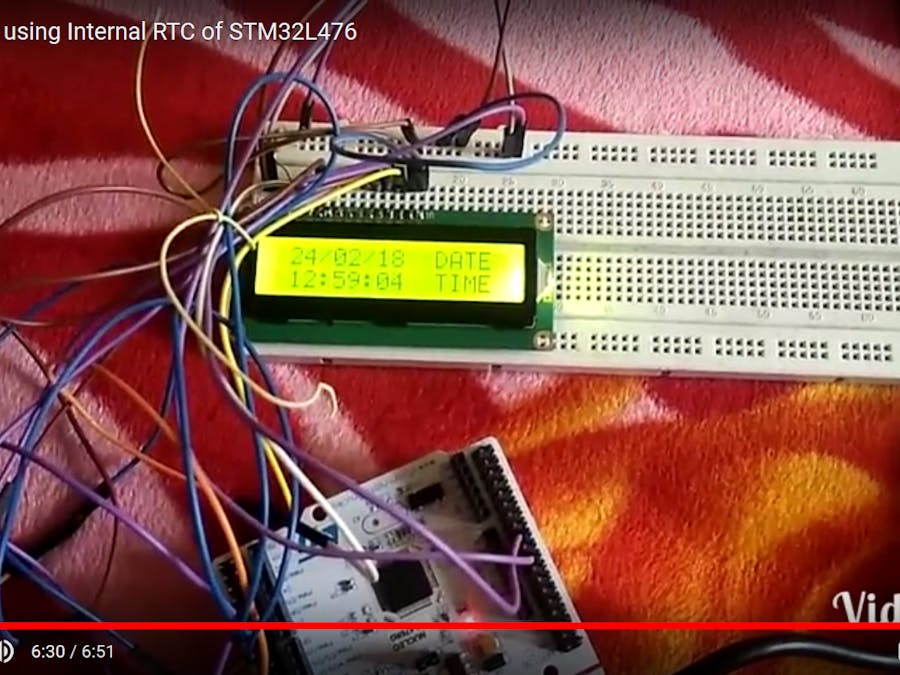
Step 6: Press the RESET Button of Board and Find Time and Date Running on Your LCD.


Comments
Please log in or sign up to comment.