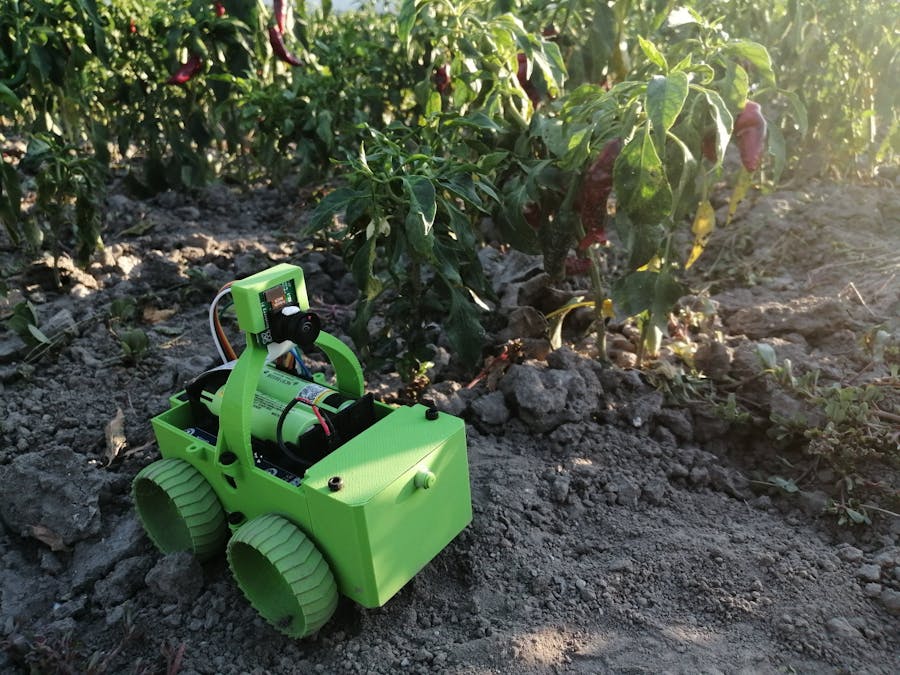
Agricultural robots are coming, but slowly. Besides all the environmental and social benefits, it would be just so cool to have a robot helping out in the home garden. It feels like we already have the necessary hardware and software available to turn a backyard into an autonomous food supply. This project explores how much precision-ag and robotics can be done with a Raspberry Pi and some minimal hardware.
Software Stack- OpenVSLAM for navigation and mapping
- TFLite runs EfficientDet-D0 for weed detection
- Colab notebooks for model training and camera calibration
- gRPC for communicating with the robot
- The on-board processes are implemented in Rust
- The visualization is built with Godot (with Rust bindings)
Navigation and MappingTo understand its environment, the robot only uses a RPi V2 camera module with a wide-angle lens. OpenVSLAM is one of the most popular visual SLAM solutions that implements monocular SLAM. It processes 640x480 images at 4fps while using less than half of the CPU on the RPi4. It provides not only the position of the robot, but also a sparse point cloud that we can reuse to localize weed detections in the 3D space.
Weed DetectionIt's important to find and register the exact 3D location of each weed on the map. Luckily, TFLite made it very easy to run DNN models on a RPi.
The main steps are:
- Feed the same images used by the SLAM module to a TFLite object detector.
- Connect the resulting 2D detection rectangles to the points on the 3D point cloud map (which is built by the SLAM process).
- Cluster the labeled points to find the center of the individual weeds.
VisualizationThe visualization tool is buildt with the Godot game engine and runs on each major OS. It uses gRPC to communicate with the robot. It implements all the necessary tools to operate the robot: 3D map visualization, camera image preview, save/load maps, save images, design waypoint mission, etc.
- Print the parts: BaseChassis.stl, Wheel.stl (2 + 2 mirrored), CameraArch, CameraHat.
- Place the gear motors in the chassis and secure them with the M1.6 screws.
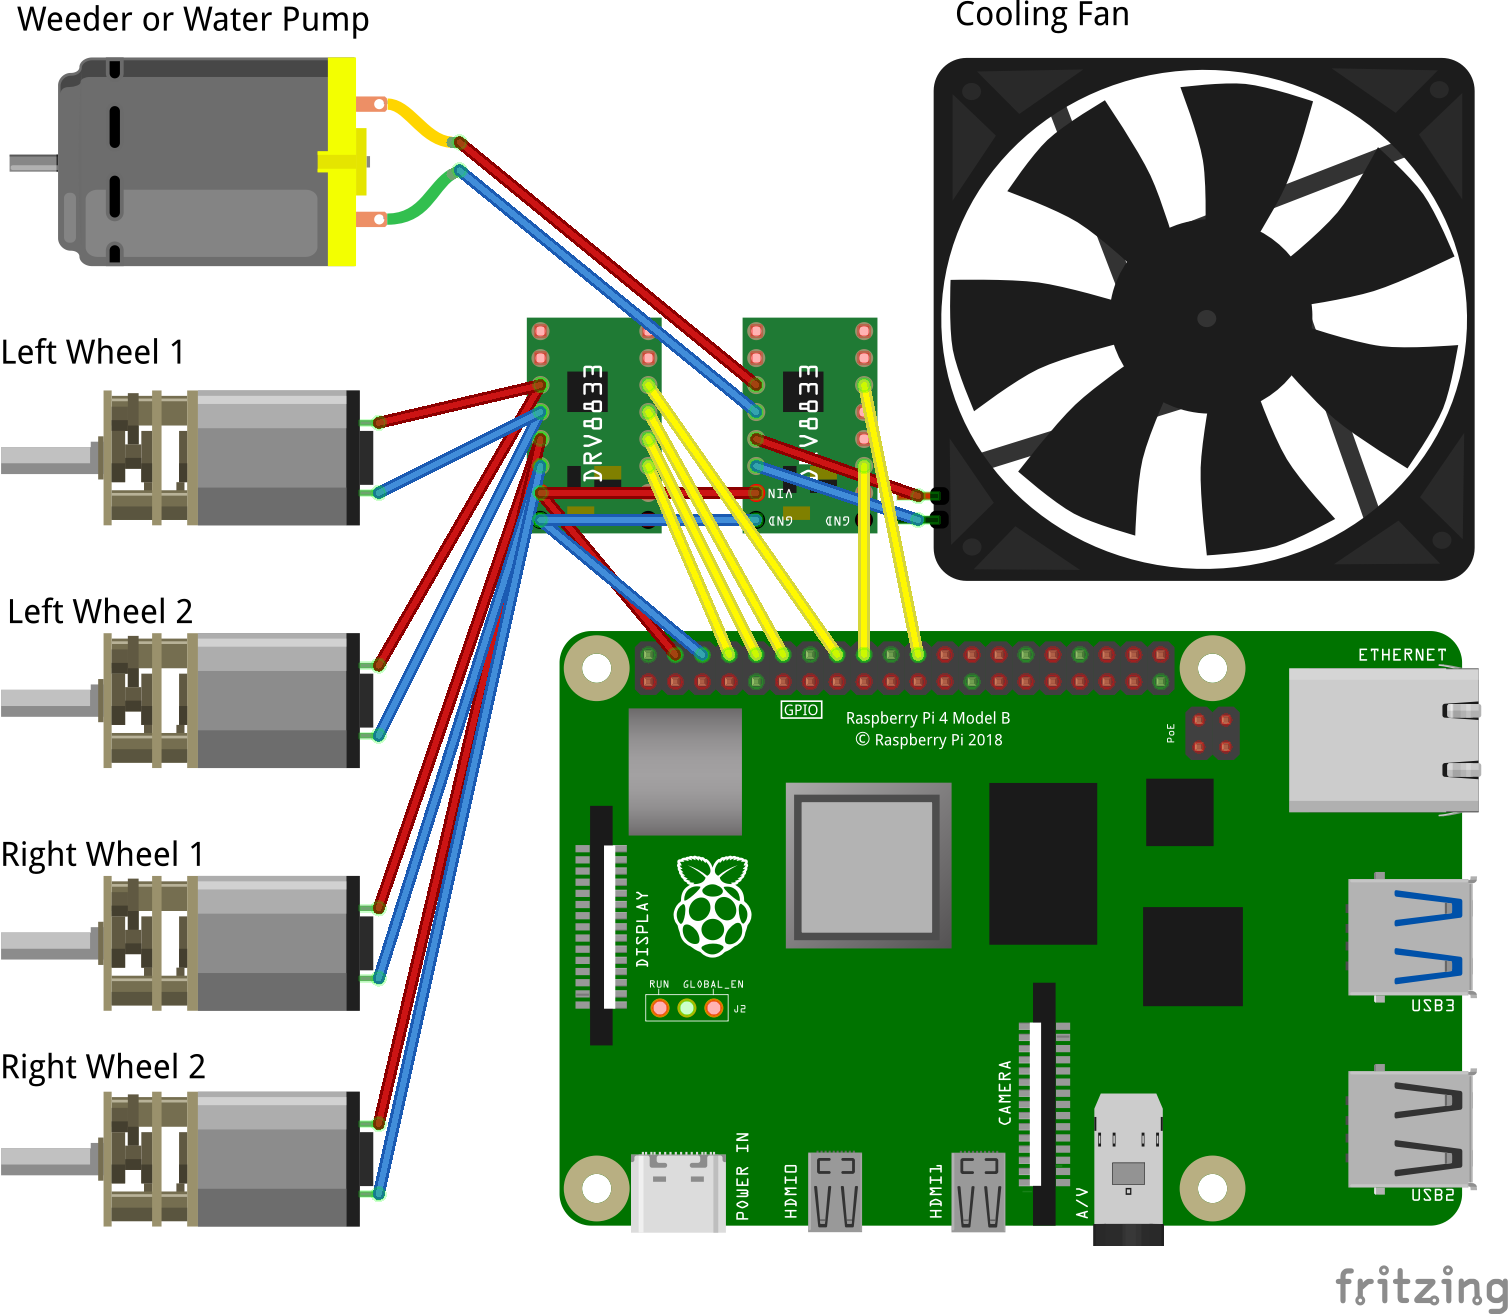
- Implement the wiring based on the circuit diagram. (If you prefer less soldering, the bottom of the chassis has enough space to add an SYB-170 mini breadboard)
- Attach the wheels with M3 screws.
- Assemble the Raspberry Pi with the camera and the UPS module. The camera cable should come out on the SD card side of the RPi.
- Put the cooling fan and the RPi in place.
- Screw the camera mount on the chassis and push the camera in place.
Assembly - Spray Tank Module- Print the parts: WaterTank.stl, WaterTankLid.stl, SprayNozzle.stl.
- Cut a 6cm piece from the water pump tube.
- Attach one end to the motor and the other to the spray nozzle.
- Place the motor in the water tank and push the nozzle in the front side hole.
- Screw (M3) the lid on the tank.
- Slide the module in the front mounting slot of the robot.
- Print the parts: Weeder.stl, WeederEnd.stl, WeederEnd.stl.
- Push the motor in the weeder part.
- Tie a knot on the nylon string. Push it in the largest hole of the end part. Then pull it in with pliers until it's securely stuck.
- Slide the motor shaft in the end part and secure it with a screw (M3).
- Slide the module in the front mounting slot of the robot.
- Slide the protecting cap on the motor.
- Create an Ubuntu 21.04 Server 64bit SD card with Raspberry Pi Imager. +info
- Start the RPi and connect via SSH. +info
- Clone the source code:
git clone https://github.com/azazdeaz/good-bug.git- Run the installation script. It takes about five hours to build everything:
cd good-bug
./scripts/rpi-setup.sh
- Start the on-board process:
make run-robot-releaseNext time, you only have to run the last command to start the robot.
Visualization Setup- Install Rust on your computer. +info
- Clone the source code
git clone https://github.com/azazdeaz/good-bug.git- Start the visualization. The first start will take longer:
cd good-bug
make run-mirrors-release- On your PC, find the IP address to the RPi. +info
- Enter the gRPC server address ("http://<RPI_IP>:50051") in the top of the visualization window and click "reconnect".
- If everything goes well, the camera image appears and the robot is controllable with a game pad or the keyboard arrows.
This part assumes that you have some basic experience with using neural networks.
Steps:
- In the visualization app, turn the "show raw image" switch on.
- Save training images by clicking on the "save image" button (or press A on a gamepad).
- Label the images for object detection. There are multiple tools for this. CVAT works well, but you can use anything you like. It just needs to be able to label detection boxes and export the dataset in TFRecord format.
- Open this colab notebook and follow the steps to create your custom TFLite object detector.
You can also use the default weed detector. It is trained on these plastic plants from Ikea. It comes as a sheet that you can cut up to have many small plants all year round.
Camera CalibrationTo make sure the robot can build a high precision map, the camera has to be calibrated.
Steps:
- Print out a checkerboard pattern. You can find one here.
- Create pictures of the pattern with the robot. (See the first steps of the model training section)
- Follow the steps in this colab notebook to calculate the calibration parameters.
Guided Mapping- Select "Teleoperation" from the "Navigation Mode" dropdown.
- Drive the robot through the desired area. You can do multiple passes to make the map more precise.
- To save the current map, set the map name and click "save map".
- To reload a map, select it from the "Map" dropdown and click "Restart SLAM The last selected map will be the default when the robot starts.
Autonomous Patrolling- Select "Waypoint Mission" from the "Navigation Mode" dropdown.
- Add waypoints by double-clicking on the map.
- Turn the "Enable auto navigation" switch on, and the robot will start following the selected path.
- Optionally, click "save map" to save the new waypoints with the map data.
- Select the weeder type the robot is equipped with from the dropdown (spray, of weed whacker) and turn the "Enable auto weeding" switch on.
- At this point, the robot should patrol the selected path and spay/cut any detected weed on the way.
The experiment has shown that a Raspberry Pi 4 is more than capable to run the necessary visual SLAM and object detection algorithms in real time.
The small physical design allows the robot to detect weed under the canopy, which would be invisible with downward looking cameras on a larger robot. Despite the small wheels, it can navigate reliably on uneven, dry soil. Unfortunately, on wet soil, the can stuck. This problem could be mitigated with different wheel designs, but I'm not confident that it can be completely eliminated.
Future Work- Implement a simulation environment to make testing and the development of new features easier.
- Implement detailed 3D reconstruction, and image segmentation algorithms for phenotyping, and plant health analysis. The RPi doesn't have enough computing power to run these
- Make the design weatherproof. The current test model can only work when it is not raining.
- Add solar panel for charging.


Comments
Please log in or sign up to comment.