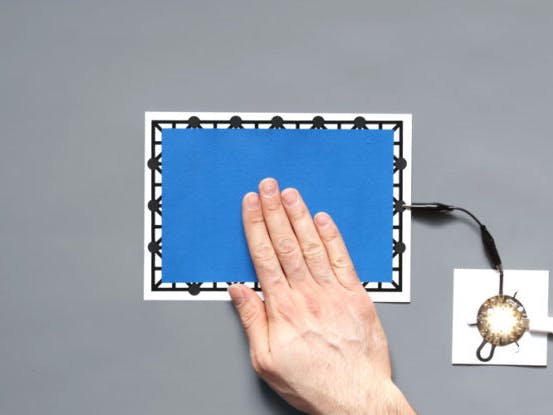
If you need to quickly create a touch or proximity sensor in a colour other than black, then this is the right tutorial for you! In this tutorial we are going to show you how to cover Printed Sensors with a different colour. The benefit of using Printed Sensors is that they are already sealed. Therefore, you are saving time by not needing to seal the sensors before painting.
Step 1: Cover the nodes
First, cover the Printed Sensor access nodes with masking tape, as they aren’t sealed. Unlike the How to cover Electric Paint in a different colour tutorial, we don’t need to seal the rest of the Printed Sensor with a varnish spray first, as it is already sealed. The masking tape is to ensure that the nodes don’t get smudged or covered in the next step.
Links
Step 2: Stencil different colour
With the masking tape securely attached, you can now paint the new colour over the Printed Sensor. We recommend using acrylic paint, as it doesn’t break the seal of the Printed Sensor. If you can still see the Printed Sensor lines through your colour, leave the paint to dry and apply another layer. When the paint has dried, carefully remove the masking tape.
Links
Step 3:
Now, when you now connect one of the nodes to either the Touch Board, Pi Cap or Light Up Board, you can touch the coloured Printed Sensor to trigger the sensor.
Note, the sensitivity of the board’s sensors will affect the performance, so make sure to adjust the sensors for the Touch Board here and for the Pi Cap here.
For a more integrated and finished look, you can also combine the coloured Printed Sensor with stencils, which we highlight in this tutorial here.
Links
Step 4: Coloured custom sensor
You can also apply these methods to custom sensors that you cut out of the Printed Sensor. Again, make sure to cover the nodes with masking tape before you apply the paint.


Comments
Please log in or sign up to comment.