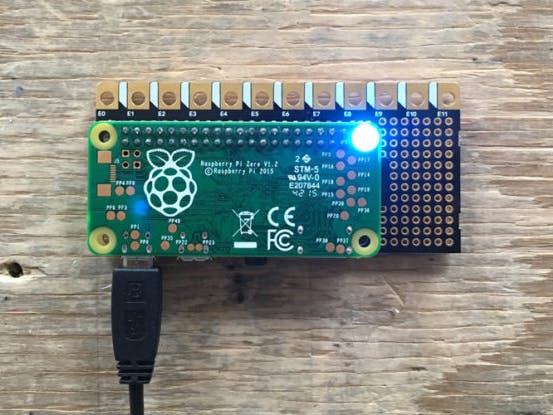
When we designed the Pi Cap we wanted to keep some of the features of the Touch Board. One of those features is that the Touch Board is completely flat on one side; all of its components are surface mounted the other side. This allows the Touch Board to be easily placed on flat surfaces, like walls or paper.
During the design process, we wanted to ensure that the Pi Cap would work with both the Pi Zero and the Raspberry Pi. This compatibility was important so that Pi users could use the Pi Cap no matter what version they had. In order to achieve this however, we faced some design constraints in optimising the Pi Cap to the two different layouts Pi shapes.
The Pi Zero is much smaller than the Raspberry Pi and doesn’t have any protruding components on its edges so the mount on this is easy. When used with the Raspberry Pi, the shape is more complex so some of the Pi Cap features are obscured. We’ll discuss these, the audio output and LED, below:
Step 1: How to use the audio output
When you use the Pi Cap with the Pi Zero, there is only one audio output available. But when you use the Pi Cap with a Raspberry Pi you have the choice between two audio outputs: one on the Pi Cap and one with the Pi itself. By default, the audio is mapped to the Pi’s audio output, so after you have set up the Raspberry Pi for the Pi Cap you should use the Pi’s output.
You can change the settings and map the audio output to the Pi Cap. Simply run “sudo map-audio-to-picap” to change the settings. You might experience some difficulties in removing the phone connector. To do so, tilt the Pi Cap a bit backwards, as shown as step 1 on the third image on the right, and then pull out the phone connector, as in step 2. To remap the audio back to the Raspberry Pi, run “sudo unmap-audio-from-picap”.
Links
Step 2: How to use the LED
We have included a LED on the Pi Cap to allow you to quickly display a code status, you can use it for debugging or anything else that you can do with a LED. When you use it on the Pi Zero, the LED is neatly located underneath to shine through one of the trough holes of the Pi Zero.
When used on the Raspberry Pi, the LED is not perfectly visible, but it is strong enough to view its glow from underneath the Pi Cap.


Comments
Please log in or sign up to comment.