We often face the problem of water getting spilled out from our overhead water tanks. So, let us make a solution to monitor water level of our tank. It is a very simple DIY project which can make our life simple. It is as simple drinking a glass of water. Take out your mobile phone,open the app and see the depth of water.
There are many online blogs, forums and Instructables out there on how to communicate with ESP12 and Blynk. But everything is scattered here and there. So I want to share my experience and problems faced. I am sure I will show you a perfect way probably the best solution available online.
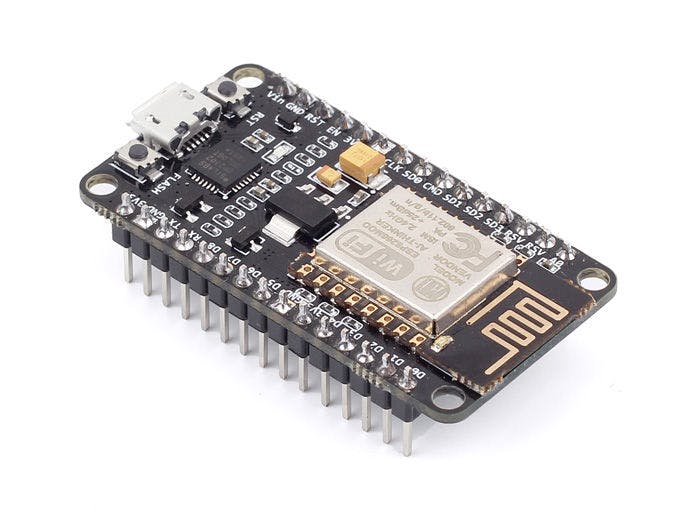
Step 1: Componenets Required- ESP12 (WiFi Module). Buy on Amazon here.
- ESP break out board (Optional) .
- HC SR04 (Ultra Sonic Sensor). Buy on ebay here.
- CP2102 (USB to UART converter). Buy on ebay here.
- LM1117 (3.3v Regulator)
You just need Arduino IDE to do all the stuff.
- Download and install the Arduino IDE from here.
- Start Arduino and go to File -> Preferences.
- Enter "http://arduino.esp8266.com/stable/package_esp8266com_index.json" into Additional Board Manager URLs field. You can add multiple URLs, separating them with commas.
- Open Tools -> Board -> Boards Manager and install "esp8266 by ESP8266 community" platform.
- Select your board as "NodeMCU 1.0(ESP-12E)" from Tools-> Board.
First we need to make connections between ESP12 and CP2102. Give LM1117 an input power of 5V.
- VCC ----> 3.3V Power supply (Vout of LM1117)
- GND ----> Ground of power supply
- CH_PD(or EN) ----> HIGH (3.3V)
- GPIO15 ----> LOW (GND)
There are two different modes of operation for ESP12.
- AT commands mode GPIO0 ----> HIGH (3.3V)
- Flashing the firmware or uploading the code GPIO0 ----> LOW (GND)
Insert CP2102 to USB of computer.The CP2102 is a USB to serial converter that lets us communicate with the ESP-12 over UART. The CP2102 will be detected as a serial device,if you have used a serial device before, you ideally should not need the drivers. In case you need the drivers, you can find the Drivers here. Mostly you will not need them anyways.
Now let us see the connection between CP2102 and ESP12.
- Rx Tx
- Tx Rx
- GND GND
Do not take power from CP2102, neither 5V pin nor 3.3V pin. This power is insufficient and will not work although the voltage given by that is 5V and 3.3 V. Trust me, I read many blogs and forums for this. I struggled with it for almost a week. So, use an external constant power source.
Step 5: Pin Configuration and Blynk App ConfigurationESP12 to HCSR04 :
- VCC ------> VCC
- GND ------> GND
- GPIO4 ----> Echo
- GPIO5 -----> Trig
Blynk App Configuration:
- Open Blynk App and Create New Project
- Give a project title and select Hardware Model as "NodeMCU"
- You will be given AUTH TOKEN which you can change by using "Refresh" or you can mail it.
- Create the Project.
- You can see a "+" on the Top. There you can add Controller, Displays and other Widgets.
Depending on your OS, you can download and install a Serial Terminal to communicate with the ESP-12.
If you have Arduino IDE installed, you can just use the Serial Monitor present inside. For that, you have to navigate to Tools > Ports, select the Port that the CP2102 was detected on, and then open the Serial Monitor.
Step 7: Adding Widgets to Project- Add two "Value Display S" Display Widgets.
- Tap on the Display Widgets to Name them and assign Virtual Pins as per your code. (V8 for Depth and V9 for Percentage in my code).
- Add three "LED" Widgets.
- Tap on LED Widget to name it and assign Virtual Pins for it (V6 and V7 in my Code). You can change the colour of the LED as well.
- Add "Push" Notification Widget to constantly monitor the water level.
- After uploading the code to ESP12 or NodeMCU tap "Run" (Play button) on the top.
That's it! Now you can constantly monitor the water level sitting anywhere in the world.


_ztBMuBhMHo.jpg?auto=compress%2Cformat&w=48&h=48&fit=fill&bg=ffffff)


Comments
Please log in or sign up to comment.