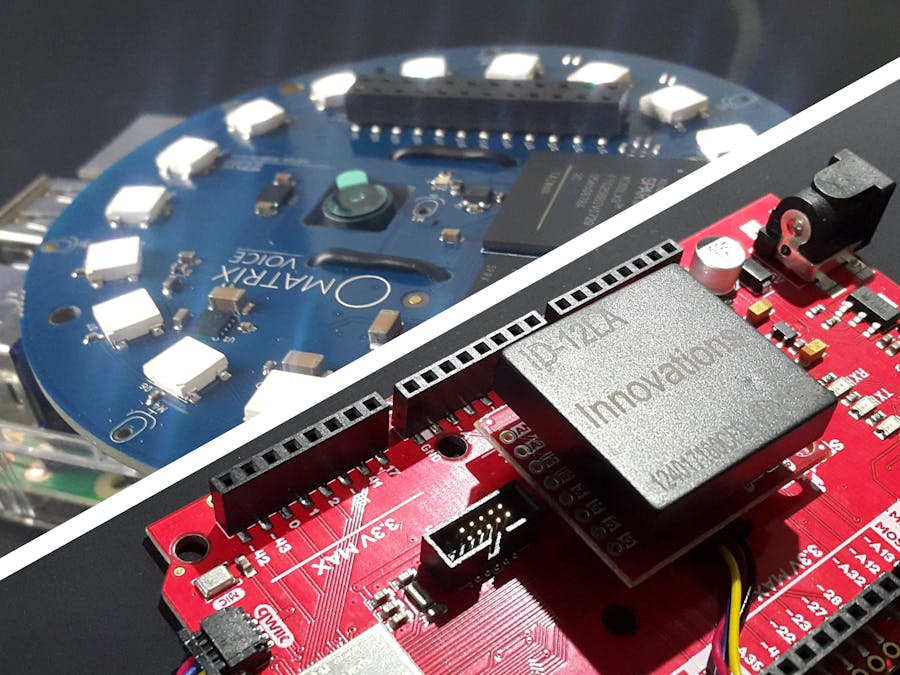
In this project I will show a proof of concept of a Voice Controlled Smart Door Bell device:
The Voice Controlled Smart Door Bell can replace a traditional / electronic Door Bell, with a one with AI powered voice control.
The device will me mounted at the main / front door of a home, and can be used both by the owner and guests.
The owner can use the device as an access control system:
- the door can be unlocked / opened with a voice based password
- the voice password can be changed with a voice command
When used by guests, the device will act as a voice controlled door bell:
- a voice command ("Ring the bell!") activates the device
- if the owner is not at home, the guest will get feedback
- if the owner is at home, a ringing sound inside the house will be played
- the owner gets a video preview from the door bell's camera
- the guest will be able to talk with the owner (work in progress)
- the guest could leave message if the owner is not at home (work in progress)
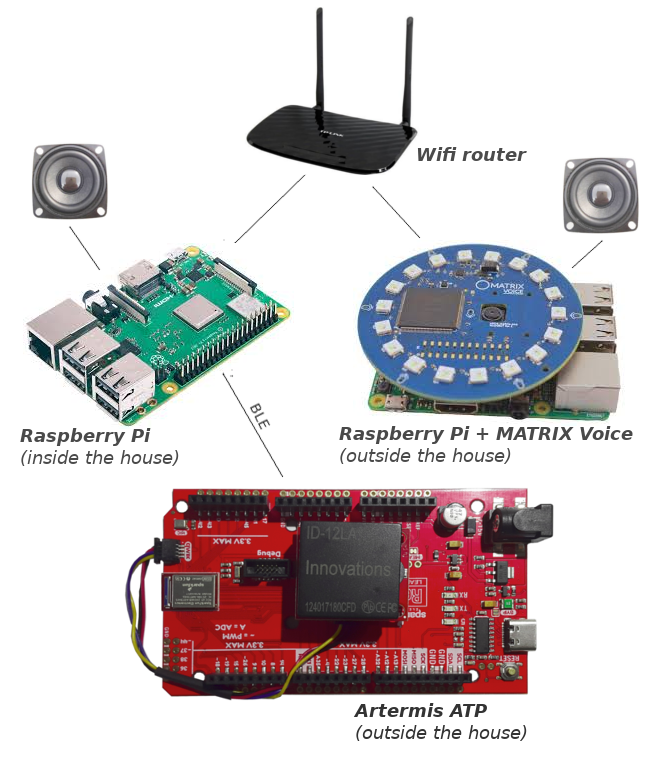
The following diagram illustrates the functioning of the device:
The device uses a Raspberry Pi 3B+ as a base. To this a MATRIX Voice, Rpi Cam V2 is and the speaker is connected.
A SparkFun RedBoard Artemis ATP board, along with a SparkFun RFID Qwiic Reader board and a RFID Reader ID-12LA module is used build an BLE Connected RFID Card Based Access Control module:
The Artermis ATP board also a has a MEMS microphone, which can be used in the future to build voice based features.
In the following sections, I will should how to build / set up these devices.
Getting StartedThe first thing we need is a Raspberry Pi with Raspbian installed. This can be done by following the official guide from raspberrypi.org:
Next, we can connect the MATRIX Voice, and set it up in two steps:
- set up the MATRIX Voice
- set up the Snips Platform
The commands to run are:
- add the MATRIX repository and keys, update package list and install updates
$ curl https://apt.matrix.one/doc/apt-key.gpg | sudo apt-key add -
$ echo "deb https://apt.matrix.one/raspbian $(lsb_release -sc) main" | sudo tee /etc/apt/sources.list.d/matrixlabs.list

$ sudo apt-get update
$ sudo apt-get upgrade- install the MATRIX creator init package
$ sudo apt install matrixio-creator-init- reboot
$sudo rebootNow, after the Raspberry Pi reboots the LED-s on the MATRIX voice should turn off.
The next step is to install the MATRIX Creator HAL by doing the following steps:
- install dependencies
sudo apt-get install git cmake g++ libfftw3-dev wiringpi libgflags-dev- clone the Git repository
git clone https://github.com/matrix-io/matrix-creator-hal.git- build the project
cd matrix-creator-hal/
mkdir build
cd build/
cmake ..
make -j4
The build takes about a minute. After it's done, in the demos folder we should have some demos that we can run:
./arc_demo- outputs a pulsing pattern on the LED ring./mic_energy- changes the intensity of the LED-s based on the sound level - works best with some music
The setup Snips to run on the MATRIX Voice, we can follow the guide from the official Snips documentation.
First we need to install the MatrixIO kernel modules:
$ sudo apt install matrixio-kernel-modules

$ reboot
Then, on a host PC we need to setup SAM (Snip's command line interface):
$ sudo npm install -g snips-samand run the following commands:
$ sam connect raspberrypi.local
$ sam init
This will install Snips on the Raspberry Pi, but to get it working we still need to change some configs:
- in the
/etc/snips.tomlfile,[snips-audio-server]section:
mike = "MATRIXIO-SOUND: - (hw:2,0)"- in the
/etc/asound.conffile,pcm.speakersection addrate 16000
pcm.speaker {
  type plug
  slave {
    pcm "hw:0,0"
    rate 16000
  }
}
(the credit for this goes to Rishabh Verma)
After this we can test the speaker and the microphone using the following commands:
$ sam test speaker

$ sam test microphone
If this worked, we can try to run the Weather demo:
### Install & launch the demo
$ sam install demo

### See the logs
$ sam install watch
Having this, if we say "Hey Snips!" we should hear sound confirming Snips is listening.
Now if ask Snips "Hey Snips, what will the weather be like in Paris in two days?", it should respond with something like "You asked for the weather in Paris in two days."
Now as we have the Snips up and running on the Raspberry Pi, we can start making a Snips App.
Creating a Snips AppThe first step is to create a Snips Assistant:
- enter console.snips.ai
- click on the + Create Assistant button
- give a name to the assistant
Snips assistants can have one or more active apps installed. This can be either installed from the official app store, or be custom apps made by us.
We want to create a new app:
- click on the + Create a New App button
- add a name and a description
Next we need to edit the Application:
add some Intents.
We will have 4 intents, each with a set examples phrases:
- Open the Door
- Set Password
- Tell Password
- Ring the Bell
Note that the Tell / Set Password intents have a password slot. The type of the slot is snips/city. This means the access password will be a city: Berlin, Tokyo, etc.
Next we need some actions linked to our intents. Using action we can define custom behaviour for each intent.
The interactions we want to achieve are show in the following diagram:
All the Actions will be of type Code Snippets:
and will run Python 3 code, and will interact with the Snips / Hermes server running on the Raspberry Pi. From these actions we can control the flow (continue with a given intent, finish) of the current Snips session.
The actions associated with our intents are:
- Open the Door - asks snips to continue the session with the "Tell me the password" phrase, and the expected
TellPasswordintent. If the password matched the door is opened. - Tell Password - checks if the value of the password slot matches the password stored in the config file, then gives the control back to the calling intent. This intent is called / used by the Open the Door and Set Password intents.
- Set Password - first asks for the current password, then stores the new password in the config file
- Ring the Bell - checks if the owner is at home. If it is home plays a bell ringing song in the house and starts video streaming
To deploy the assistant we need to do two sam actions:
- login to the Snips platform
$ sam login- deploy the Assistant
$ sam install assistant -i proj_M1KOD3nyDobNow we should be able to interact with the assistant...
Note: as this project is still a proof of concept, in this stage some parts of the system are just mocks:
- is owner at home? - is a
yes/novalue stored in thesmart-door-bell-is-owner-at-home.txtfile - door state - is a
locked/unlockedvalue stored in thesmart-door-bell-door-state.txtfile - ringing the bell - to ring the bell a MQTT message is sent on the
smart-door-bell/actions. This need to be intercepted by a device at home to play the ringing bell note. I used my laptop for this purpose and I run the following command
$ stdbuf -i0 -o0 -e0 mosquitto_sub -d -h pi-casso.local -t "smart-door-bell/actions" | stdbuf -i0 -o0 -e0 grep ring_bell | stdbuf -i0 -o0 -e0 xargs -n1 -I% play ~/Downloads/Doorbell-SoundBible.com-516741062.wavAlong sound we may also want to have live image streaming functionality in our our door bell.
We can use a RPi Cam module for this purpose. The MATRIX Voice / Creator both have square hole that fits a RPi Cam. I used twist ties to mount the camera:
We can do this using Motion. To set it up on the Raspberry Pi, I followed this tutorial. The step to do are:
- using
raspi-configenable camera support. This can be done from the camera -> Enable support for Raspberry Pi camera section
$ sudo raspi-config- install Motion and enable the bcm2835-v4l2 kernel module
$ sudo apt-get install motion

$ sudo modprobe bcm2835-v4l2
$ sudo nano /etc/modules
# at the end of the file, add this line :
bcm2835-v4l2- set up Motion to run in daemon mode
sudo nano /etc/default/motion
# in this file, search for start_motion_daemon and activate it
# start_motion_daemon=yes- configure Motion (resolution, network, etc.)
$ sudo name /etc/motion/motion.conf

# change / set the following properties
daemon on
width 648
height 480
ffmpeg_output_movies off
stream_port 8082
stream_localhost off
webcontrol_port 8081
webcontrol_localhost off
Next we can start the Motion service with:
$ sudo service motion startAfter this, the web control interface with live video preview should be available at http://your-pi.local:8081/:
On the hardware side we use the following components:
On the software side we need the Arduino IDE with the SparkFun Apollo3 board package and the SparkFun Qwiic RFID library.
I started creating the project with the BLE LED example, and then added the RDIF functionality.
The final code works as follows:
- the BLE advertising is set up with some basic services
- continuously scan for RFID tags
- if an RFID tag is found, publish the tag id in the BLE advertising data
- after the 5 seconds the BLE advertising data is reset to the initial value, and we set again when a new tag is found
Having this, we can move on for further processing of the BLE data.
First I checked that the BLE works as expected:
The from a Raspberry Pi we can relatively easily extract process the advertised information. For example, we can use tools like bluetoothctl and hcitool for this:
The extracted Tag ID information then can used to allow or not access to the building.
DemoHere is a demo video showing off the functionality of the device:
Future EnhancementsThe next step, I think, would be to extend the system with a more owner oriented user interface. This could be either:
- a Snips based solution, running on a 2nd Raspberry Pi and MATRIX Voice inside the house
- or a mobile app based solution running the owners phone
Along these, other useful features would be a 3D printed enclosure and a built in speaker.
Enjoy! :)


Comments