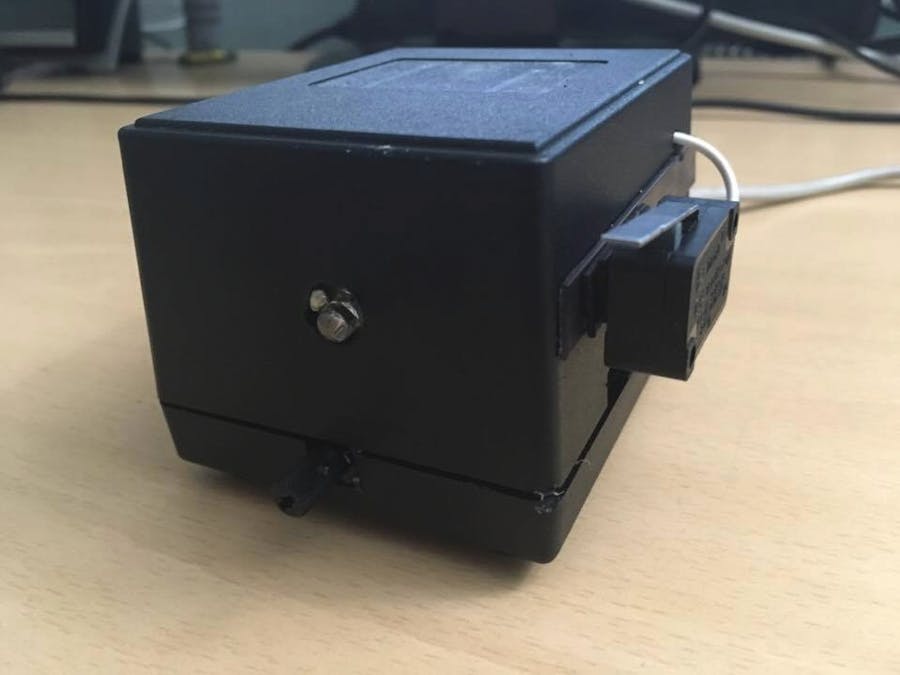
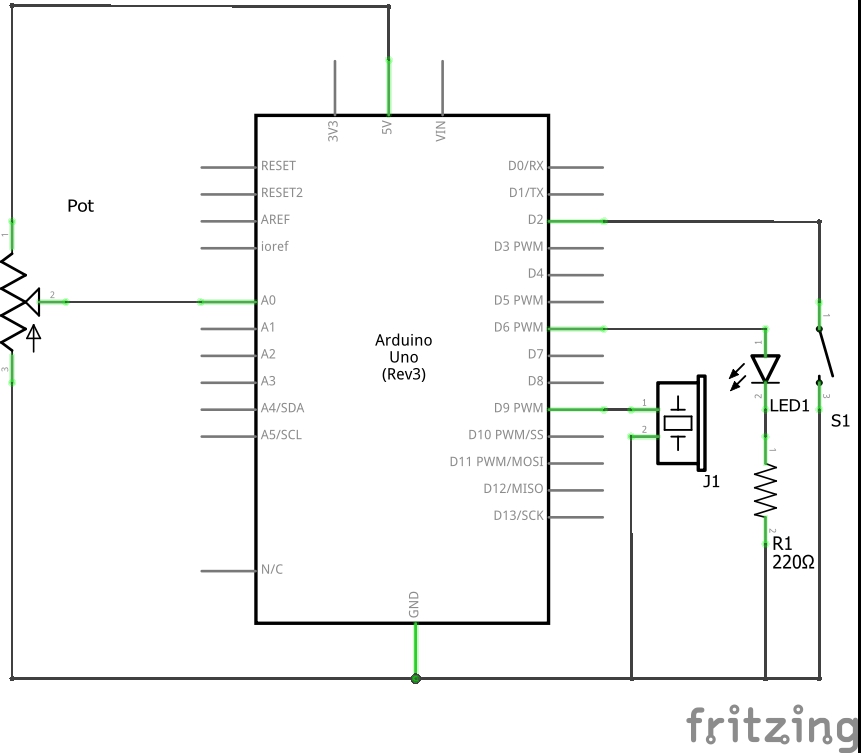
Morse code machine, based on Vlada Krsmanovic's project. This version has added potentiometer for long click delay adjustment, pwm on LED for dimming effect, changed to micro limit switch instead of a normal button for added authenticity, putted everything inside of plastic case and made a Windows program that makes it easier to use this device.
Arduino codeI'm only going to explain the changes I made to the code, if you want explanation on how typing works look at the original project.
In setup():
pinMode(buttonPin, INPUT_PULLUP);
Switch now uses internal resistor as opposed to external one in the original project:
digitalWrite(ledPin, HIGH);
tone(buzzer, 1500);
delay(200);
digitalWrite(ledPin, LOW);
noTone(buzzer);
Because of the way the Arduino is encased when you plug it in you cannot see the PCB lights and thus don't know if it's really on. This is a quick "boot completed" feedback.
In loop():
pause_value = map(analogRead(pot), 0, 1023, 70, 300);
Potentiometer is on A0 and map function is used to calculate the delay time for the long clicks.
buttonState = !digitalRead(buttonPin);
Important to invert the reading because of INPUT_PULLUP.
if(Serial.available() > 0) longclick = (Serial.read() == 't') ? true : false;
Read the serial input and change the longclick bool.
if (signal_length<2*pause_value){
   tone(buzzer, 1500);
   digitalWrite(ledPin, HIGH);
   }
   else if(longclick){
     tone(buzzer, 1000);
     analogWrite(ledPin, 50);
     }
 }
Note since the tone function is used, most of the pwm pins are not going to work. In this case, the buzzer is on pin 9 and pwm only worked on pin 6.
Windows programRelatively simple program made in visual basic, using visual studio. On the control panel on the top you can connect/disconnect from a COM port, change the font size and set program language (error messages are always in English). On the left of the program you have instructions for the device, after that appears what you wrote, on the right you have the Morse code with keyboard instructions. Available in Serbian and English.
CaseI didn't document anything as I was making this, but there isn't much to it. It's not 3D printed, I used a case from a dysfunctional PSU I had. I drilled the holes for the USB, potentiometer, LED, wires for the switch and added sticky magnetic tape I had laying around to hold the switch.
Final wordAll in all, it's a really fun project and a thing to play with, proved very attractive at faires, and can even be used as an educational tool for learning morse code more easily.


_ztBMuBhMHo.jpg?auto=compress%2Cformat&w=48&h=48&fit=fill&bg=ffffff)


Comments
Please log in or sign up to comment.