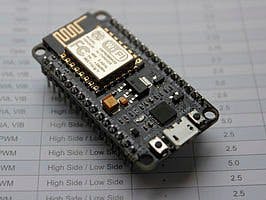
This will be a simpified tutorial on how to use websockets with nodemcu. We will cover 3 things here: backend (Arduino code), frontend and at the end I will show you how to secure the sockets by checking cookies, that material builds up on my previous tutorial.
(Basic knowledge of NodeMcu and Arduino is required)
BackendFirst of all, download the library.
Before setup, we need this:
WebSocketsServer webSocket = WebSocketsServer(81); //ws will run on port 81
And then in setup:
webSocket.begin();
webSocket.onEvent(webSocketEvent);
In loop:
webSocket.loop();
Now we initialised websockets on backend, after that we create a function that will be called on web socket event, and it will be called webSocketEvent():
void webSocketEvent(uint8_t num, WStype_t type, uint8_t * payload, size_t length){
  if (type == WStype_TEXT){
   for(int i = 0; i < length; i++) Serial.print((char) payload[i]);
   Serial.println();
  }
}
Notice we have type comparing ( if (type == WStype_TEXT) ). There are more available types but we are more interested in this one. This one is used if we receive text from a client trough websockets. That text is stored in array payload, and it length is stored in length variable. Having that in mind we print our incoming data to the serial monitor.
if (Serial.available() > 0){
     char c[] = {(char)Serial.read()};
     webSocket.broadcastTXT(c, sizeof(c));
   }
Now if we have something in our serial buffer we will send it to the client. We must create an array for sending because it needs to know the size of the data it's sending. When we want to send text, we just use webSocket.broadcastTXT(chararray, sizeof(chararray));
Frontend(I will explain only elevant parts here, full code with be posted below)
HTML
<body onload="javascript:start();">
When the html page is loaded, this function will be called, we use it to initialise websockets on our client
<input class="txd" type="text" id="txbuff" onkeydown="if(event.keyCode == 13) enterpressed();">
This is our texbox that will have the string we want to send to our server. One wery important this is it's id (txbuff) because we will use it later. onkeydown checks if you pressed enter and calls enterpresed function if so.
<input class="txd" type="button" onclick="enterpressed();" value="Send" >
This is just our button that will do the same thing as pressing enter in txbuff
<textarea id="rxConsole" readonly></textarea>
Textarea is same thing as a richtextbox, this will be our console that has everything we received from server. It's id is rxConsole
JavaScript
var Socket;
How awesome would it be if we could also var everything in Arduino.
function start() {
This is the function that is called when html page is loaded
Socket = new WebSocket('ws://' + window.location.hostname + ':81/');
With some magic, our Socket var is now a WebSocket handler that is connected to our server with the things you see added before and after window.location.hostname (witch is the ip adress of the server).
Socket.onmessage = function(evt) {
This function will be called when we get message from out server
document.getElementById("rxConsole").value += evt.data;
  }
}
We add the received text to our textarea by calling it's id. If you look on the command above this one you will se that evt var was passed when this function is called, we acces it's data by adding evt.data to it.
function enterpressed() {
This function is called from our inputs (button or enter press in textbox)
Socket.send(document.getElementById("txbuff").value);
Send the data from txbuff input to server, to use this function just input the string you want to send.
document.getElementById("txbuff").value = "";
}
This just clears the texbox after data is sent
( Im not going to explain the CSS)
SecurityThis is a more advanced part and will not be covered within this code.
The basic principle is the same as in my last tutorial, you take the cookie header and check it with sesioncookie string.
const char * headerkeys1[] = { "Cookie" };
 size_t headerKeyCount = sizeof(headerkeys1) / sizeof(char*);
 webSocket.onValidateHttpHeader(validateHttpHeader, headerkeys1, headerKeyCount);
 webSocket.onEvent(webSocketEvent);
 webSocket.begin();
Now we store the header in the seperate variable from the our login-check one, but the principle is the same. now we have.onValidateHttpHeader that will call a function that will validate the http header (validateHttpHeader) the second one is the header and the third thing is the header size.
bool validateHttpHeader(String headerName, String headerValue) {
 bool valid = true;
 if(headerName.equalsIgnoreCase("Cookie")) {
   valid = isCookieValid(headerValue);
 }
 return valid;
}
Not much to explain here, if the cookie is valid it will return true ( though it doesn't make sense why is it true by default, I didn't write that function myself)
bool isCookieValid(String rawCookieHeaderValue) {
   return rawCookieHeaderValue == ("c=" + sessioncookie);
}
This part compares the cookie to the c variable that has value from sessioncookie string (part of my previous tutorial)
Testing and conclusionFor the test, here's the screenshot
That is basically it, the point of this tutorial is when I needed to use websockets like this I barely understood what I needed to do, the big part of my problem was that I had zero previous experience with html/javascript/css. So I hope this will be enough to explain someone who was in my (or similar) situation.


Comments
Please log in or sign up to comment.