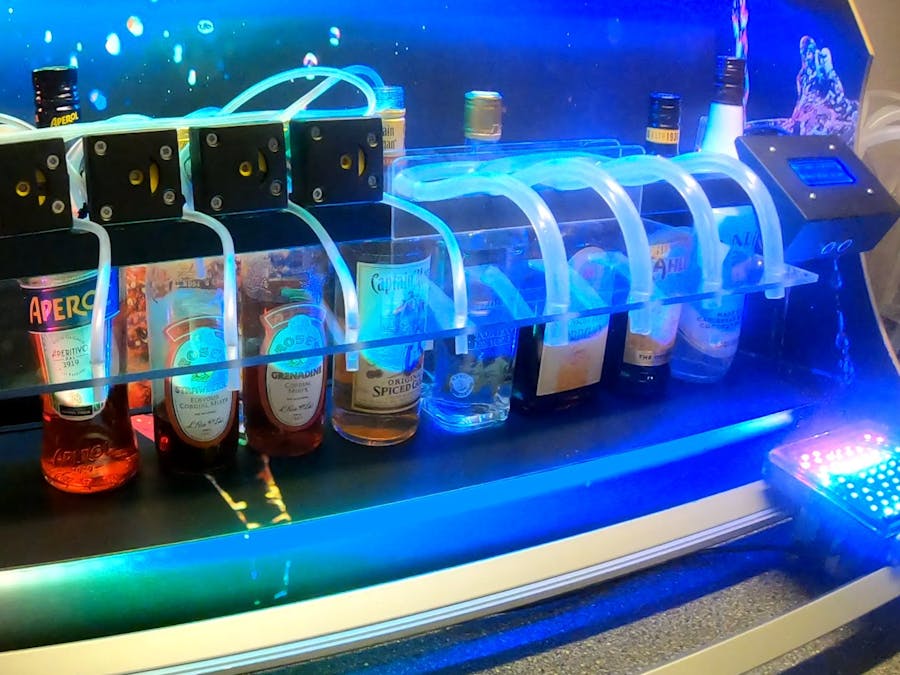
See the video below to see how the project was built. You can follow the tutorial and build it yourself, but I recommend that you check out this tutorial afterwards, so you can look back at it and see how it was done!
Step 1: Building the frameThe frame is basically built by eye, and can be sawed out by a jigsaw in some plywood, or you can use a cnc cutter like we did. the measurements aren't that important, as long as they match what you want to have in your final product.
Take some time and try and visualize how many bottles you want. We went with 10 liquor bottles and 4 mixers, but any mix will do. Try and draw some different measurements on paper, and build your own design!
In the frame-building part, you also have to cut out some metal bars that will act as stabilization in the frame, and as holders for the pumps. The rails will also need to be cut out. This is where the v-groove wheels will come into play, as the rails are basically just 2 metal bars twisted a bit so the wheels can drive on them.
After the whole frame is assembled, as you can see how in the video, you will need to mount an endswitch in the middle of the 2 rails. This will acts as a stopper for the sleigh later on.
The sleigh is basically just a wooden plate with a stepper motor underneath it and a screw which can trigger the end switch when it comes too close. See in the video on how it is put together.
We started making this by cutting out a piece of wood, which will vary in size compared to your whole setup:
And then we mounted the wheels by drilling some holes into the sides, and screwing the wheels in via some cut threads:
Now to make the part that holds the belt for the stepper motor, take a long piece of metal like shown underneath here, and cut it to size, and then mount the belt onto it with double-sided tape. Then mount this to one of the rails also with double-sided tape:
Now mount your stepper motor of choice onto the baseplate like shown here. Also try to manage your wires like I did, as they will have to travel some distance when moving back and forth. Also remember to align a screw in the plate with the endswitch that I mentioned earlier:
Now you can mount the sleigh to the rails by screwing 2 of the wheels of, and then putting the sleigh on the rails with the stepper motor underneath the belt. You can tighten the screws by screwing the wheels a bit further up or down.
Part 3: Moving the sleighNow it's time to code! Take the example in the code section of this tutorial and try to make the sleigh move! All the schematics can be seen in the video, but most of the schematics are just basic wiring to the Arduino digital ports. These are written in the code, and also explanations is available in the code.
Just wire up the stepper motor to the stepper motor controlboards, and wire the step+dir pin to the Arduino. Also wire the PSU to the controlboard so everything gets power. The example code moves the sleigh back and forth a bit.
Part 4: The pumpsStart by 3d printing the stl files provided by GreatScott! This will probably take a few days, so play around with your fancy new glass-moving machine! :-)
After that, assemble the whole thing as shown in the video, and drill the required holes. Now you can test the pumps via the provided code examples in this article.
Part 5: Setting up the bottle-positionsMeasure out where you want your bottles to dispense from. Now add these to the array in the example code. Then calibrate the pumps by pumping out an amount of water through them, and then measuring out how far you came from your target. All of this is also mentioned in the code examples, along with some test-data on how I calibrated mine. This might be sufficient for your needs, but try and calibrate them based on your specific pumps and tubes that you bought!
This part of the code is the main part of the code, as this is really the heart of the machine. So be happy that I did the footwork for you can made some code that is almost read for plug-n-play!
Part 6: The airpumpsThe peristalic pumps are awesome for dispensing a precise amount of liquid, but they are quite slow. So we made use of some airpumps to push liquid out of some airtight containers into the glass.
An example of how they work are shown in the video, but below here is a picture of it in action:
These were quite tricky to calibrate, as we got a batch of 4 different pumps with each their speed, so we had to calibrate each and every one of them.
In the video you can see the wiring schematic, and in the code examples you can find how to test and calibrate them!
You're done!Now you're done with your awesome new machine! Please share your creating with me on Facebook or YouTube.
What there's left to do is how to make an app order the drinks instead of an Arduino loop, and also how to wire up the bluetooth module. All of this is provided as code examples, and you can take these, swap out the variables, and play along with your new drink machine! There's also a visual studio project for the android app that you can freely use!


Comments
Please log in or sign up to comment.