// Tali helmet - voice detection LED control by bzqp (2021) https://www.youtube.com/user/Beezqp
//https://www.thingiverse.com/bzqp/designs
//
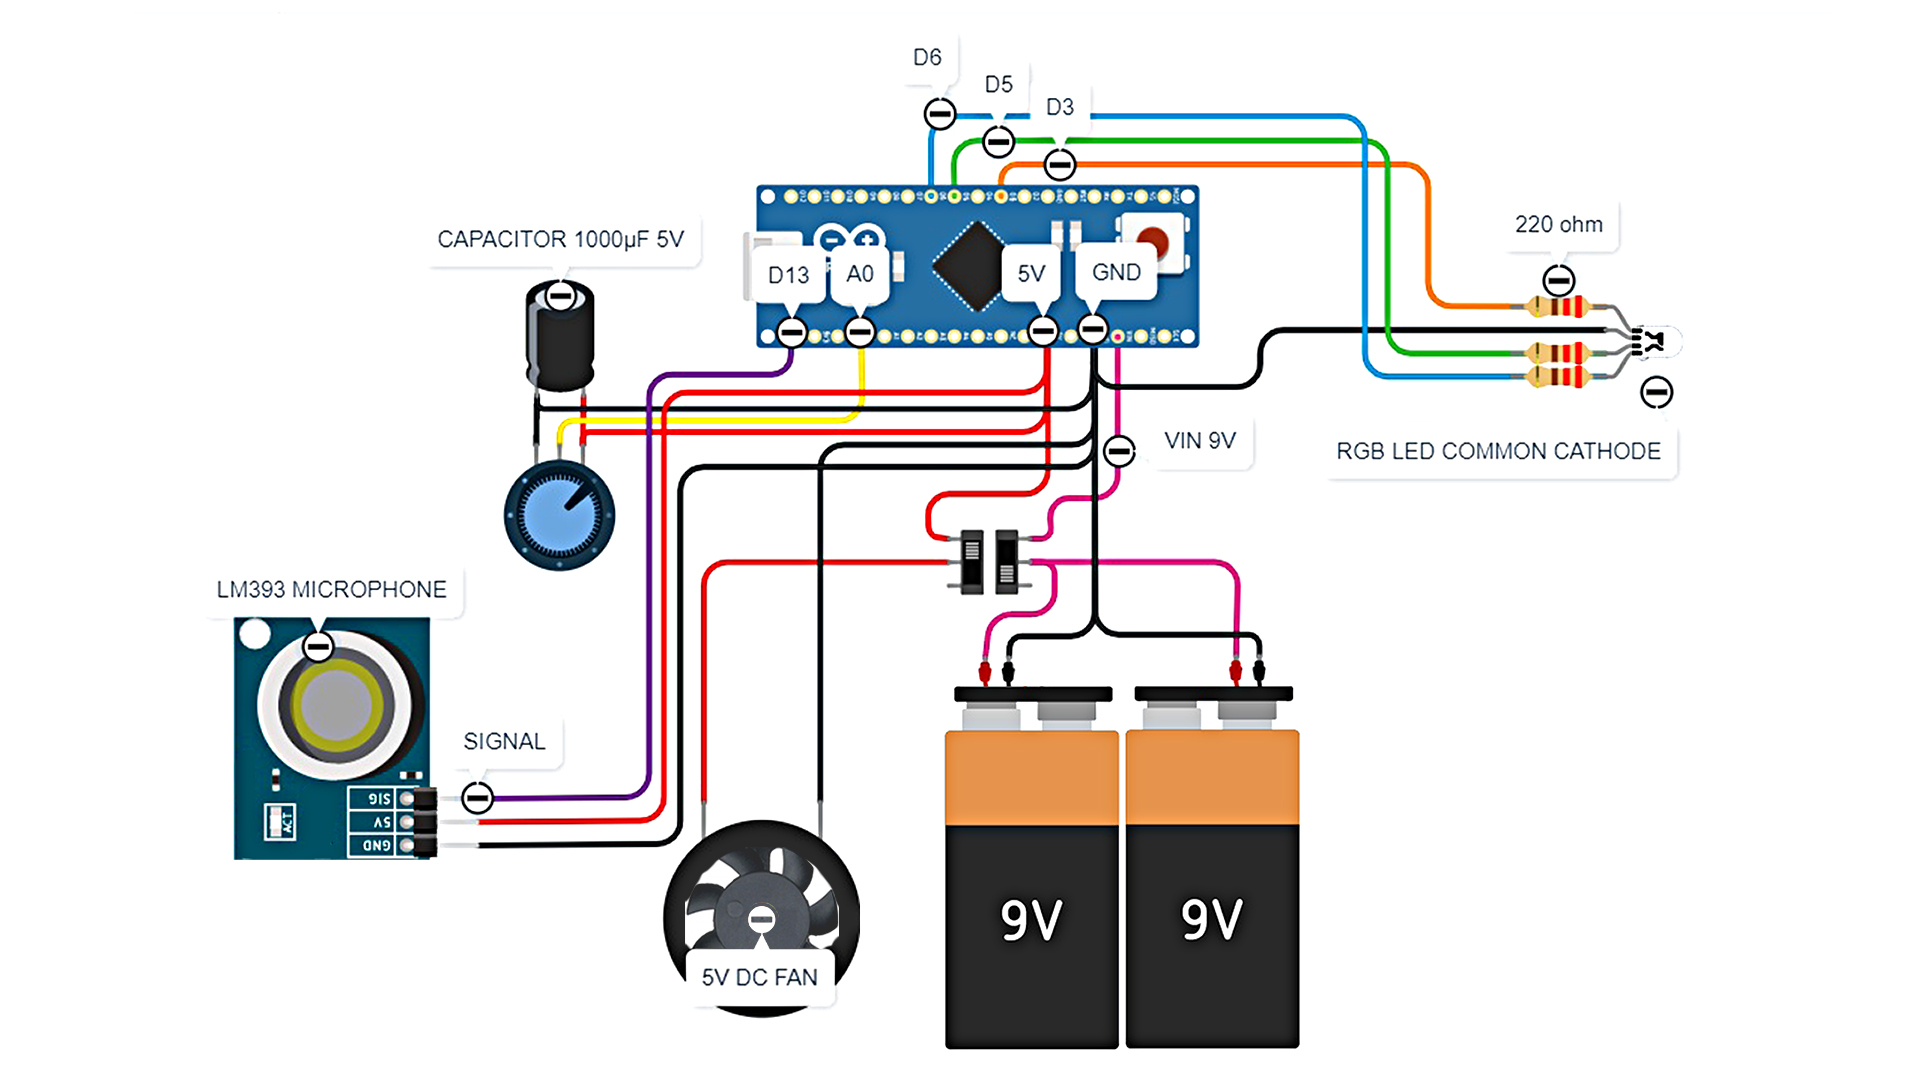
//A0 - potentiometer
//D13 - microphone
//D3 - red
//D5 - green
//D6 - blue
int brightness = 0;
int brightnesscache=0;
int loudness = 0;
const unsigned long timeout=100; // voice sampling time in ms
unsigned long timestamp=0; // first sample timestamp
void setup() {
  pinMode(13, INPUT); //D13 - microphone
  pinMode(A0, INPUT); //A0 - potentiometer
  pinMode(3, OUTPUT); //D3 - red
  pinMode(5, OUTPUT); //D5 - green
  pinMode(6, OUTPUT); //D6 - blue
  Serial.begin(9600); // Serial for debugging, not really needed normally
}
void loop() {
brightness = floor(analogRead(A0)/4);
loudness = digitalRead(13);
Serial.println(brightness);

if(brightness<8){
    // if brightness below 5 turn off the lights to prevent unbalanced RGB color flickering
    analogWrite(3, 0);
    analogWrite(5, 0);
    analogWrite(6, 0);
    delay(1);
}
else{
unsigned int  dl=(floor(float((float(1)/(float(brightness)+2))*float(100000)))); //delay in microseconds, the same total delay for every brightness setting
//Serial.println(brightness);
if(loudness==LOW){
  // if a sound is detected by a microphone, mark a timestamp
  timestamp=millis();
}
if(millis()-timestamp<timeout){
  // if within the timeout period, gradually lower the brightness to zero
  while(brightnesscache>0){
    brightnesscache--;
    analogWrite(3, brightnesscache/2);
    analogWrite(5, brightnesscache/3);
    analogWrite(6, brightnesscache);
    delayMicroseconds(dl);
  }
  }
else{
  // if no sound is detected, gradually rise the brightness to the value determined by the potentiometer
  while(brightnesscache<brightness){
    brightnesscache++;
    analogWrite(3, brightnesscache/2);
    analogWrite(5, brightnesscache/3);
    analogWrite(6, brightnesscache);
    delayMicroseconds(dl);
  }
  // just to be sure it goes all the way up to brightness
    analogWrite(3, brightness/2);
    analogWrite(5, brightness/3);
    analogWrite(6, brightness);
}
}
}


Comments
Please log in or sign up to comment.