Maker spaces typically have hundreds of valuable tools available for use by their members. These tools can navigate from room to room and project to project. There is no real good way of knowing the whereabouts of a particular tool at a given time. Paper sign-out systems are often forgotten in the adrenaline rush of finishing an exciting project, and you can't always count on people putting things away properly (though they really should!). It is easy for items to become misplaced and lost, sometimes for weeks on-end!
The hardware and software projects contained within this article aim to provide an affordable method of tracking these tools and other valuable items. This solution uses Long Range Ultra High Frequency RFID technology to tag and monitor items. This solution may also be implemented in homes: workspaces, dens and garages if need be (and definitely on that elusive Phillip's head screwdriver!!).
In order to keep the solution affordable, most of the cost is up-front when deploying the actual monitors and antennas. Any number of individual items can be tagged with inexpensive EPC Gen 2 passive RFID stickers, cards, or fobs. This means the solution can scale cost effectively.
In a nutshell, multiple RFID readers are deployed to various rooms throughout the building, and, depending on the room size, you can even deploy multiple readers to the same room. These readers (which are also called Monitors in this article) will collect time stamped readings of specific tags with the monitor IP address and feed this data to a cloud Web Api service hosted on Azure. There is also a ASP.NET MVC web application UI provided that will allow the consumer to register their RFID readers (Monitors) and Tags. The web application also has an inventory screen where they can view the last known location of an item (based on the location of the monitor providing the latest reading) as well as the time stamp of the latest reading for that item.
Hardware Required
- Raspberry Pi 2 with Windows IoT Core (1 for each monitor)
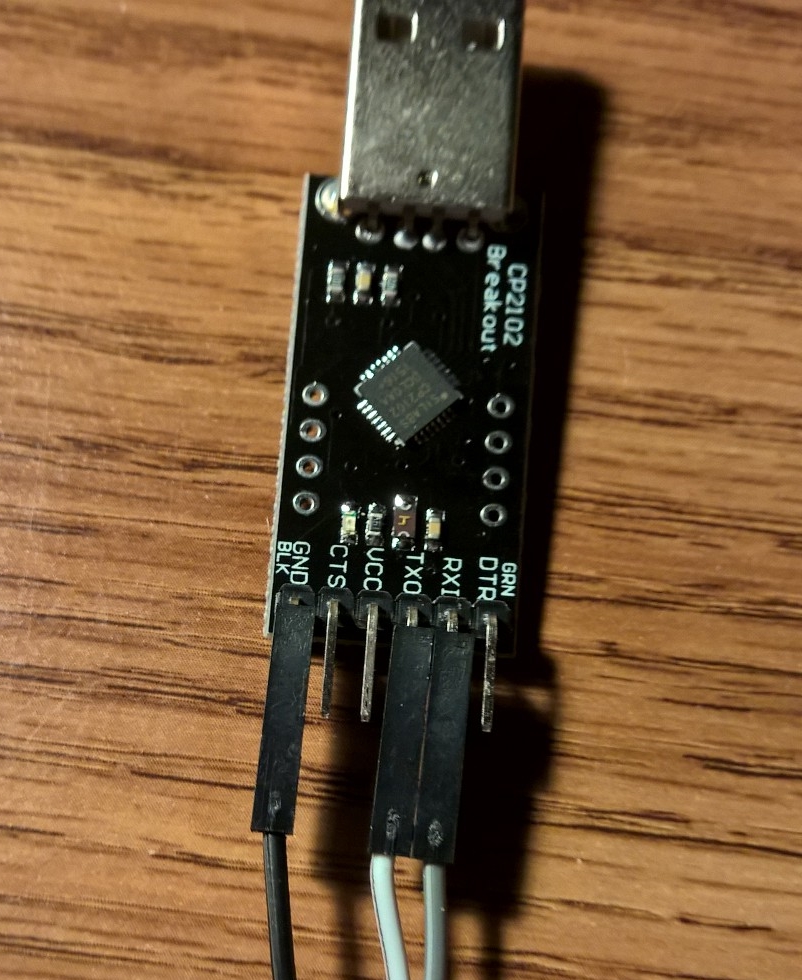
- CP2102 USB to UART TTL conversion module (1 for each monitor)
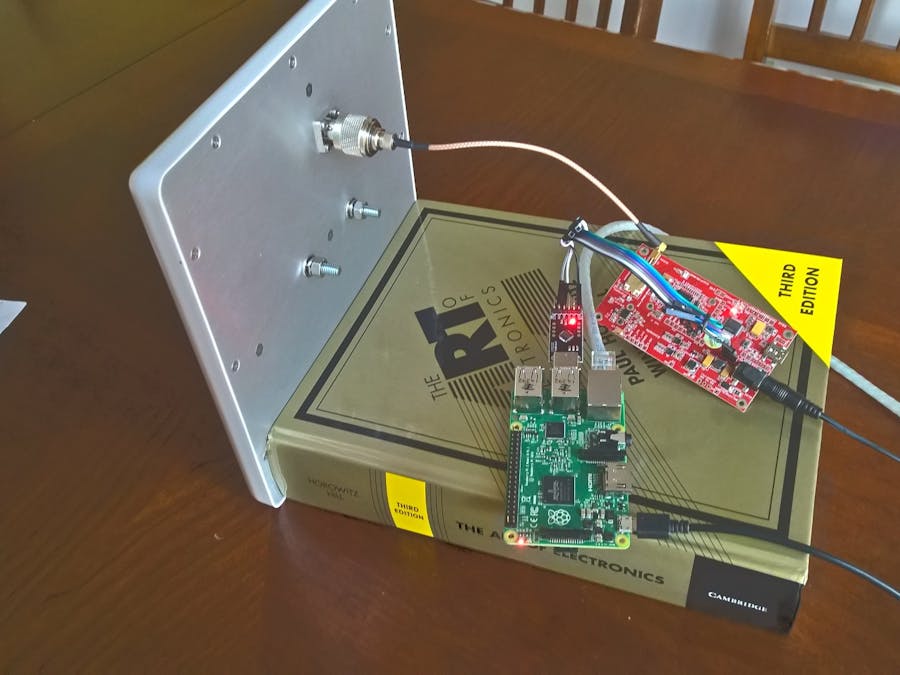
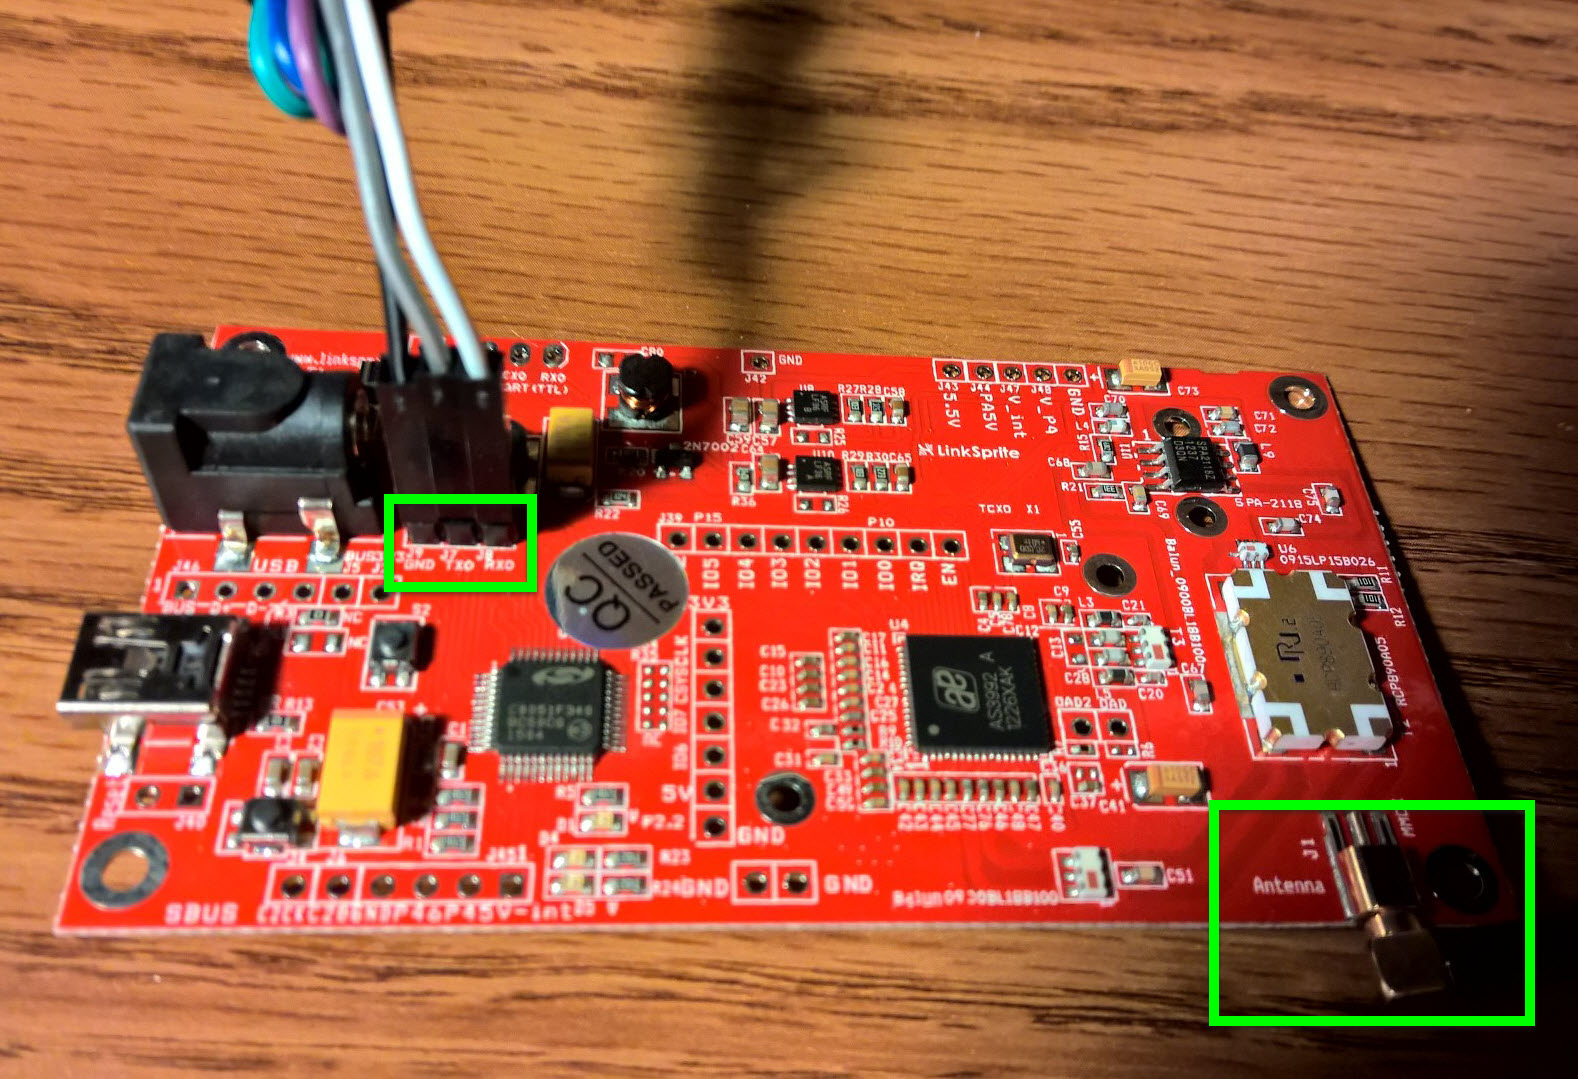
- Cottonwood UART Long Range UHF RFID reader board (1 for each monitor)
- Mid to Long Range UHF RFID antenna (commercial grade circular antennas are best, in my case I had to stay on a personal budget, so this proof of concept uses an 8dbi directional antenna) (1 for each monitor)
- Antenna adapter cable (1 for each monitor)
- 5VDC 2A Power Supply with center-positive 5.5x2.1mm barrel connector (1 for each monitor - the Cottonwood board requires it's own power supply)
- A series of UHF RFID tags (stickers, cards, fobs)
Hardware Setup
Hardware setup is pretty simple. First grab your CP2102 USB to UART TTL conversion module and connect 3 wires: Ground (GND), TX and RX.
Connect the following wires:
- CP2102 GND to Cottonwood GND
- CP2102 TX to Cottonwood RX
- CP2102 RX to Cottonwood TX
Next attach your antenna and 5VDC/2A power supply barrel connector into your Cottonwood board.
Installing the Cottonwood into your Raspberry Pi is as simple as plugging in the conversion module into an available USB port.
Software Overview
This solution is comprised of two parts. An online web application that lets the user register their monitors and tags, and a Windows IoT Core Background Application, that is responsible for reading tags and sending the data to the cloud (Web Api service provided with the online web application).
The first thing the user needs to do is access the web application to register their monitors and tags. When registering the monitor, the user provides the IP address (I would have preferred the MAC address but couldn't find a good way to retrieve that in Windows IoT Core) as well as its physical location (most likely a room, like the Den or Garage). The user will then register their tags and describe the item that it is associated with. The web interface also provides an Inventory view that the user can access to see the last known location of their items (based on the monitor providing the read) as well as the timestamp of the last read. Full source code for this web application is available in the Tracker.Web repository linked in the code section.
In this project, the Raspberry Pi will be running in headless mode, meaning that there is no user interface (though it won't hurt anything if you do deploy it to a headed device). The project type for the application that will run on the Pi to gather UHF RFID tag inventories is of the type Windows IoT Core, Background Application.
Included in the provided source code is an RfidScanner solution (see repository in the code section, the code in this solution is heavily documented inline). This solution contains two separate projects. First, there is a Universal Application class library (CottonwoodRfidReader.csproj) that contains a Cottonwood class that is used to simplify communication and configuration of the Cottonwood board. This class contains methods to turn the antenna on or off, set the reading frequency, and perform a tag inventory scan. The second project in the solution is the RfidScanner Universal Windows background application project. It is this application that will use the above Cottonwood class to scan for RFID tags and send the information to a cloud Web Api service that is hosted on Azure. The source code for this service can be found in the Tracker.Web solution, it is deployed alongside the monitor and item management website we reviewed earlier (see repository in the code section). The RfidScanner project makes use of Serial communications, as such, if you are only using portions of the code, ensure you add the device capability in the Package.appxmanifest file:
<DeviceCapability Name="serialcommunication">
<Device Id="any">
<Function Type="name:serialPort" />
</Device>
</DeviceCapability>
Bringing it all together!
In my proof of concept, I have one monitor located in my den, and have 2 RFID stickers within reading proximity of my Windows IoT Core based monitor.
I have a secondary monitor setup in the kitchen, along with a single RFID tag.
I unfortunately discovered a little too late that I only had one 5VDC 2A barrel power adapter, so I could only run one monitor at a time. I have already registered both of my monitors and 3 sticker tags through the web interface hosted on Azure. Here is a quick tour of the web interface with raspii_2 located in the den currently scanning for tags.
I hope you have fun creating this project!


Comments
Please log in or sign up to comment.