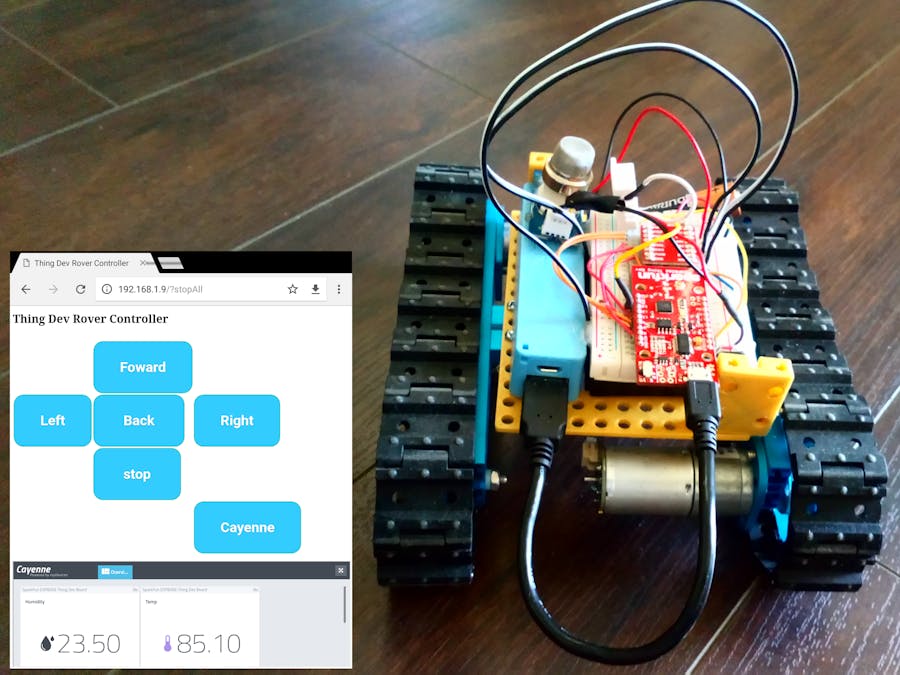
This is a great weekend robotics project you can undertake, using the Sparkfun’s ESP8266 Thing dev board as the brain of the rover, which host the code for the web application which is used to drive the motor on the rover, and post sensor data to Cayenne.
As part of the demo video above, I am posting temperature, humidity and Gas sensor values to the Cayenne IoT platform. Cayenne by myDevices.com is a great IoT solution and is the world’s first drag-and-drop IoT Project Builder, which enables customers to bring IoT projects from prototype to mass production, this means it is also great for hobby projects like this one, which can be scaled to an industrial application to monitor spaces on the factory floor, which are hard to get to or not habitable. The icing on the cake is that recently myDevices has added support for ESP8266, which makes its super easy to integrate as part of your code using the MQTT library which you can find at https://github.com/myDevicesIoT/Cayenne-MQTT-ESP8266. And as part of the web application as you see in the screenshot below, I have a button to upload data to Cayenne when the button is hit, but you could modify the code below to post data every couple of minutes to Cayenne based on your use case.
In addition, to using the Cayenne IoT dashboard you can also setup triggers and alerts in the dashboard, to send out text messages or emails, if your sensors hit a specific threshold. In my case, I setup a trigger to send me a text message if the humidity rises above 50% at home.
Here are the list of steps to complete the build.
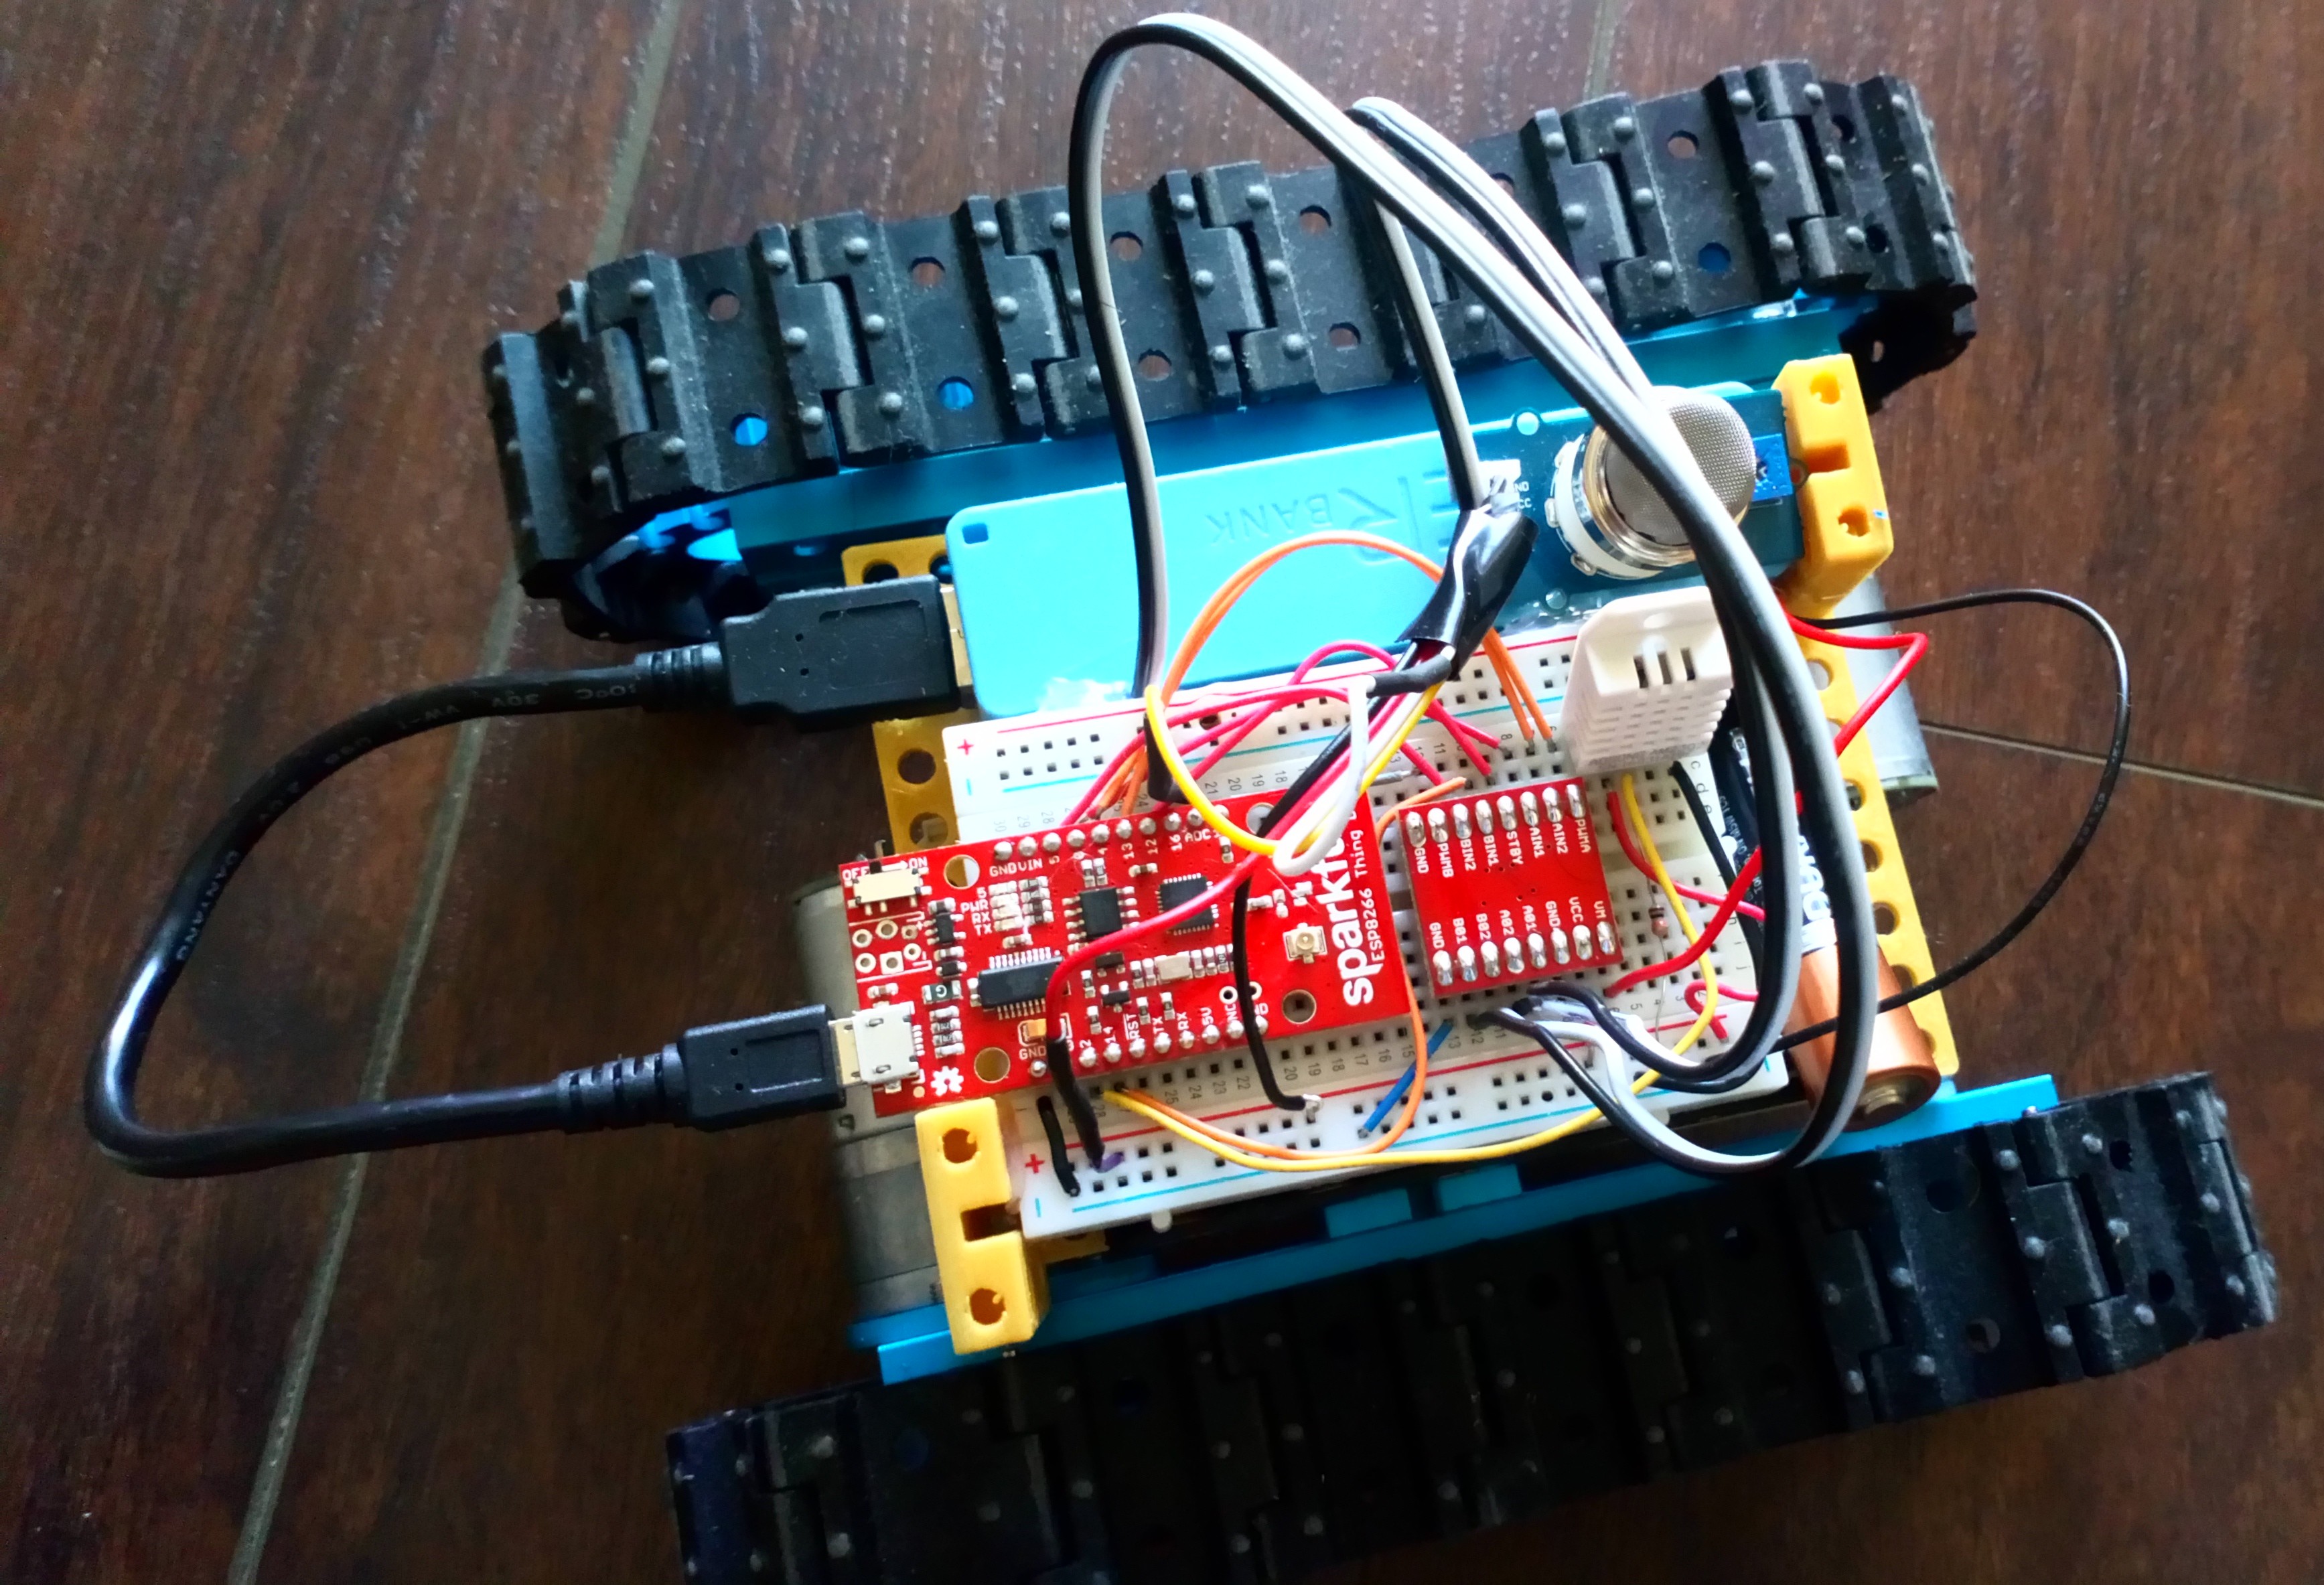
Connecting the circuitAs part of the circuit here are the high level connection to the sensors and motor driver:
- DHT22 temperature and humidty sensor is connected to pin# 2 on ESP8266 Thing dev board
- Gas sensor connected to ADC pin
And here are the connection to the Sparkfun motor driver(TB6612FNG), to control right motor of the rover use:
- PWMA on the motor driver to pin# 13 - this is a PWM pin to control the speed of the motor
- AIN1 to pin# 0
- AIN2 to pin# 4 - both these pins decide the direction the back wheels will spin.
To control the left motor:
- PWMB to pin# 15
- BIN1 to pin# 14
- BIN2 to pin# 5
Then connect the left motor pins to A1 and A2, and also connect the right motor to pin B1 and B2 of the motor driver breakout board.
Before you upload the code to the ESP8266 using the Arduino IDE you will need to create an account at https://mydevices.com/cayenne/signup/
Once you have created an account, select the Device/Widget drop down and select SparkFun ESP8266 Thing Dev board, and then select done. On the next screen make a note of the following, which you will need to update as part the code, you will upload to the Thing Dev board.
- MQTT USERNAME
- MQTT PASSWORD
- CLIENT ID
If you would like to embed the dashboard in the web application. Go to the dashboard and click the sharing button. And check the Overview (dashboard) below the "What would you like to share?" question. Make a note of the link in the sharing link textbox - https://cayenne.mydevices.com/shared/xxxxxxxxxxxxxxxxxx
Once you done with putting the Circuit together, it is now time to upload the code in the github repo below to the Thing Dev board. Before you upload the code you will need to setup Arduino IDE for ESP8266, checkout the guide at https://learn.sparkfun.com/tutorials/esp8266-thing-development-board-hookup-guide/using-the-esp8266-in-arduino.
You will also have to download DHT Sensor Library and unzip it to the Arduino IDE library folder,from https://github.com/adafruit/DHT-sensor-library. In addition you will have to download the Cayenne-MQTT-ESP8266 https://github.com/myDevicesIoT/Cayenne-MQTT-ESP8266 and unzip this in the library folder of your Arduino IDE folder.
And just before you upload the code using the setting below, update the following:
- WiFiSSID[] - your WiFi router name
- WiFiPSK[] - WiFi router password
- username[] - Cayenne MQTT USERNAME which you made a note of earlier
- password[] - Cayenne MQTT PASSWORD
- clientID[] - Cayenne CLIENT ID
- update the Cayenne share link in the iframe src section.
Now select the port that your board is connected to in the Arduino IDE and upload the code to the ESP8266. Run a basic test as shown in the video below to test out the direction of motor, if they are not moving in the same direction when you hit the forward button the web application, swap the motor connections to the motor driver board.
3D PrintingNow as part of my setup I am using Makeblock rover basic kit, which does not have breadboard and the Arduino holder. This meant I had to design and 3D print a part as the base to hold the AA batteries and the Breadboard with the circuit as you see in the picture below. The STL files, if you have a similar kit, can be found in the section below. I printed the files on the Flashforge with Hatchbox 1.75mm golden yellow PLA.
Once you are done 3D printing , use 4x40 screws and nuts to hold the components together in place, and if required use some glue to secure the components together before you take the rover for a spin.
Setting up Triggers and Alerts in Cayenne DashboardNow if you have ever used IFTTT.com before you are going to love the triggers and alerts feature on the Cayenne Dashboard. You can setup triggers to send you/your colleagues on the factory floor text messages and emails when a sensor threshold is hit, while you take the rover for a spin. In my case since this is a prototype, I am sending myself a text message when the humidity >50 % .
Thanks for reading the project post, if you make something similar don’t forget to post some pictures in the comment section below.


_3u05Tpwasz.png?auto=compress%2Cformat&w=40&h=40&fit=fillmax&bg=fff&dpr=2)
Comments
Please log in or sign up to comment.