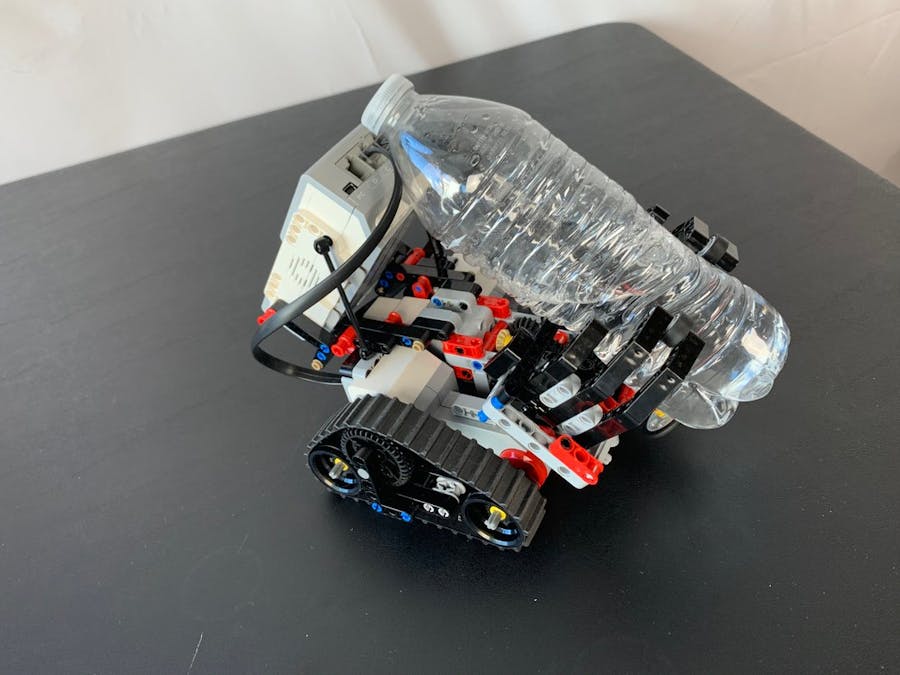
My friend, Jody Dyer, was truly the inspiration for this project. Jody was the first paraplegic to graduate from Georgia Tech. I asked him how a LEGO Mindstorms robot could assist him in his every day life. Jody answered that if he had a robot to bring items to him, it would greatly help out.
Using the GRIPP3R as a base, I added voice control commands to:
- Open the claw
- Close the claw
- Turn left / right at an angle specified by the user.
- Turnaround
This tutorial builds upon Mission 3 of the Hackster LEGO Mindstorms Challenge.
Before You Begin: Complete Mission 3 here
This tutorial follows 4 main steps:
1. Build the GRIPP3R LEGO robot pages 1-57.
2. Update mission-03 python code and upload to the GRIPP3R.
3. Modify your Alexa skill (from Mission 3) with the added voice control commands.
4. Run the Python code on your GRIPP3R robot.
Step-by-Step Tutorial
Step 1: Build GRIPP3RFor this project, you will need to build the GRIPP3R per the instructions from page 1 to 57. Note that the 2 large motors are used in the same way from the EV3RSTORM as they are used to move the robot across the table or the floor. Next, note that the medium motor has been repurposed from a cannon to the claw and will control the claw opening and closing.
At this point, I recommend "calibrating" the claw of your GRIPP3R robot by removing the microSD card, powering up the robot, and running the demo function.
Once the Demo has run, power down your robot and replace your microSD card.
Step 2: Edit Python codeFor this step (and the following steps), you'll need to download the code from here.
In Visual Studio Basic, open up the mission-claw.ini file and update with the gadget Amazon ID and Gadget Secret that you created in Mission 1.
[GadgetSettings]
amazonId = YOUR_GADGET_AMAZON_ID
alexaGadgetSecret = YOUR_GADGET_SECRET
Save your new mission-claw.ini file.
Next, let's take a look at the changes from mission-03.py to mission-claw.py
First, I added to the list of preset directions and commands that the code would recognize. I also commented out the associated cannon commands from Mission 3.
class Direction(Enum):
    """
    The list of directional commands and their variations.
    These variations correspond to the skill slot values.
    """
    FORWARD = ['forward', 'forwards', 'go forward']
    BACKWARD = ['back', 'backward', 'backwards', 'go backward']
    LEFT = ['left', 'go left']
    RIGHT = ['right', 'go right']
    STOP = ['stop', 'brake']
    TURNAROUND = ['turn around']


class Command(Enum):
    """
    The list of preset commands and their invocation variation.
    These variations correspond to the skill slot values.
    """
    MOVE_CIRCLE = ['circle', 'spin']
    MOVE_SQUARE = ['square']
    PATROL = ['patrol', 'guard mode', 'sentry mode']
    CLAW_OPEN = ['open', 'claw open']
    CLAW_CLOSE = ['close', 'claw close']
    WATER = ['water', 'beer', 'fetching water', 'fetching beer', 'wine', 'fetching wine']
    #    FIRE_ONE = ['cannon', '1 shot', 'one shot']
    #    FIRE_ALL = ['all shot']
Next, I add in the code to activate and control the opening and closing of the claw:
Define Open and Close positions for the medium motor
CLAW_DEGREES_OPEN = 225
CLAW_DEGREES_CLOSE = 920
CLAW_SPEED_PCT = 50
Declare the claw is OUTPUT_A and the MediumMotor
#define claw
self.claw = MediumMotor(OUTPUT_A)
Next, we define the claw_open and claw_closed
def claw_open(self, state):
    if state:
        self.claw.on(speed=self.CLAW_SPEED_PCT * -1, block=True)
        self.claw.off()
        self.claw.reset()
        self.claw.on_to_position(speed=self.CLAW_SPEED_PCT,
                            position=self.CLAW_DEGREES_OPEN,
                            brake=False, block=True)
def claw_close(self, state):
    if state:
        self.claw.on_to_position(speed=self.CLAW_SPEED_PCT,
        position=self.CLAW_DEGREES_CLOSE)
Later in the code, if we receive a command to open the claw, we need to activate that command:
if command in Command.CLAW_OPEN.value:
        self.claw_open(True)
if command in Command.CLAW_CLOSE.value:
        self.claw_close(True)
Next, I also modified the turning code to be able to turn left and right by an angle specified by the user.
def _turn(self, direction, degrees, speed):
    if direction in Direction.LEFT.value:
        self.drive.on_for_degrees(SpeedPercent(0), SpeedPercent(speed), degrees)
    if direction in Direction.RIGHT.value:
        self.drive.on_for_degrees(SpeedPercent(speed), SpeedPercent(0), degrees)
When the user directs the robot to turn by a number of degrees, now th code recognizes degrees.
if direction in (Direction.RIGHT.value + Direction.LEFT.value):
    self._turn(direction, degrees, speed)
    #self.drive.on_for_seconds(SpeedPercent(speed), SpeedPercent(speed), duration, block=is_blocking)
if direction in (Direction.TURNAROUND.value):
    self._turn("right", 2100, speed)
self.drive.on_for_seconds(SpeedPercent(speed), SpeedPercent(speed), duration, block=is_blocking)Let's head over to Amazon's Developer Console, and hit Edit on the Mindstorms Alexa skill we created in Mission 3.
We now need to add in our Intent and Slots so that Alexa can recognize the commands, "Claw Open," "claw close," "turn right by 45 degrees," and so forth. Go to JSON Editor in the Build tab and drag and drop the model.json file from mission-claw folder.
Click "Save Model"
Then click "Build Model"
Next, head over to the Code tab and copy and paste the code from index.js to the lambda code index.js. Click "Save."
Then click "Deploy."
Turn on your GRIPP3R EV3 robot with the microSD card from Mission 3. You'll also need your Amazon Echo device from Mission 3 for this step.
Connect your EV3 to your computer and transfer your mission-claw.py and mission-claw.ini files to your robot. (Same as in Mission 3)
Run mission-claw.py
Once the python code has started and your EV3 is paired with your Amazon Echo device, launch the Mindstorms Alexa skill as you did in Mission 3.
Your terminal in Visual Studio Code should look something like this when working properly:
My invocation phrase was:
Alexa, launch Lego Mindstorms.
Next you can start issuing commands such as:
Claw close
Claw open
Right turn 45 degrees
Turn left 10 degrees
Forward 3 seconds
Turnaround
Set your object about an arms length away (and directly in front) of your EV3 and say:
Please bring my water.
To end the skill say,
Thank you
Now you can modify the code to string together more commands or create new commands to pick up objects with your EV3.
Thanks for checking out my project and have fun with this!


_dyynx0bnuf_8u4Xi07d4z.png?auto=compress%2Cformat&w=48&h=48&fit=fill&bg=ffffff)

Comments
Please log in or sign up to comment.