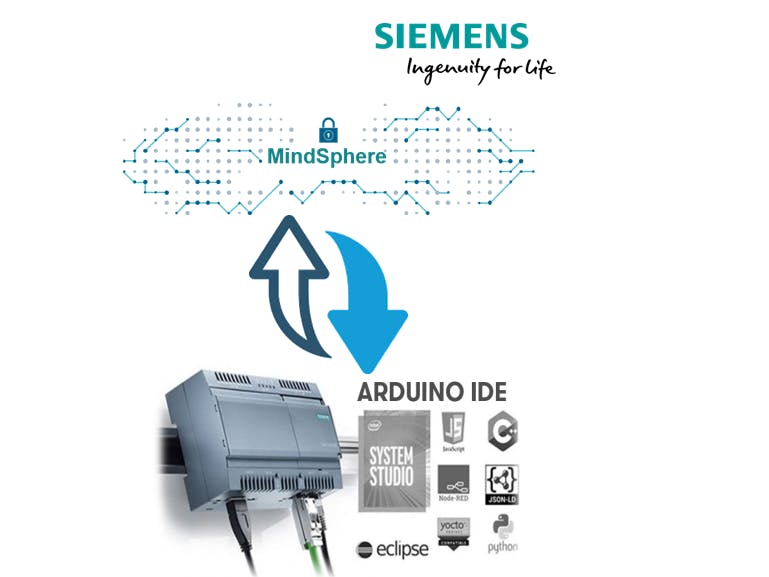
Siemens is offering high quality hardware and software for industrial IoT. However, limited documentation is available for general public about these solutions. This project aims to provide a step-by-step description to the creation of an IoT2000 or IoT2040 device that sends data to MindSphere using MCL.
To complete this project, it requires multiple steps performed on both MindSphere and the IoT device.
Creation of the Asset in MindSphereDuring this step, three element will be created in the order : Aspect, Type, and Asset. the creation has to be done from the Mindsphere website. the URL might change according to the tenant that you are using. This proof of concept was built using iotusdev tenant available at https://iotusdev.eu1.mindsphere.io/index.html#/
The three element will be created using the asset management as illustrated in the figure below.
Aspect creation
The documentation describes how to create an Aspect.
However, keep in mind that the Type and Unit are IMPORTANT! and needs to match exactly the once on the data source.
Create a new Aspect with :
- Name = light
- Data Type = INT
- Unit = light
The figure below illustrate the "+" button to create a new aspect and how the aspect should look like.
Type creation
The documentation describes how to create an Type. The type has to be linked the Aspect that was created on the previous step.
Create a new Type by clicking on BasicAgent → MindConnectLib → "+" with :
- Name = lightmcl
- Aspect = iotusdev.light
The created Type should look like the figure below.
Asset creation
The documentation describes how to create an Type. The Asset has to be based on the Type that was created on the previous step.
Create a new Asset with :
- Name = ssi-web-mcl
The created Asset should look like illustrated in the figure below.
Once the asset created, it should be prepared for the onboarding. To do so, we need to access to the MindConnect Lib configuration as illustrated in the figure below.
Choose the SHARD_SECRET as Security profile as illustrated below and click save.
Then you can access to the iat (initial access token) required for the onboarding as illustrated on the figure below.
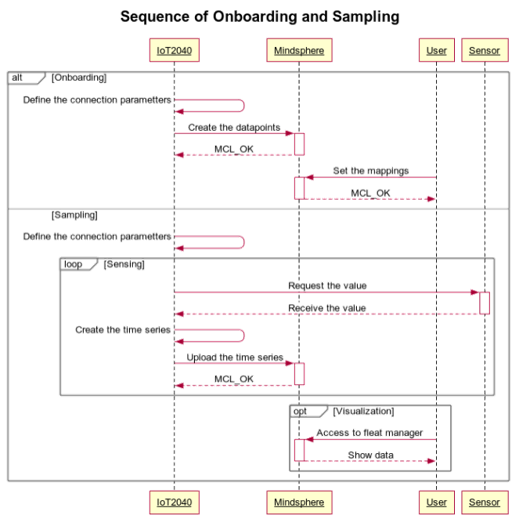
The onboarding step require that we run the code available at this repository https://code.siemens.com/ssi-web-ct-us/ssi-web-mcl-iot2040-onboarding.git
We have to update the configuration->tenant and configuration->initial_access_token to fit the tenant and the asset that we are using as illustrated below. Note that if your device is inside Siemens production network, the lines regarding the proxy should be enabled.
if (MCL_OK == code)
{
 configuration->mindsphere_hostname = "https://southgate.eu1.mindsphere.io";
 configuration->mindsphere_port = 443;
 configuration->mindsphere_certificate = mindsphere_certificate;
 configuration->security_profile = MCL_SECURITY_SHARED_SECRET;
 // DONT use the proxy
 configuration->user_agent = "XXXX agent v0.1";
 configuration->initial_access_token = initial_access_token;
 configuration->tenant = "YOUR_TENANT";
 configuration->load_function.shared_secret = (mcl_load_shared_secret_callback_t) custom_load_function;
 configuration->save_function.shared_secret = (mcl_save_shared_secret_callback_t) custom_save_function;
 // Initialize mcl communication with the configuration.
 printf("Initializing mcl communication : ");
 code = mcl_communication_initialize(configuration, &communication);
 printf("%s.\n", mcl_log_util_convert_error_code_to_string(code));
}
Note that the data point configuration fits the once configured for the aspect as illustrated below.
if(MCL_OK == code)
{
 // Generate GUID for data point 1.
 mcl_random_generate_guid(&data_point_id_1);  // Add data point to data source.
 char *data_point_1_name = "light";
 char *data_point_1_type = "INT";
 char *data_point_1_unit = "light";
 char *data_point_1_description = "Lum Description";
 printf("Adding data point 1 to data source : ");
 code = mcl_data_source_configuration_add_data_point(data_source, data_point_id_1, data_point_1_name, data_point_1_description, data_point_1_type, data_point_1_unit, NULL);
 printf("%s.\n", mcl_log_util_convert_error_code_to_string(code));
}
Run the program on your IoT2040 device and check if the onboarding was successful as illustrated below.
A data mapping is a mandatory step before been able to send data. We have to link the variable light on the Aspect to the variable light from the datapoint created by the onboarding program from the device. The resulting mapping should look like illustrated in the figure below.
A successful onboarding will generate three interesting files (among others as illustrated below): configurationId.txt which contains the configuration-id, datapoint-id.txt which contains the datapoint-id, and registrationInformationFile.txt contains information about the connection to the Mindsphere backend. The two first files contains the information that needs to be used as parameters for the next step.
At the fleet manager, choose the asset that was created in the previous step. the results should look like the once illustrated in the figure below.
'


Comments
Please log in or sign up to comment.