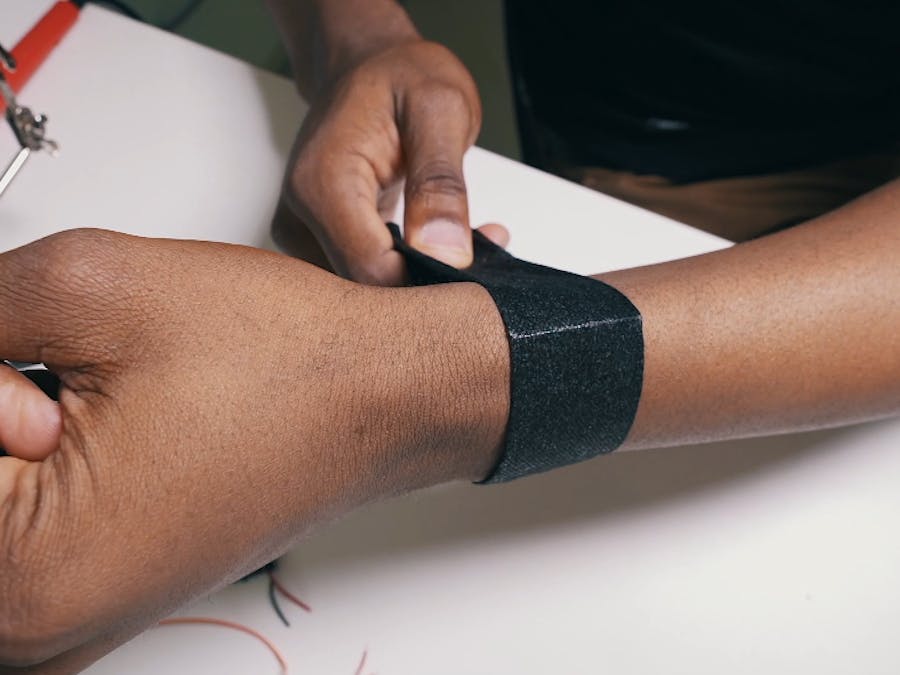
Hello guys, we developed a flexible microcontroller board and decided to show off some of the cool projects you can do with it. So Flexuino is a flexible ESP8266 based microcontroller development board. It is ideal for wearable or irregularly shaped projects and can also be used just like a normal Arduino based board. In this project, we will show you a smart bracelet which we have done with this board, which you can actually wear :)
Our smart bracelet will record your pulses and send them any cloud-based platform of your choice using the ESP8266 WiFi. It is not only restricted to indoor use as it can also work outdoors by connecting to WiFi signal from your mobile device. This can be extended to included accelerometers and other body vitals sensors. But for simplicity sake, we will discuss only the heart rate sensor.
Step 1: ComponentsFor our smart bracelet we need just a few basic components:
- Flexuino (https://www.embrayonic.com/flexuino)
- Heart Rate Sensor (https://www.sparkfun.com/products/11574)
- Coin cell.
- Small coin cell holder.
- A material to enclose the bracelet ( could be a piece of cloth or any material).
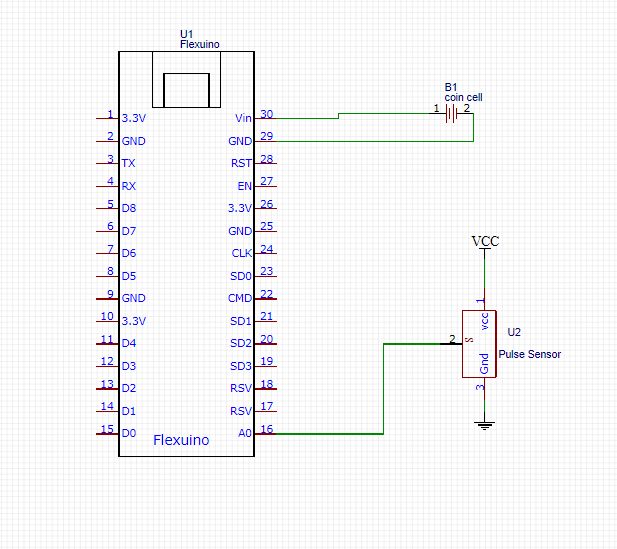
So the hardware here is pretty basic nothing complex. We just power the Flexuino using the coin cells and the connect our heart rate sensor to the specified pins. The pin arrangement is the Flexuino is just like in a normal NodeMCU board, so this shouldn't pose any problems if you have used the NodeMCU ESP8266.
The pulse sensor works using analog signals, you can get more info about the sensor at this link: https://pulsesensor.com/.
Tips:1. Place the Pulse rate sensor just under your wrist to get the best results.
2. Shorten the connection wires from the pulse rate sensor and coin cell pack in order to make the bracelet not too long.
Step 3: Softwarehttps://github.com/WorldFamousElectronics/PulseSen...
In order to minimize power consumption and elongate battery use, we will read the pulses and store them in an integer and then upload to our cloud platform at a specified interval. You can vary this interval depending to get longer battery life or higher frequency reads.
for outdoor use, you can configure the device to use your phone wifi, by setting up the wifi Hotspot in your mobile phone.
For the user interface, we will use NodeRed because it's quite simple and easy to follow. You can configure this to use any other cloud platform of your choice. Our Flexuino will communicate with our dashboard using MQTT protocol. Here is a sample code.
Step 4: Web DashboardNode-red is one of the easiest web-based dashboards for IoT development. It is just a simple drag and drop tool that is quite intuitive, so dont worry if its your first time of using this. Here is a setup guide which is really straightforward :
http://www.steves-internet-guide.com/node-red-over...
You can use any other dashboard like the ThingsBoard, Things speak, e.t.c. You can even build a mobile app on your mobile phone to display the data :)
Node-Red configurationAfter you have familiarized with the node-red platform, You will need to create a simple node-red flow on your desktop computer or any chosen platform. Our basic node-red flow just includes an MQTT input node, a function to process the received data and a chart to display the output.
If you have been following up to this point you should a cool bracelet on your wrist now :). We would like to see photos of the designs you were able to come up with, so please comment and tell us what you think about the Flexuino Board. We really love hearing your feedback. You can learn more about the Flexuino board at our site:
https://www.embrayonic.com/flexuino
One of our young developers talks the how cool the flexuino is !!!


Comments
Please log in or sign up to comment.