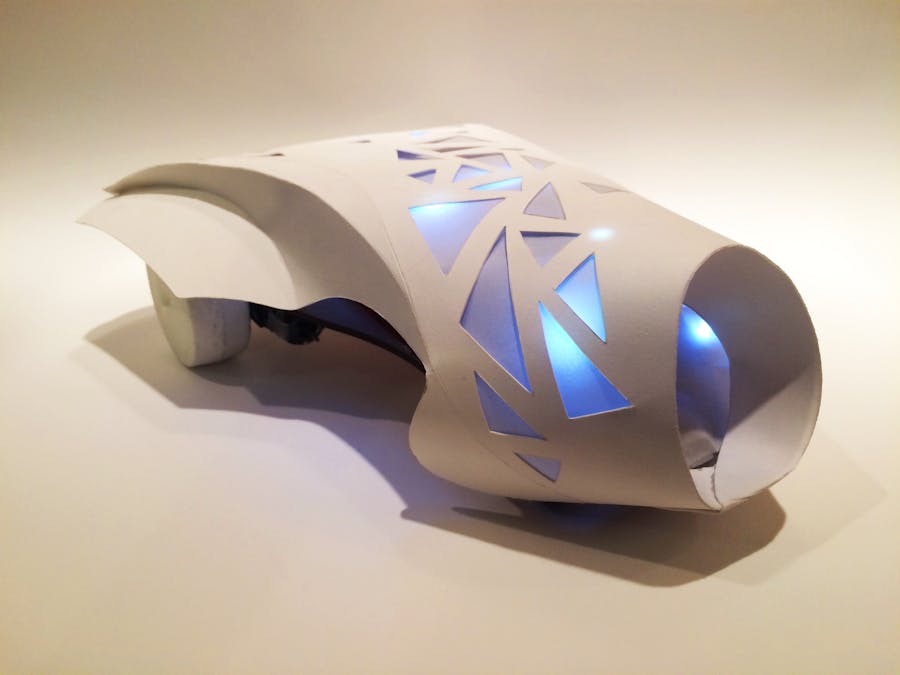
For the final iteration of my vehicle, I redesigned the body and fixed prior complications with the motor control. I crafted my vehicle chassis with organic curves, and designed it to embody serenity. The translucent paper in the car chassis diffuses the LEDs beneath and gives the car a soft, starry glow, which inspired the name "Stella".
Design Goals
My vehicle design had previously evolved from a tank, to a slightly better tank, to a functional car. Links to the previous iterations of the project are below:
Week 1:
Week 2:
https://www.hackster.io/chell-cool-13/homework-7-bluetooth-controlled-vehicle-d9f52e
Week 3:
https://www.hackster.io/chell-cool-13/homework-8-finish-vehicle-5949ee
My car worked, but lacked refinement. It turns extremely quickly, and is relatively non-fluid due to the dual motor steering option I chose. It jumps almost like an animal, so I decided I wanted my design to be organic and feel “alive”. Next, I knew I wanted to incorporate light. I found the “aliveness” of the Arduino and motor controller lights to be complementary to my previous designs, and I wanted to emphasize the effect. Finally, I had had some previous problems with the motors, which I fixed.
Inspiration
I searched through countless designs for car bodies, futuristic vehicles, and lamps, as well as nature photos to find inspiration for my car. Below are the images I relied most heavily on for inspiration.
Vehicle Inspiration
The shape of the car and the pattern adorning it are inspired by koi fish. As I designed rough drafts of my vehicle body, I found it looked more and more aquatic. The curves mimic the movement of fish, the front of the car has a “head” like a open-mouthed koi, and the pattern falls similar to the splotch pattern of many koi fish. Koi are associated with tranquility, and so I found these animals were a good model for graceful lines, serene patterns, and organic movement.
Design
I went through roughly 17 iterations before I decided on a body design I was happy with. I also experimented with a variety of materials. I found that mat board was too stiff to work with, but that a soft, thin cardboard from the art store was perfect for modeling. My final design is made out of Bristol board, with two layers of tracing paper to serve as a window over the cut outs in the car body. Initially, I laser cut my design, but upon bringing it home, I found the laser-engrave cuts were cut too deep. In the end, I traced my laser-cut body piece and re-cut it myself using an X-acto knife.
I tried several variations of the body design itself. I played with the idea of having two arms extending toward the front of the car like a crouching animal, but I found the proportions difficult to work with. Folding the arms in (into the open-mouthed koi shape) gave the body more dimension and better proportions. The base was cut out of a soft wood composite board, with slots cut to attach zip ties and screw down the Arduino. I made a few changes to the arrangement of the wheels as well. I attached the motors to the underside of the vehicle instead of the top of the base, which gave my vehicle more height and clearance for going up ramps. I also reduced the size of the front wheels, which had previously been very large. The front wheels are attached underneath, and housed within the body of the vehicle.
The shell itself is mounted using thread. I used a needle to attach thread to the back of the car, and threaded it through holes in the base to make a simple hinge. The front attaches loosely with a small piece of wire, and is easy to detach and lift up. For added lights, I found by far the easiest solution was to buy a cheap LED string necklace and drape it across the interior. This simple solution saved me a great deal of time.
Drawings
Design Process
Illustrator Files
Electronics and Code
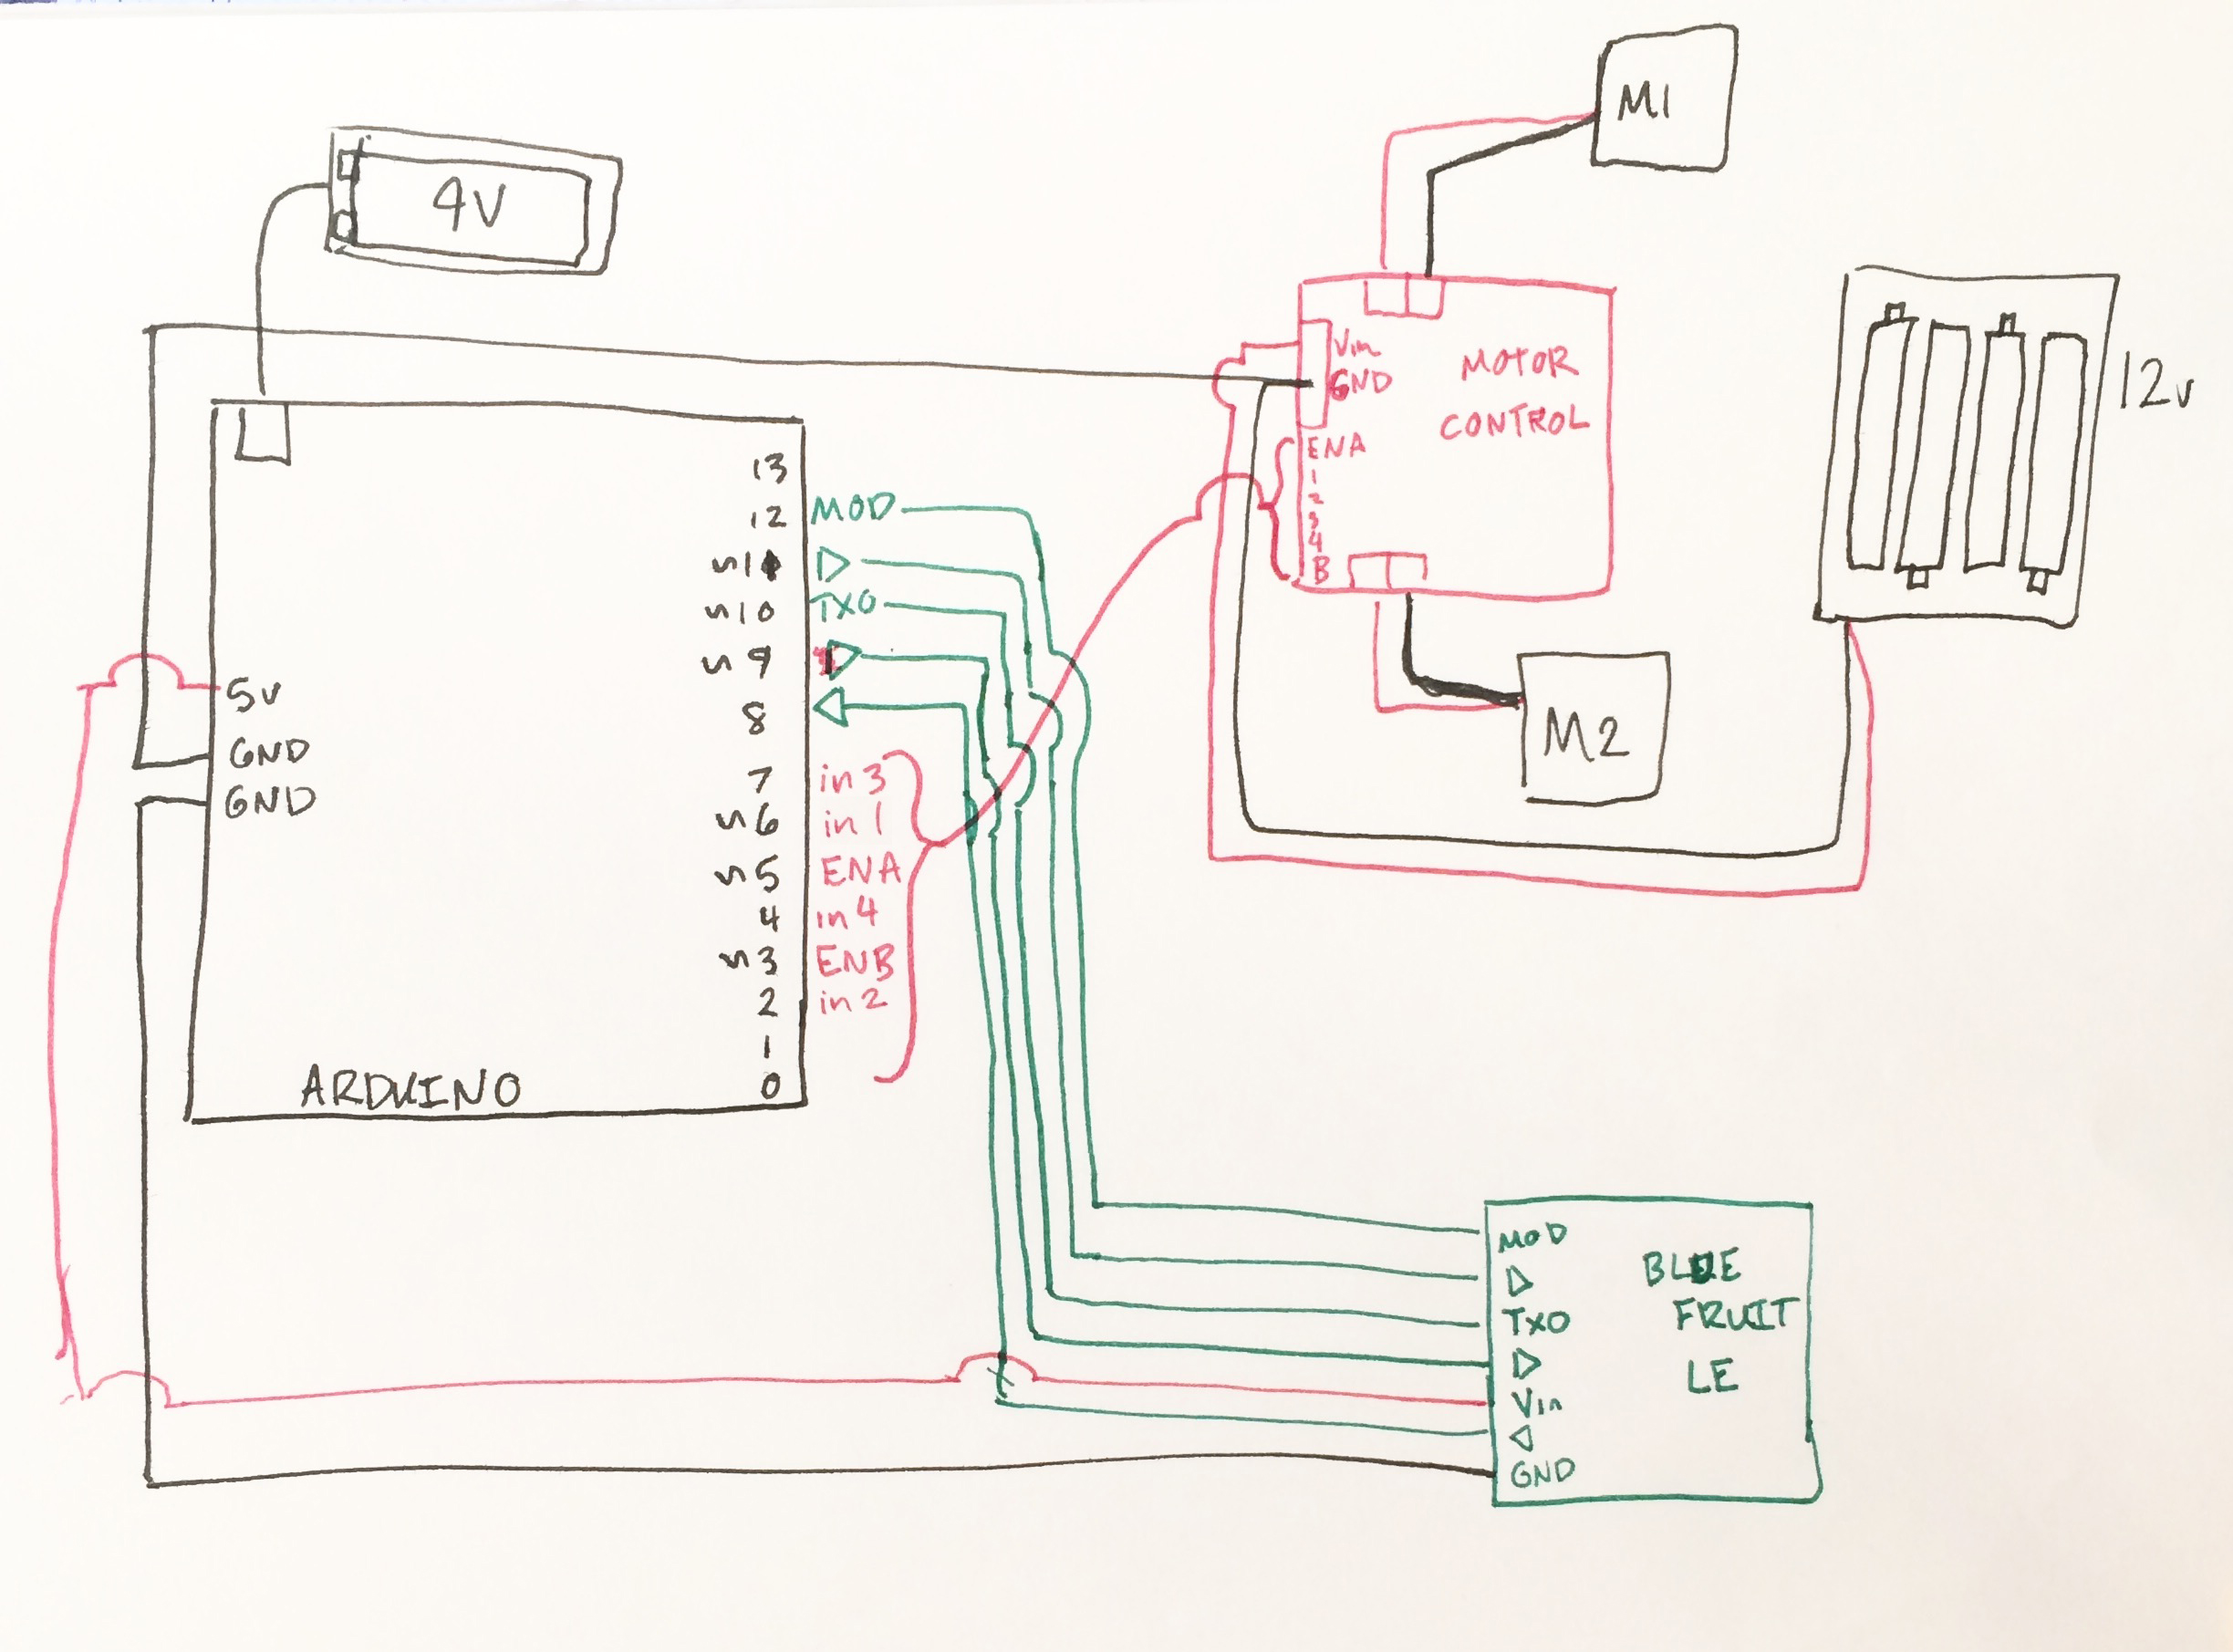
My electronics worked well from my previous design iterations, so I opted not to change them too much. However, I had some trouble that I thought originated in my code. One wheel of my vehicle wouldn’t turn backward, and my car would not run backward. After establishing that it wasn't a code problem, I thought it was a problem with the motor. After switching parts out, the problem persisted. Finally, (after asking an expert) I realized that my vehicle wasn’t running properly because I had a control pin for one of the motors attached to pin 1 on the Arduino. This pin (along with pin 0) is what the Arduino uses to communicate with the computer. Attaching the motor to this pin caused problems with the signal. I fixed it by attaching this pin to pin 6 instead.
I used a small wood board to screw the Arduino onto, and I offset it with a few wood pieces so that it hovered over the circuit board and wheels. Also, I covered the wheels with cut balloons in order to increase traction.
Finished Piece and Video
Finished Stella Car
Youtube Video
Future Design Innovations
I am very pleased with the car as it turned out, but there is always room for refinement. I found I had some problems with the front wheels-- they were too loose and could use more constraints. The car might also do well with a sturdier material. The paper shell was easy to work with and looked fine, but it is not durable in the long run. My electronics, also, could have used some refinement and constraints on the wires. If I were to build this car again, I would pay more attention to anchoring electronic pieces to the base with either walls along the base of the car, or with screws. Overall, though, it works quite well!


_ztBMuBhMHo.jpg?auto=compress%2Cformat&w=48&h=48&fit=fill&bg=ffffff)


Comments