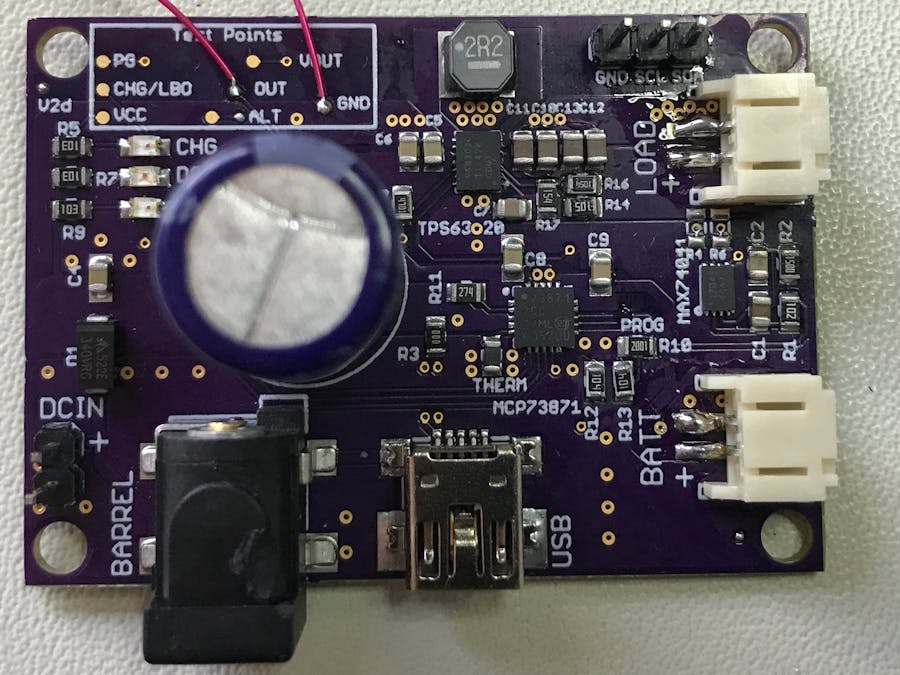
I build connected sensors, which are often deployed in local parks where there is no access to utility power. Over the past couple years, I have been refining and testing my solar power modules, and have arrived at this compact integrated design. I have a number of these deployed and they have been in continuous service for up to two years. I wanted to share this design in case it might be helpful for your projects. I would also greatly appreciate any input or suggestions on this design so v3 will be even better.
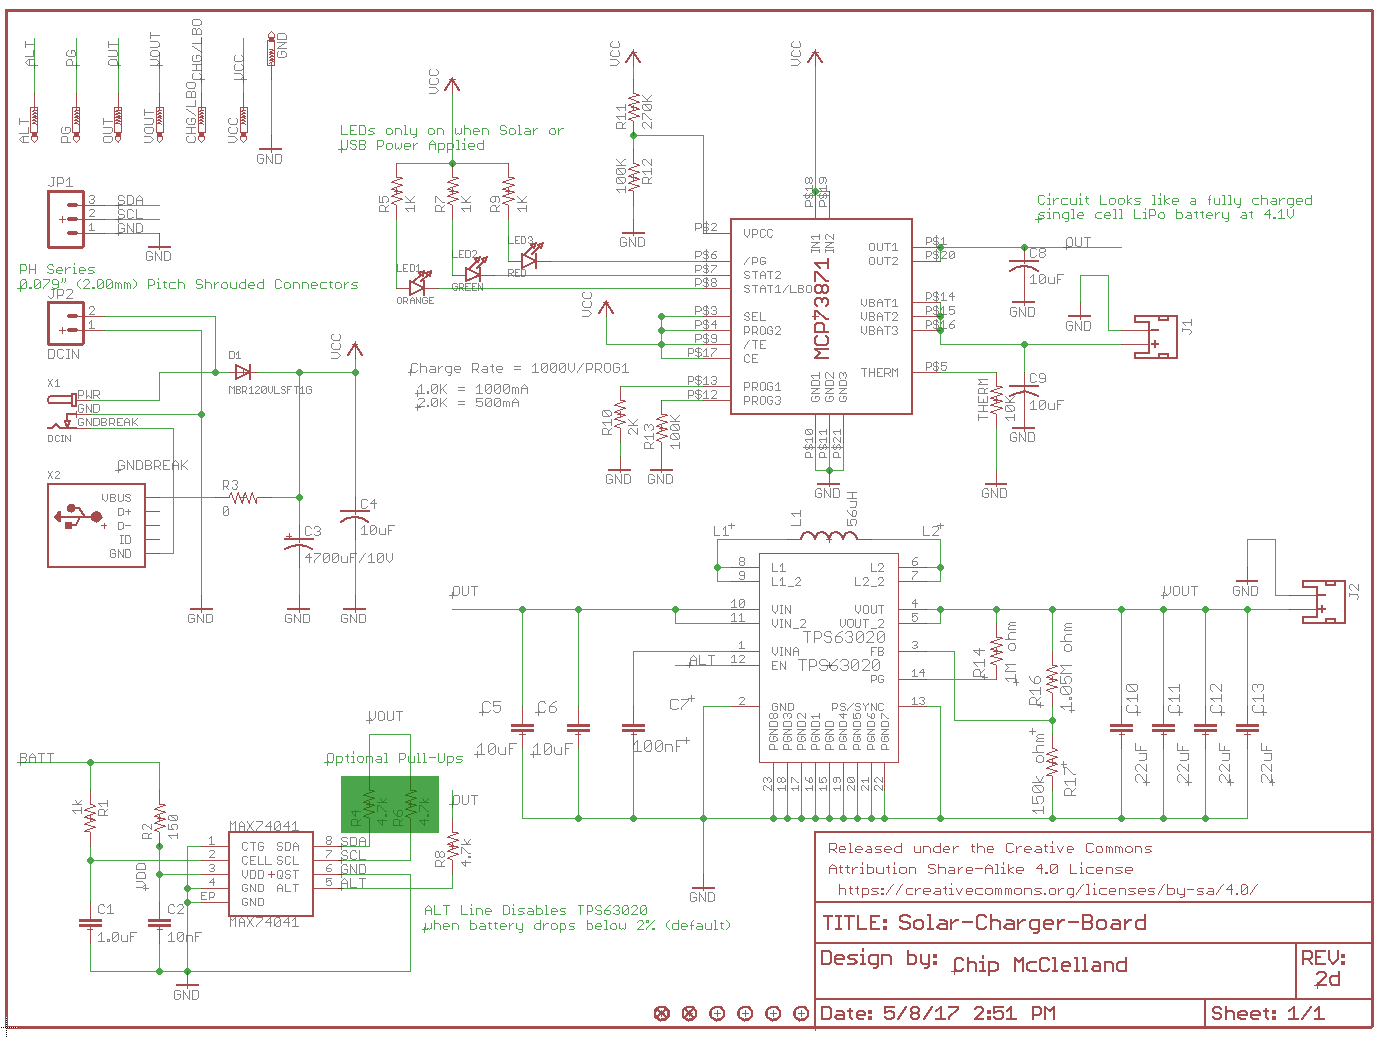
Purpose for the ComponentsThe system diagram shows what the major components are for this system. My interest was to develop a system that can manage solar energy to keep the battery charged indefinitely. In order to do this, I needed the following functionality:
- Safely charge the LiPo battery (don't want to start forest fires)
- Seamlessly switch between external power, solar and battery
- Deliver a consistent 4.2v (fully charged battery) voltage to microcontroller
- Monitor and communicate the actual state of the LiPo battery's charge
- Automatically turn off the load if the battery level reaches critical levels
These requirements are met using the following components:
- MicroChip MCP73871 to manage the solar and DC charging of the LiPo battery. While not a solar-specific charger, I have found it works well in this use and allows me to top-off the battery using a variety of inputs. Since it is focused on charging, the voltate output will vary from 3.6 to 6V depending on the availability of sunlight and the state of charge on the battery. To handle this range of voltages, I would need to put extra circuitry and complexity on my microcontroller. So the output goes to the ....
- Power Supply - TI TPS63020 Buck-Boost Converter. This magical chip can either increase or decrease the voltage at high-efficiency. The output of the converter is variable so, I picked values to deliver a consistent 4.2V to the microcontroller which is what it would expect from a fully charged battery.
- All this requires some monitoring and that is where the Maxim MAX17043 LiPo Fuel Gauge comes in. It can communicate the exact charge level to the microcontroller via i2c. It will also take action and turn off the power supply once the battery is dead.
A note on LiPo safety. If you are going to build this, please pay attention to the components listed on the data sheet. There are some elements which control the safe temperature range for charging the battery and the rate at which it is charged. I have had no issues over a couple years and the temperature ranges of the seasons. If you are not comfortable with this part, I encourage you to buy the Adafruit DC/ Solar Charger board and use the Solar Charge Manager v1 which only contains the fuel gauge and power supply components. Also, please buy your LiPo batteries from a reliable source such as the one in my components link.
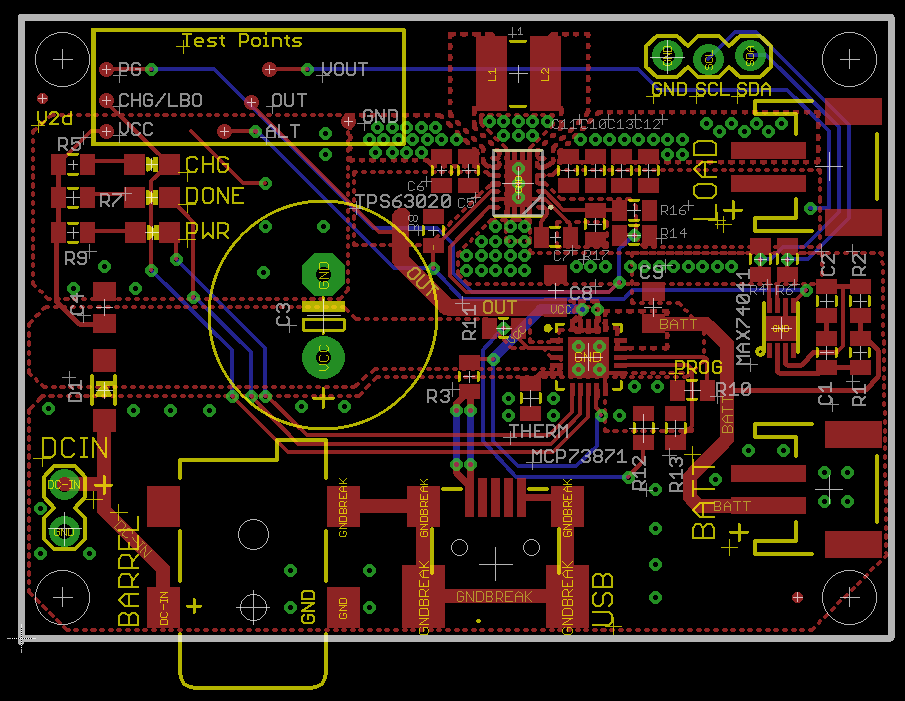
PartsIf you would like to try the board as-is, you can order the board and stencils from OSHPark and OSHStencils respectively. Using the link in the Things section you can get the board for about $20 for a set of three.
OSHStencils will send you a stainless steel stencil in a few days so you can apply the solder paste in a technique not unlike silkscreening a t-shirt.
You then place the parts on the pads and put it into a reflow oven. Dave from EEBlog did a great tutorial on this technique which I would recommend.
Application in Local ParksI am using these Solar Power boards for my Trail Counters in local Raleigh parks. You can see the progress I am making in better understanding park utilization by following me on Twitter. Here is what it looks like, counting pedestrians and bikers coming into the park (see small solar panel on the information kiosk).


_1x_bGT19vVAby.png?auto=compress%2Cformat&w=40&h=40&fit=fillmax&bg=fff&dpr=2)


_3u05Tpwasz.png?auto=compress%2Cformat&w=40&h=40&fit=fillmax&bg=fff&dpr=2)


Comments