


Hardware components | ||||||
 |
| × | 1 | |||
 |
| × | 1 | |||
 |
| × | 1 | |||
 |
| × | 1 | |||
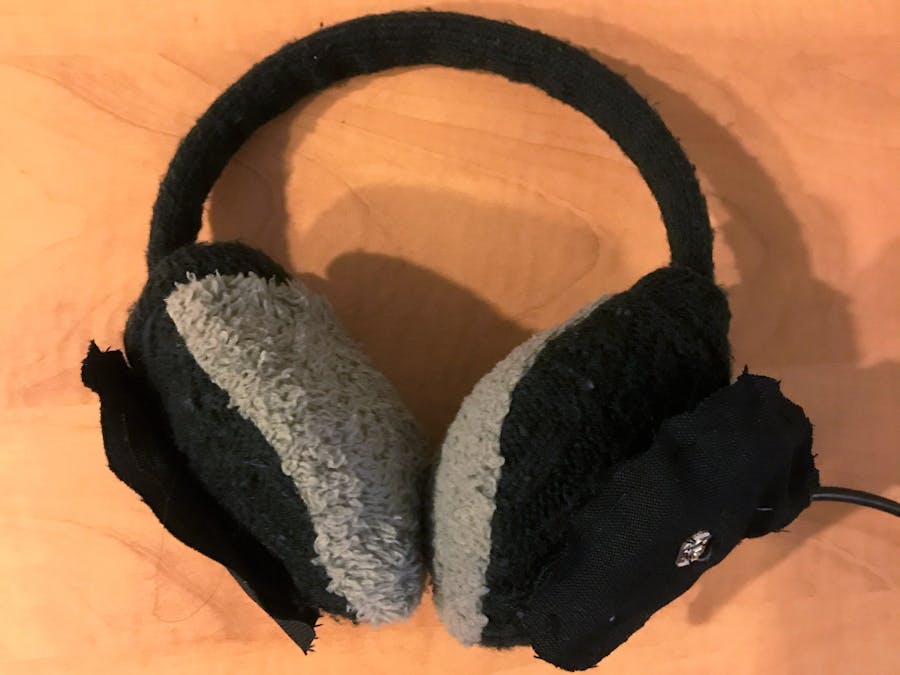
I had a pair of earmuffs lying around, so I wanted to use them to experiment with embedding sound into a soft object. The electronic components of the project are detachable, so the earmuffs can still be worn safely in wet weather.
Materials- LilyPad Protosnap Plus Board
- LilyPad Buzzer
- LilyPad Button
- 110mAh LiPo Battery
- Conductive thread
- Alligator clips (at least 5)
- Earmuffs
- Large scrap of black fabric
- 4 metal sew-on snaps
- Black thread
- White thread
1. Gather materials
2. Prototype the schematic with alligator clips
3. Cut out five circles out of the black fabric. The circles should be about three inches in diameter, or big enough to fit the LilyPad board and the battery.
4. Secure the LilyPad board on to one of the circles with black thread. Secure the button on to another one of the circles with black thread.
5. Attach the circle with the board and the circle with the button to each other with black thread. The board and the button should be facing outside.
6. Using conductive thread, attach one end of the button to the A4 port on the board. This will be the positive end for the button. For all of the conductive connections, be careful not to let them intersect with each other.
7. Secure two snaps on to another black circle with black thread. Then, line up the snaps so that they're even with the circle with the board and the buzzer. The snaps should be facing outside.
8. Sew the snaps with conductive thread so that one snap is attached to the A3 port on the board and the other snap is attached to the negative port on the board.
9. Attach the battery to the board. Then secure the circles with the board/button and snaps together with black thread, leaving room for the LilyPad USB to charge if needed.
10. Sew the negative end of the button to the snap that goes to the negative port on the board with conductive thread. One side of the detachable components is now done.
10. Secure two snaps on to another black circle with black thread.
11. Secure the buzzer into the middle of the last black circle with black thread.
12. Line up the unattached circle with snaps and the circle with the buzzer so that they're even. The buzzer and the snaps should be facing outside.
13. Sew one of the snaps to the positive end of the buzzer with conductive thread. Sew the other snap to the negative end of the buzzer with conductive thread. The two detachable components are now done.
14. Embroider a plus sign with white thread on to each detachable component, to indicate where the positive charge is flowing. This is so the circuit can be attached properly.
15. Sew the corresponding snaps to the earmuffs. There should be two snaps per earmuff side.
16. Using conductive thread, connect one of the snaps to the other snap across from it on the earmuff. Then, use conductive thread to connect the remaining snaps.
17. Attach everything together, using the plus signs as a guide. Assuming the battery is charged, the earmuffs should then play "Say So".
Final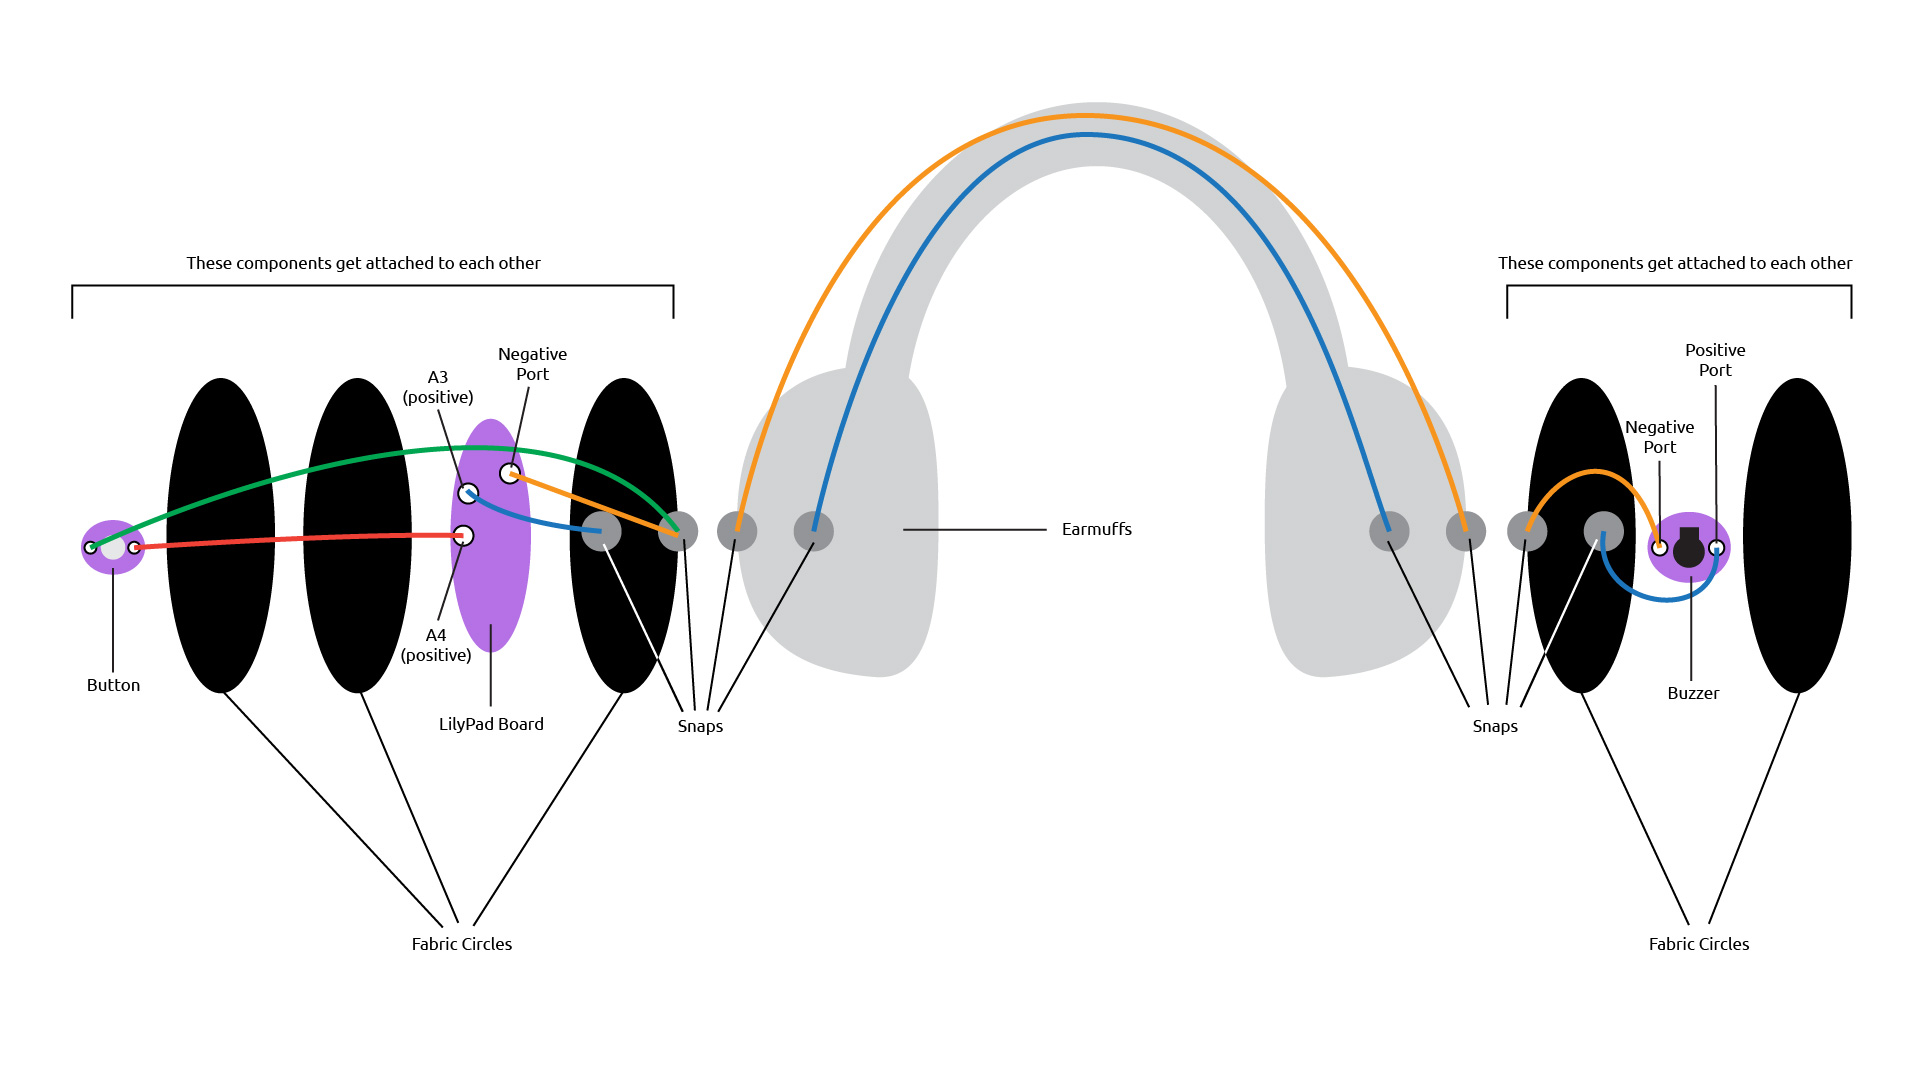


_3u05Tpwasz.png?auto=compress%2Cformat&w=40&h=40&fit=fillmax&bg=fff&dpr=2)


Comments
Please log in or sign up to comment.