Backstory
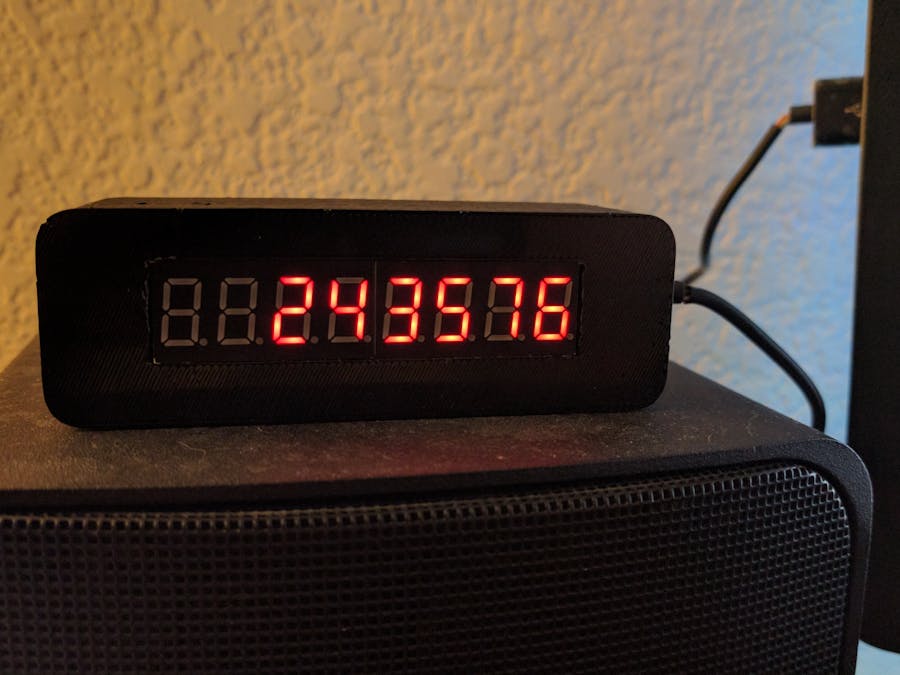
I maintain a semi-popular PHP package (league/commonmark). I occasionally check on the total number of downloads - it's a great reminder of how much my open-source work is helping others. Instead of manually checking it every other week (or whenever I remember to), I decided to build a simple device to continuously display this count for me.
GoalsMy primary goals were to:
- Regularly pull the latest total install count.
- Display it on a 7-segment display.
- Be as small as possible.
- Have no external dependencies - everything should run on the device.
I decided to build this project using the Particle Photon. This is an Arduino-like device with built-in WiFi - important because the device needs to pull data from the Internet. The cloud service also allows you to create webhooks - predefined HTTP requests that can easily be dispatched and received by the firmware with minimal coding. (I originally considered using a Raspberry Pi Zero, but that's a larger board and would have a protruding WiFi dongle.)
For the display, I went with an 8 digit 7-segment display I picked up on eBay. I only need 6 digits to show the current count, so I don't expect to ever run out of display space. (That wouldn't be a bad problem to have!)
The display's product listing showed 5V were required but it seems to run fine with 3.3V instead.
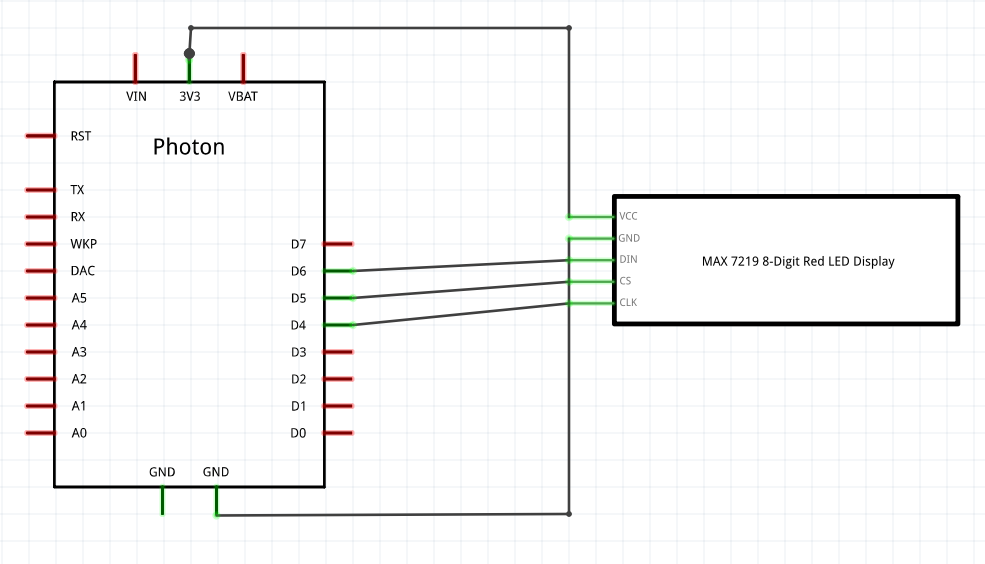
WiringWiring was super simple - I just made five direct connections between the display's board and the Photon:
- VCC => 3V3
- GND => GND
- DIN => D6
- CS => D5
- CLK => D4
The firmware I wrote does the following:
- On boot, show
--------. - Request the latest package count.
- Parse the JSON to retrieve the number and display it.
- Repeat steps 2 & 3 above every few minutes.
Packagist provides all the package information, including version details and download counts, via a (relatively) massive 32.5KB file: https://packagist.org/packages/league/commonmark.json This is a problem because the Photon webhooks provide the response in 512-byte chunks spaced 250ms apart; it's possible that the single integer I want would be split across a chunk boundary and would require complex logic to accurately grab.
I briefly considered throwing a simple PHP script online to parse this and only return the total downloads, but that would defeat my goal of having a single, standalone device.
I ultimately ended up using Yahoo's YQL service to query for the single field I wanted. As a result, my firmware only needs to handle a single 124 byte response:
{"query":{"count":1,"created":"2016-04-27T21:40:25Z","lang":"en-us","results":{"package":{"downloads":{"total":"243576"}}}}}
To parse the number without a JSON library, I simply look for "total":" and extract everything between that and the next " character.
Creating the webhook was as simple as running this particle-cli command:
particle webhook GET commonmark-count "https://query.yahooapis.com/v1/public/yql?q=select%20downloads.total%20from%20json%20where%20url%3D'https%3A%2F%2Fpackagist.org%2Fpackages%2Fleague%2Fcommonmark.json'&format=json&env=store%3A%2F%2Fdatatables.org%2Falltableswithkeys"
The firmware checks for the latest count every 5 minutes. Packagist caches the JSON data for a short while, so updating more-frequently wouldn't have any effect.
You can find the full source code for the firmware down below.
EnclosureI designed a custom enclosure in Tinkercad and had it 3D printed. Here's a screenshot of the rendered model (shown in yellow for easier viewing):
Inside the case I added two small ledges to hold the display in place. These were ultimately a couple mm too far away, but the display fits so snugly in the cutout that it ultimately wasn't needed.
I also added a simple honeycomb pattern of holes on the back for ventilation. I don't know how warm the Photon gets, but this will always be running and I didn't want to take any chances.
The actual STL file can be found further below.
AssemblyThe first step was to test-fit everything in the enclosure. You'll notice the body has two cutouts - one for the screen and another for the USB port. The LED display was 61mm wide, but I used 60mm in the model and the final print measured 59mm. I therefore used a Dremel to widen it. The screen now fits nice and snug inside.
I also didn't properly measure the USB cutout, so I widened that out too. (I should really invest in a caliper...)
Once I was certain everything fit, it was time to solder the components together. I used a second Photon without header for the final product. Using some 22 gauge connecting wire, I connected the Photon's pin holes to the display. The display's headers weren't facing the right way, so I ended up keeping them and soldering the wires onto the other side of them. Some additional heat shrink was added to help insulate the connections and keep them from breaking off.
The Photon sits directly on top of the display's board. They are separated by the wires and some extra electrical tape for good measure.
The USB cable was then placed snugly into the hole and connected to the Photon.
I'm very pleased with the final result - it works perfectly and looks great!


Comments
Please log in or sign up to comment.