Abstract
Weather monitoring is a common hobby of hackers and technology enthusiasts. The hardware and infrastructure is getting expansive fast and it is often hard to set up. Today, we want to show you how easy it is to use the Connectino with a sparkfun weather shield to get temperature, pressure and humidity data to our Connectino Weather app.
Requirements
To setup the Arduino IDE for Connectino please use our Quick-Start-Guide available at: Initial Setup
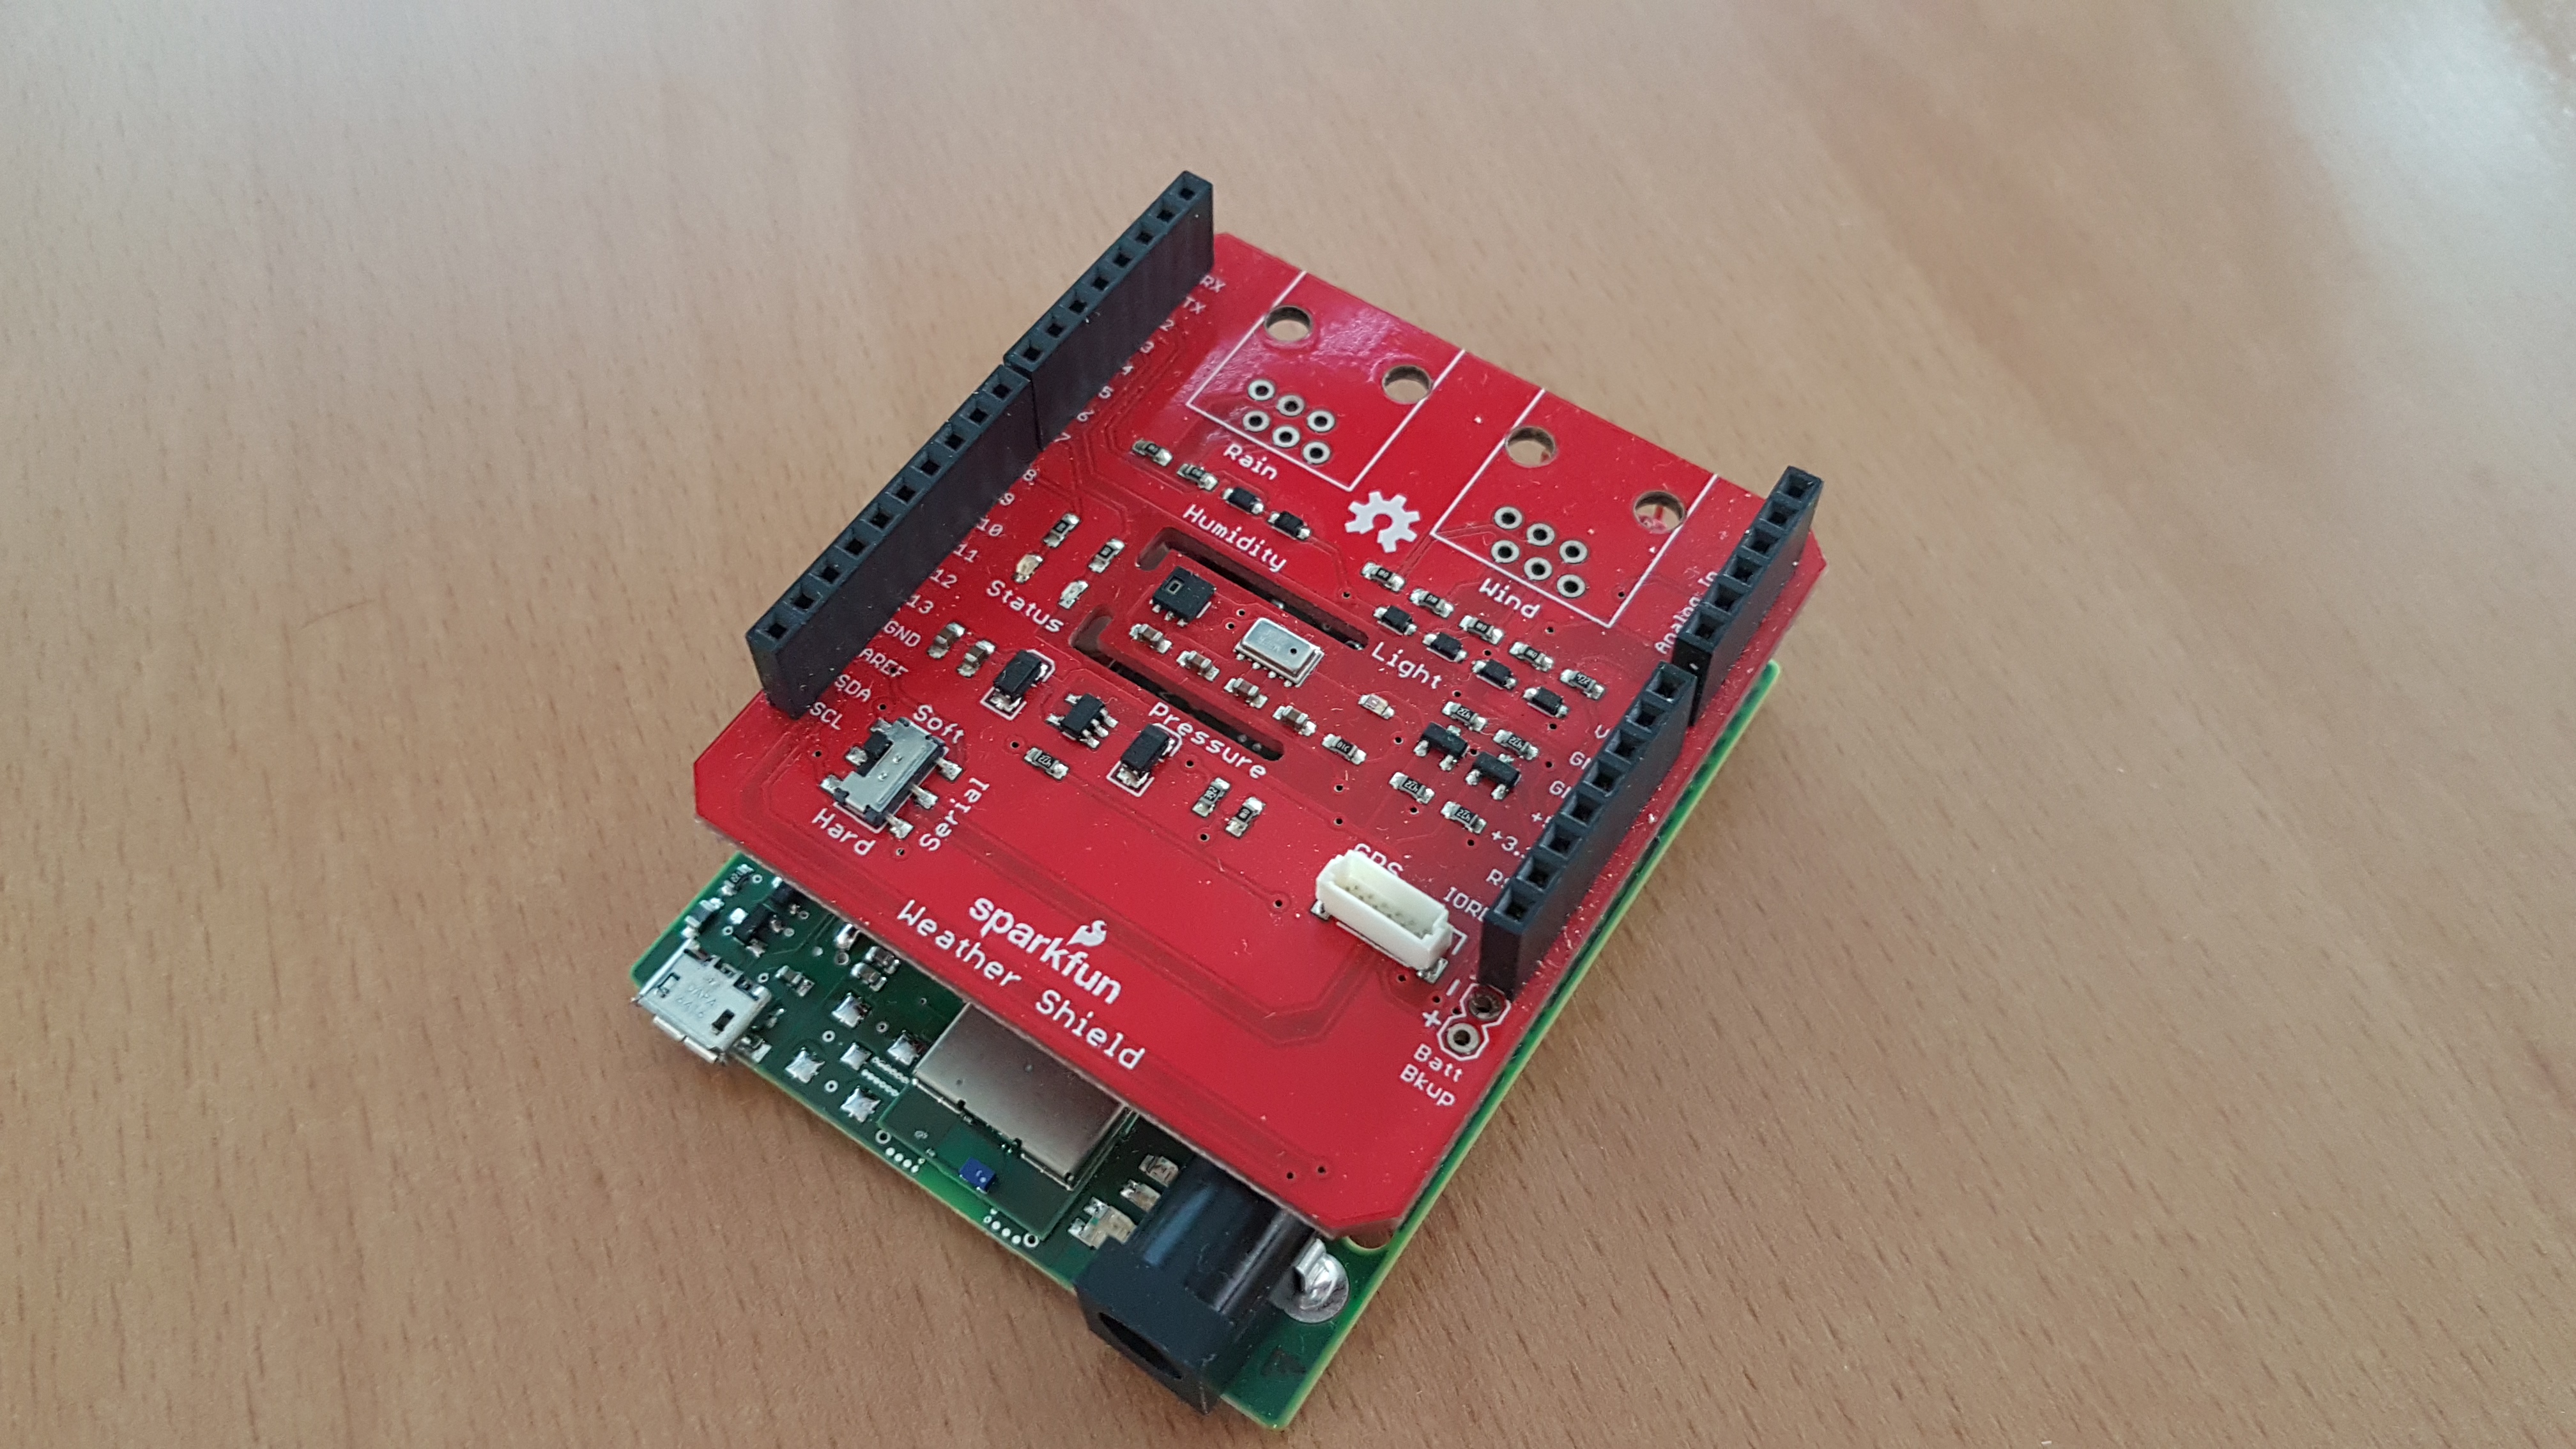
You will need a Connectino and a Sparkfun Weather Shield like in the picture or a similar weather shield.
This tutorial was verified to work with the following software versions of the Connectino library and WiFi module firmware:
- Connectino Library: 1.0
- Wifi module firmware: 1.0 and 1.1
Hardware Setup
You just have to connect the Weather Shield to the Connectino. If you already know how to set it up with the Arduino, it will be no difference on the Connectino. Be aware of older hardware revisions.
Setup IDE
To use the Sparkfun Weather Shield you need to install the necessary libraries for the sensors. To do so, start the Arduino IDE, go on “Sketch”>”Include Library”>”Manage Libraries” and search for the libraries as shown in the pictures below and install them.
SparkFun HTU21D Humidity and Temperature Sensor Breakout:
SparkFun MPL3115A2 Altitude and Pressure Sensor Breakout:
Smartphone App
Connect device
When started the app will automatically search for Connectino devices in the connected local network. Make sure to have the your smartphone either connected to the same network as your Connectino or to have it connected directly.
If you have to insert user credentials and did not change them it should be the default credentials.
User interface
The app shows the measured temperature (Temperatur), pressure (Druck) and humidity (Feuchtigkeit) as numbers and with graphical representations in between the configured limits. In the header the city configured and sent by the sketch is displayed, as well as the date and time of the last received measurement update. On the right you see thee buttons with the following functions:
Upload sketch button (left): Upload an example sketch to the connected Connectino. The app includes the sketch, so you don’t have to worry on how to get the sketch into the app. To use your own sketch just upload it as usual.
Configuration button (middle): For further configuration of the Connectino the Connectino app will be started. If you don’t have it installed yet, the playstore will be opened on the according page.
search devices button (right): You can restart the device search, from when you started, to find all the Connectinos available trough your network. When the scan finished you can choose another device with a weather shield to observe.
Download the Weather Connectino App:
Android App:
IPhone App:
/
Code
Setup Function
On the startup the Connectino has to configure and to enable the sensors on the weathershield as well as the ajax communication on the IoT-Module.
Loop Function
In the running programm, it is always checked, if an app sent a query for weather information. If it did, all requested informations are fetched from the sensors and sent back to the app.
Sourcecode
Download example: ConnectinoWeather.ino
#include <ConnectinoAjax.h> // Library for Communication with the Connectino
#include <SoftwareSerial.h> // Necessary for Connectino
#include <Wire.h> //I2C needed for sensors
#include "SparkFunMPL3115A2.h" //Pressure sensor
#include "SparkFunHTU21D.h" //Humidity sensor

#define ZONE "+1"
#define PLACE "Hannover"
#define T_MAX 40  // Temperature maximum, Default: 85
#define T_MIN -20  // Temperature minimum, Default: -40
#define T_UNIT "°C"  // Temperature unit, Default: "C"
#define P_MAX 1060  // Pressure maximum, Default: 1100
#define P_MIN 966  // Pressure minimum, Default: 500


MPL3115A2 pressure; //Create an instance of the pressure sensor
HTU21D humidity; //Create an instance of the humidity sensor


// Variables to save the values in
float hum = 0; // Humidity[%]
float tempf = 0; // [temperature °F]
float tempc = 0; // [temperature °C]
float press = 0; // Pressure[Pa]
uint16_t cmdLen = 0; // the length of the command (not used)
uint8_t cmdReadingHead = 0;
char ajaxCmd[32] = "";
String ajaxResponse = "";

ConnectinoAjax ajax = ConnectinoAjax(StxSerial);
SoftwareSerial debug = SoftwareSerial(4,5);

void setup() {
  //Configure the pressure sensor
  pressure.begin();               // Get sensor online
  pressure.setModeBarometer();    // Measure pressure in Pascals from 20 to 110 kPa
  pressure.setOversampleRate(7);  // Set Oversample to the recommended 128 (=>7)
  pressure.enableEventFlags();    // Enable all three pressure and temp event flags

  StxSerial.begin(115200);
  StxSerial.add(ajax);

  debug.begin(9600);

  //Configure the humidity sensor
  humidity.begin();
}

void loop() {
  //Get command from Connectino
  if (ajax.dataAvailable())
  {
    ajax.getData(ajaxCmd, cmdLen);
    cmdReadingHead = 0;
    while ( cmdReadingHead < cmdLen ) {
      switch (ajaxCmd[cmdReadingHead]){

        case 'c':
          //Return the config for the temperature scale
        ajaxResponse.concat("c="
          + String(T_MIN) + ","
          + String(T_MAX) + ","
          + T_UNIT);
        break;
           case 'd':
          //Return the config for the pressure scale
          ajaxResponse.concat("d=" + String(P_MIN) + "," + String(P_MAX));
        break;
        case 't':
          //Measure temp in fahrenheit from pressure sensor
          tempf = pressure.readTempF();
          //Convert from Fahrenheit to Celsius
          tempc = (tempf - 32) / 1.8 ;
          ajaxResponse.concat("t=" + String(tempc));
          break;

        case 'p':
          //Calc pressure & Convert from pascal to hektoPascal
          press = pressure.readPressure() / 100;
          ajaxResponse.concat("p=" + String(press));
          break;

        case 'h':
          //Calc humidity
          hum = humidity.readHumidity();
          ajaxResponse.concat("h=" + String(hum));
          break;

        case 'z':
          //respond time zone
          ajaxResponse.concat("z="ZONE);
          break;

        case 'l':
          //respond place/location
          ajaxResponse.concat("l="PLACE);
          break;

        default:
          ajaxResponse.concat(";");
          break;
      }
      cmdReadingHead++;
    }
    ajax.respond(ajaxResponse.c_str()); // send response
    ajaxResponse = ""; // "clear" response
  }
} Conclusion
You see monitoring the weather can be very easy. You just need your Connectino, a Weather Shield and the app on your smartphone and within Minutes you can work your own weather station.
Troubleshooting
The Humidity is -998 or the given minimum
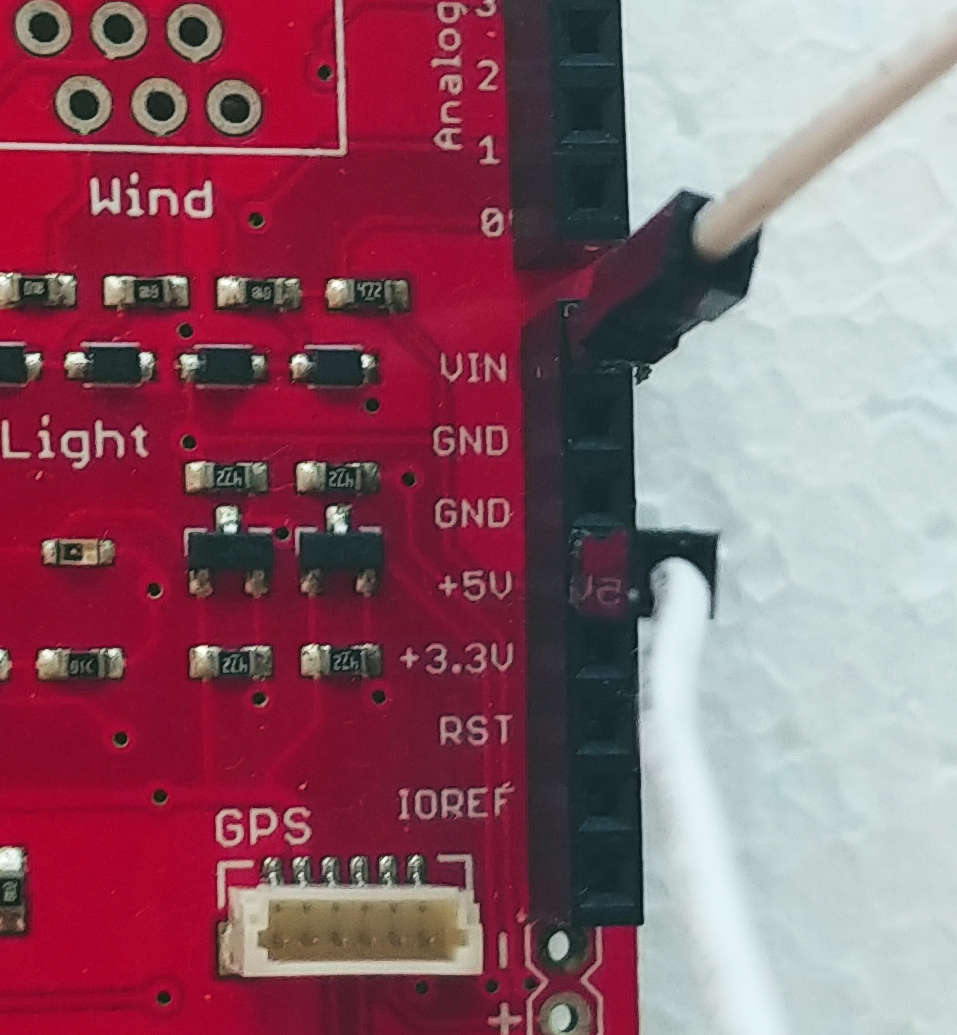
-998 on humidity is an errorcode of the sparkfun-library, meaning that the communication with the shield failed. If your Connectino got a 5V and a 3V output, connect the 5V port to the Vin port. If you still get the error code, check the connection pins of the shield.


_3u05Tpwasz.png?auto=compress%2Cformat&w=40&h=40&fit=fillmax&bg=fff&dpr=2)


Comments
Please log in or sign up to comment.