
Hardware components | ||||||
_ztBMuBhMHo.jpg?auto=compress%2Cformat&w=48&h=48&fit=fill&bg=ffffff) |
| × | 1 | |||
 |
| × | 1 | |||
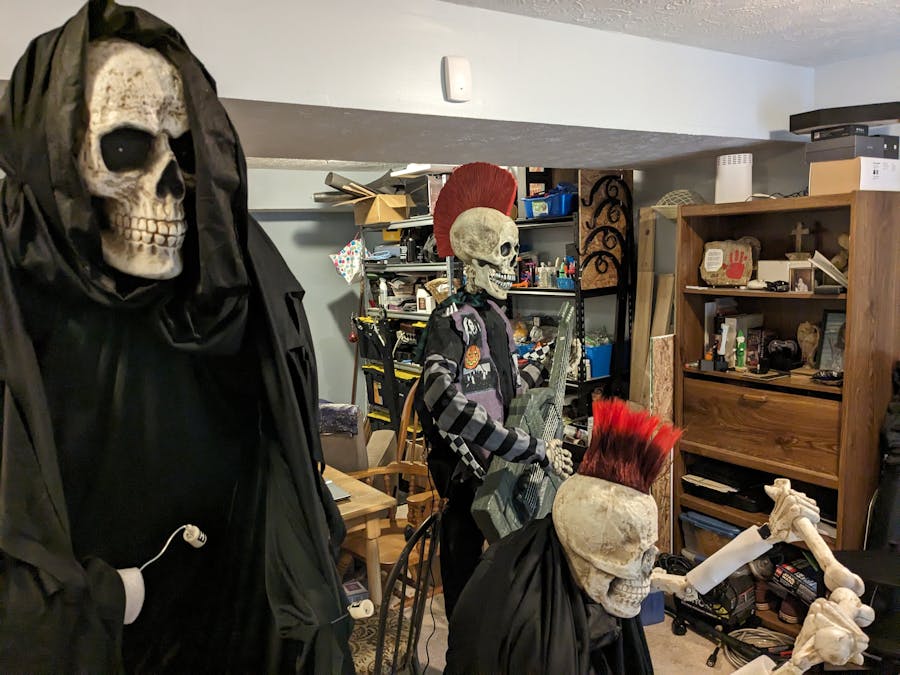
As a Halloween fanatic, I needed a way to sync up the Costco Skeleton punk rocker animatronic with the Lowe's Bluetooth Reaper Band animatronics. Once I figured out what I needed to do it was surprisingly easy. This little project will keep the punk rocker animation going for as long as the music is playing, just like the Lowe's Reaper Band animatronics do.
I wanted a good way to sync them up, and do it nondestructively so I wouldn't have to cut or splice any wires and the whole thing could be undone if necessary.
The Reaper Band and Punk Rocker look great together, but they are entirely different products and concepts from different manufacturers and retailers. The way they work is completely different - the Reaper Band acts as a Bluetooth speaker and can synchronize animation between the two different props, and the Punk Rocker will only play from his own prerecorded 30-second bits, triggered by either a timer, a continuous mode, or a motion sensor.
Using Arduino, we can override that motion sensor and continuously trigger it as long as the Reaper Band is playing music, instead of waiting for motion to trigger it.
Here's a video of it in action:
DisclaimerThe usual stuff applies. I am not a professional and I am not responsible if you hurt yourself or damage your expensive props trying this out.
How It WorksThe Reaper Band syncs up to each other by using a small cable to plug one into the other. When music is playing, the Reaper Band prop set to "Leader" sends an analog signal to the Reaper Band prop set to "Follower".
As long as it's getting a signal, the "Follower" prop animation keeps playing. We need the Costco Punk Rocker to do the same thing.
The Arduino will listen to the analog signal coming the Reaper Leader and if it detects sound, it will send a pin up/pin down signal to the Punk Rocker, just like its motion sensor would, triggering an animation sequence while the music is playing.
We aren't going to use the motion sensor at all, it will be disconnected and the Arduino will be plugged in to the wires that the motion sensor was plugged into. Essentially, using the Arduino to make the Skeleton Punk Rocker think his motion sensor is being triggered. The sensor is just a simple PIR sensor which is actually very similar to the motion sensors sold for Arduino, so it was easy to figure out what was going on there. Even though we don't had access to the controller or software for the Punk Rocker, we can assume it's working the same way.
Basic Workflow1.) The Reaper Band Leader sends an analog signal to its Follower, with a value of 1-1024 for the audio signal, or 0 for paused/no audio (more on that later). This is the important thing that makes this project work.
2.) Arduino is connected to the output cable from the Reaper Band Leader, and if it detects an audio signal (1-1024) then it will do what the motion sensor normally does and send a PIN HIGH/PIN LOW digital command to the Punk Rocker's electronics.
3.) OPTIONAL - if you have a "Follower" Reaper Brand Prop, use Arduino to send the analog signal back out to the Follower prop to run the animation.
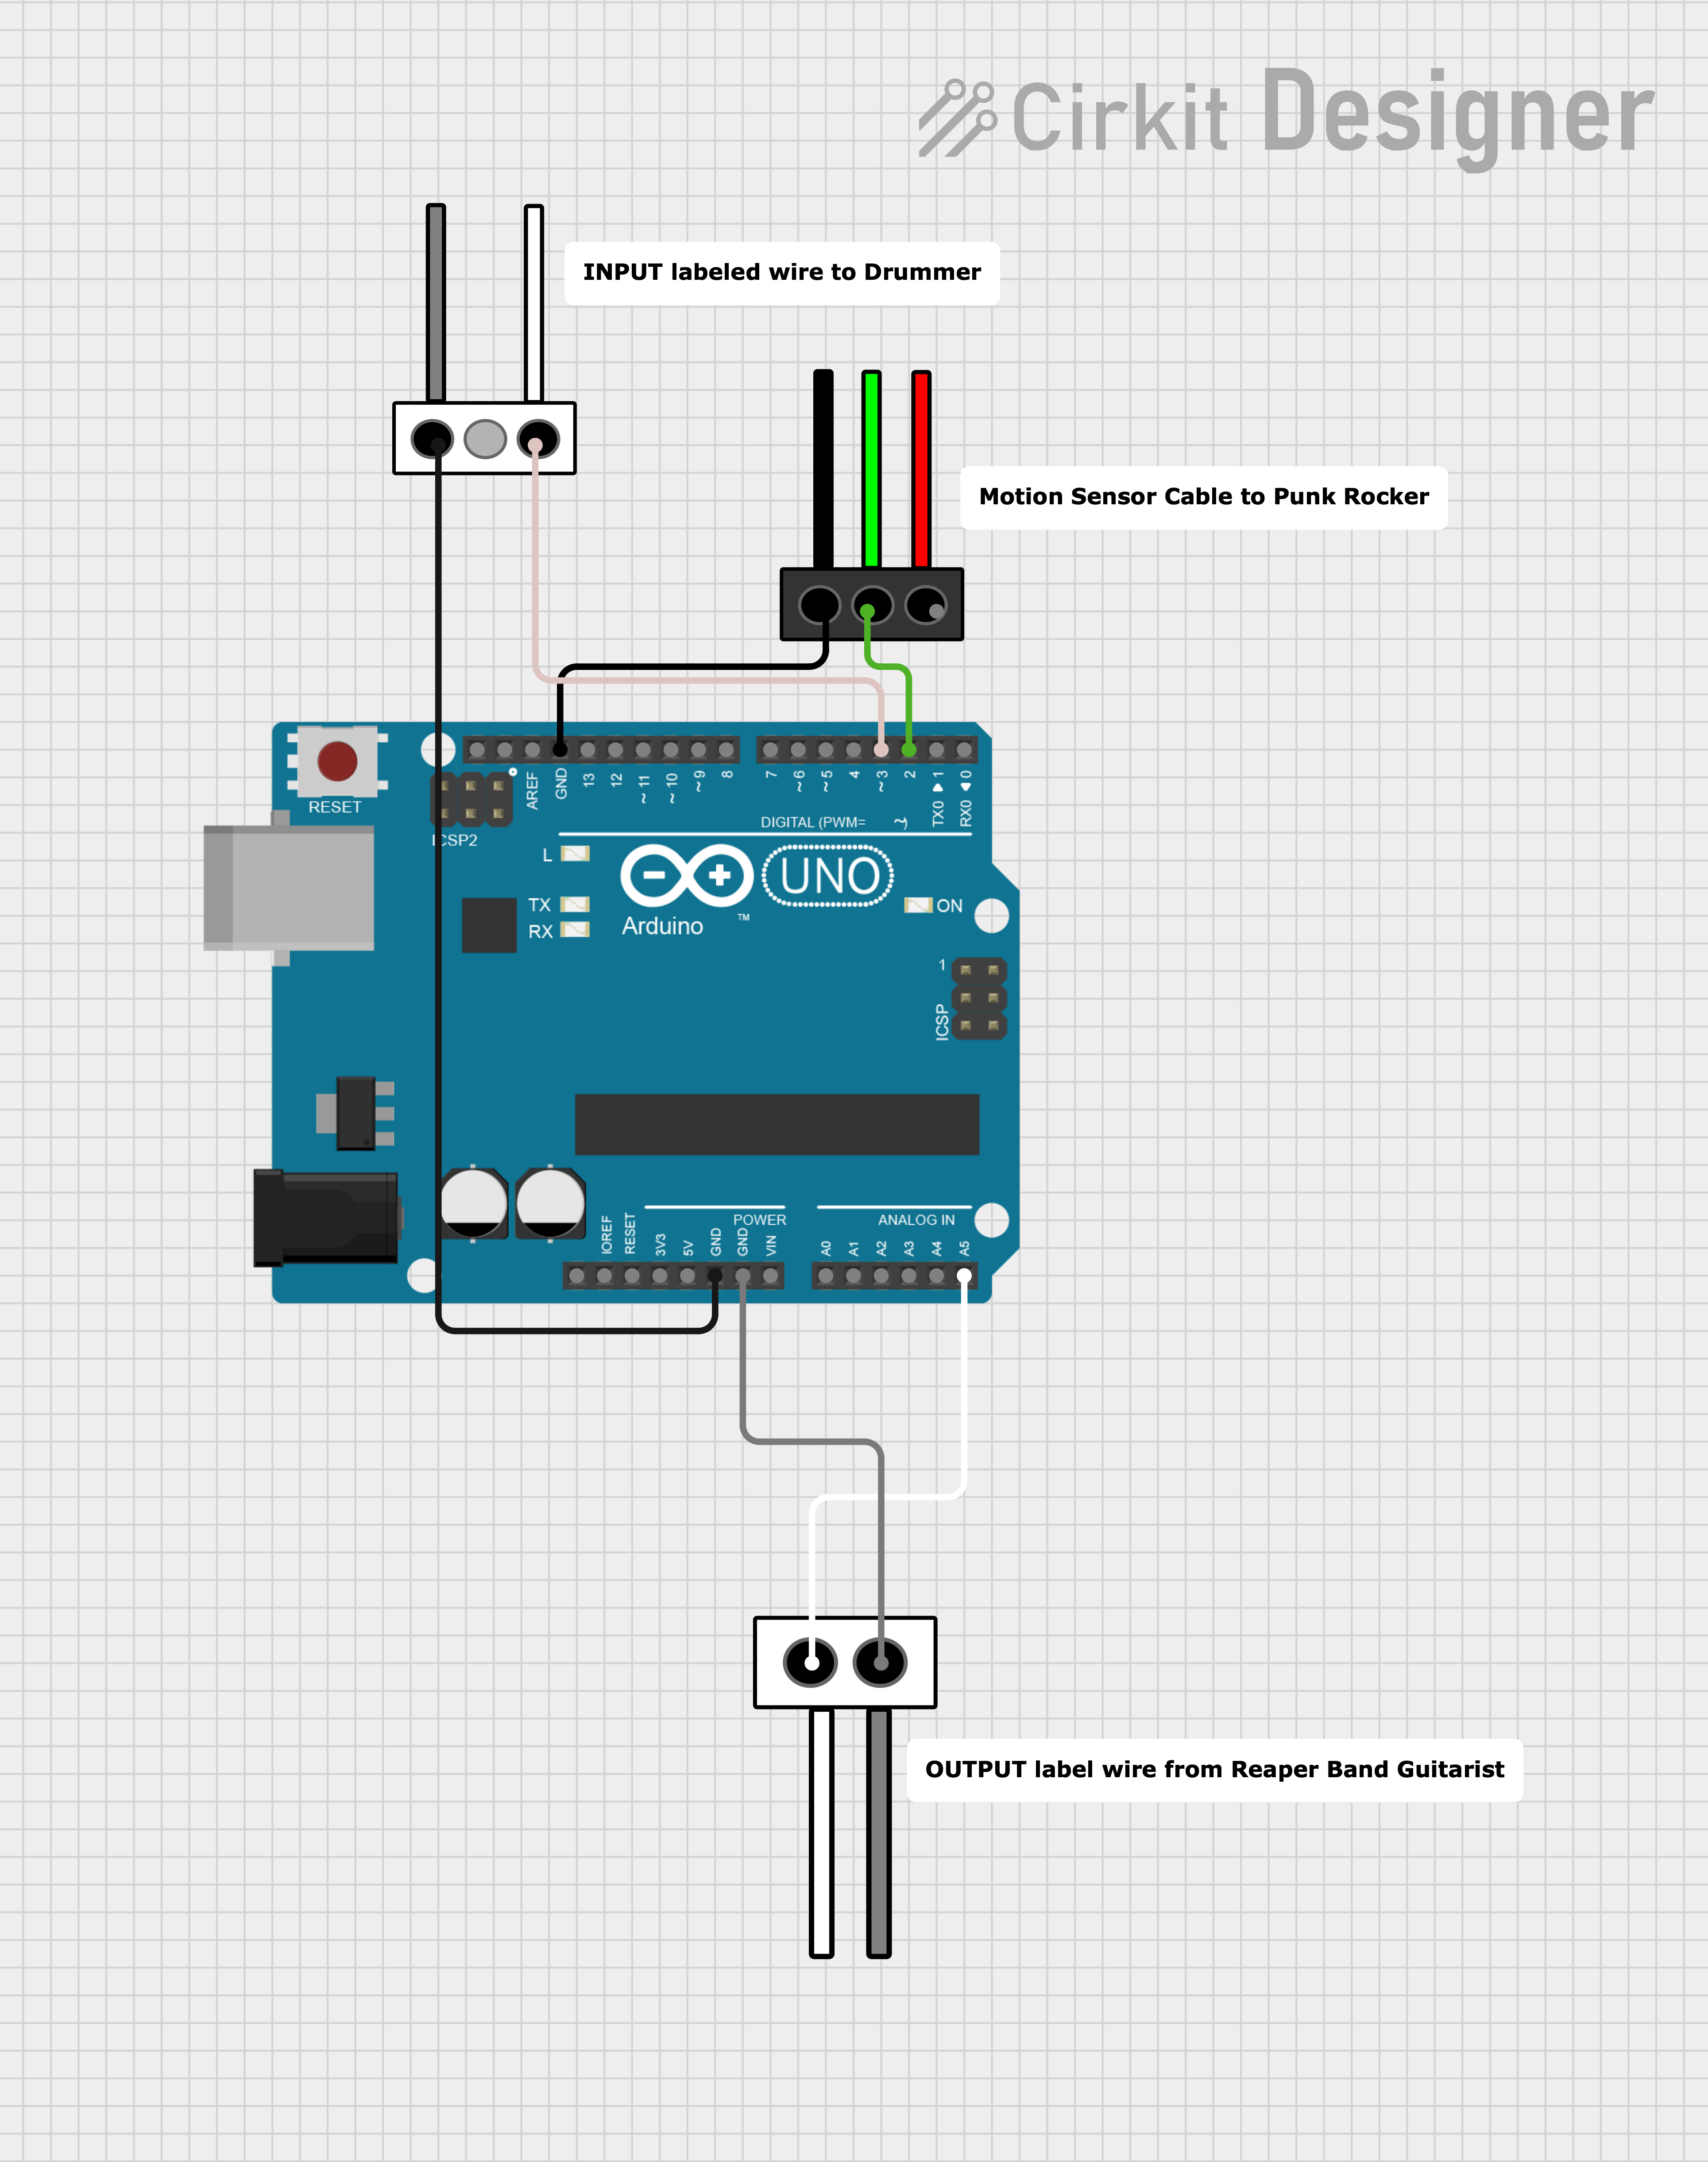
WiringFrom the Leader Reaper Band prop, use the Output/Input wire that was included with him. (if you're good with making wires, crimping, etc you could create a DuPont connector for this, but I just plugged in a couple of male/male jumper wires and secured them with shrink tubing).
You can then easily connect the output wire to the Arduino. From the Reaper Leader, connect the output wire to pins A5 (gray wire) and GND.
Next, connect the Arduino output to the Punk Rocker. Connect the green wire on the Punk Rocker's motion sensor wire port to digital pin 2 on the Arduino, and the black wire in this same port to one of the GND pins on the Arduino. We no longer need the red wire on this particular ribbon. Again, I just used jumper wires but if you want to make your own connections that works too.
If you have a second Reaper Band prop you want to make into a follower, there's now a problem: we've already used the included Input/Output cord to connect to the Arduino. Luckily, both of the Reaper Band props include their own Input/Output cord, so we can use the second cord to take the signal back out of the Arduino and into the second Reaper Band member.
Connect the second Reaper's Input/Output cord to GND and Pin 3, again using male-male jumper cables or Dupont connectors. (The ~3 on the header means that this pin is capable of analog output. Do not use 5 or 6 for analog output here, it sends too high of a signal and the animation will never stop.)
Wiring DiagramI labeled this according to how I set mine up, but you don't necessarily need to have Guitarist as leader and Drummer as follower. Also worth noting - the input/output cable included with the Reaper Band members has a 3-pin Dupont connector on the Output end with only two wires, the middle pin is not used. I tried to reflect that in my diagram. (I assume it was done this way to prevent connecting two input ports to each other).
Code is included in the normal code section.
Limitations/IssuesThe main thing is there's no way to stop the Punk Rocker once he starts one of his motion sequences. He's going to go for all 30 seconds every time, even if the current song stops, and even when the code has detected a stop. For example, if there is only 10 seconds left in the song that's currently playing, and the Punk Rocker gets triggered to start a new animation sequence, he will keep going for his entire 30 second sequence, even after the Reapers stop. Unfortunately there's no way to stop the Punk Rocker mid-sequence, so there's no way easy way to prevent this short of actually modifying his embedded software, which is way beyond the scope of my abilities and not likely possible (but if you know how please share!)
Finding a place to put everything might also be an issue. I stuck my Arduino inside a 3D printed case which is stored in a weatherproof socket box and made a long cable to connect to the Punk Rocker. Your mileage may vary.
Also, these are indoor props, but if you're going to put them outside like most people, make sure you protect your wires, connections, and Arduino.
Other Notes:It seems obvious, but make sure the Punk Rocker is in motion sensor mode or this project won't work at all.
Update, Sept 9: I kept seeing an issue where occasional random noise or interference on the analog input pin would cause the Punk Rocker to start when the music was paused. I fixed this by checking for an analog input over 200 instead of 0, since songs usually average around 900 for analog input and the little noise events were around 0-15. There's tutorials out there on how to "smooth" or "average" the analog input, which also works and is probably the more "correct" way to do it, but it's less code and works fine doing it this way.
Happy Haunting!


Comments