


NavQPlus is an open source reference design provided by NXP and manufacturable by anyone. Since NavQPlus has USB-C ports capable of being configured as a USB Ethernet Gadget, a cable with a USB-C connector on both ends is all that is required.
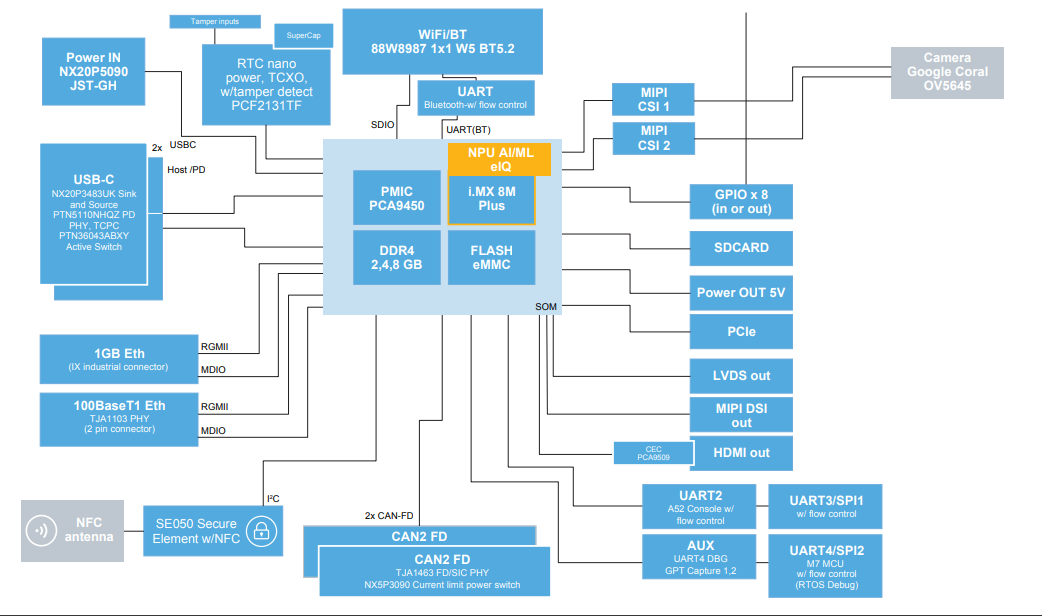
The board features abundant capability in vision, neural-net acceleration, and security:
- i.MX 8M Plus application processor with a Neural Processing Unit (NPU) operating at up to 2.3 TOPS.
- Dual MIPI-CSI cameras with dual ISPs. Hardware accelerated multimedia capabilities including 1080p60 h.264/h.265 video encode and decode
- 1000Base-TX Gb Ethernet with IX industrial connectors
- Dual CAN-FD
- Dual USB-C 3.1
- WiFi 5 / BTLE 5.0
- Linux Ubuntu/Yocto, ROS/ROS2, FastRTPS, OpenCV
The NavQPlus is suitable for many purposes, including generic robots, various vision systems, and AI/ML applications.
- Drones, Multicopters, Unmanned Aircraft, VTOL
- Rovers
- Road going Delivery Vehicles
- Robotic Vacuum
- Time of Flight (TOF) Cameras
Two specific complete developer tool examples are the NXP HoverGames Drone, and the NXP-CUP Car.
PowerPower on the NavQPlus by plugging in a USB-C cable. NavQPlus will boot, and you will be able to confirm it has fully booted by observing the LEDs on board. NavQPlus should boot normally after applying power. The boot process starts with U-Boot, loading the device trees in the boot partition and loading the Linux Kernel.
To log into NavQPlus, you can use the included USB to UART adapter, Ethernet, or USB-C gadget mode (recommended). The default username/password combo is as follows:
Username: user
Password: user
USB to UART adapterThe NavQPlus kit comes with a USB-C to UART adapter and a TTL to USB cable. This adapter is used to tap into the serial debugging console on NavQPlus.
Connect the included USB to UART adapter to the UART2 port on the NavQPlus, and open your favorite serial console application.
Use your favorite serial console software such as PuTTY (Minicom, MobaXTerm, or screen) to access the NavQPlus serial console directly. Open a serial console with a baud rate of 115200. Press enter if there is no output on the screen to get a log-in prompt.
Baud Rate: 115200
For this example, we use screen. The screen package is pre-installed on most Linux distros nowadays. If you don’t have screen installed on your system, you can easily install it using:
sudo apt install screenTo access the NavQPlus platform in this way, do the following:
screen /dev/ttyUSB0 115200Connect the included IX Industrial Ethernet cable to NavQPlus, and connect the RJ45 connector to your computer, switch, or router on your local network. You can log into NavQPlus over SSH. The default hostname for NavQPlus is imx8mpnavq. To SSH into NavQPlus, you can run the following command:
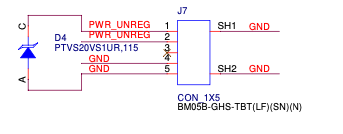
ssh user@imx8mpnavq.localNote: Our board did not arrive with this connection on the board due to shortage of components.
USB-C Gadget EthernetThe IP address of the usb0 network interface on NavQPlus is statically assigned to 192.168.186.3. If you want to use USB-C gadget ethernet to connect to NavQPlus, you will need to assign a static IP to your existing gadget ethernet interface on your computer. The network configuration is as follows:
IP Address: 192.168.186.2
Network Mask: 255.255.255.0
Once you have set up your USB-C gadget ethernet interface on your computer, you can SSH by running:
ssh user@imx8mpnavq.localTo connect NavQPlus to your local WiFi network, you can use the nmtui command:
sudo nmtuiFor a non-GUI way to connect to WiFi or manage your network connections, use nmcli by running the following command:
sudo nmcli device wifi connect <network_name> password "<password>"Once you are finished connecting to your local WiFi network, you can exit the application. Your NavQPlus will continue to connect to this WiFi network even after a reboot.
Configuring System Username and PasswordTo change the default username and password, use the commands below.
Username:
usermod -l <new_username> user
mv /home/user /home/<new_username>
Password:
passwdhttps://iroboteducation.github.io/create3_docs/hw/navqplus_hookup/
https://nxp.gitbook.io/8mpnavq/navqplus-user-guide/quickstart


Comments