Found Ryan Bate's Venduino kit online and fell in love with it. Bought one of the kits but as a hacker myself I wanted to see if there was anything I could do to make it unique for me, so I decided to add in a 2.8" TFT LCD touchscreen to the project.
Quick OverviewThere are three quick steps to this build: gathering the parts, wiring + testing the servos, and putting everything together.
Step 1: Gathering the PartsYou can order the lazercut kit for the Venduino via Ryan Bates website and check out https://www.thingiverse.com/thing:3306469 for the 3D printed LCD screen cover.It's pretty self explanatory to create the lazercut vending machine kit, just follow the pictures that come with the kit or on the website.
There is one adjustment that we are going to have to make for the 2.8" TFTLCD screen, the original screen size is for a much smaller LCD screen. So use a dremel to cut a 2.35" by 1.75" square around the original hole to fit the TFTLCD screen.
Next we are going to create the wire spools that hold the candy in the vending machine. I went to Micheal's and got some decorative wire because it was easy to work with. I found a nearby cylinder (something a bit smaller than a coke can) and spun the decorative wire around it six times. Then give the decorative wire about 3-4 extra inches and cut the wire. Use those remaining inches to attach the decorative wire to the servo arm.
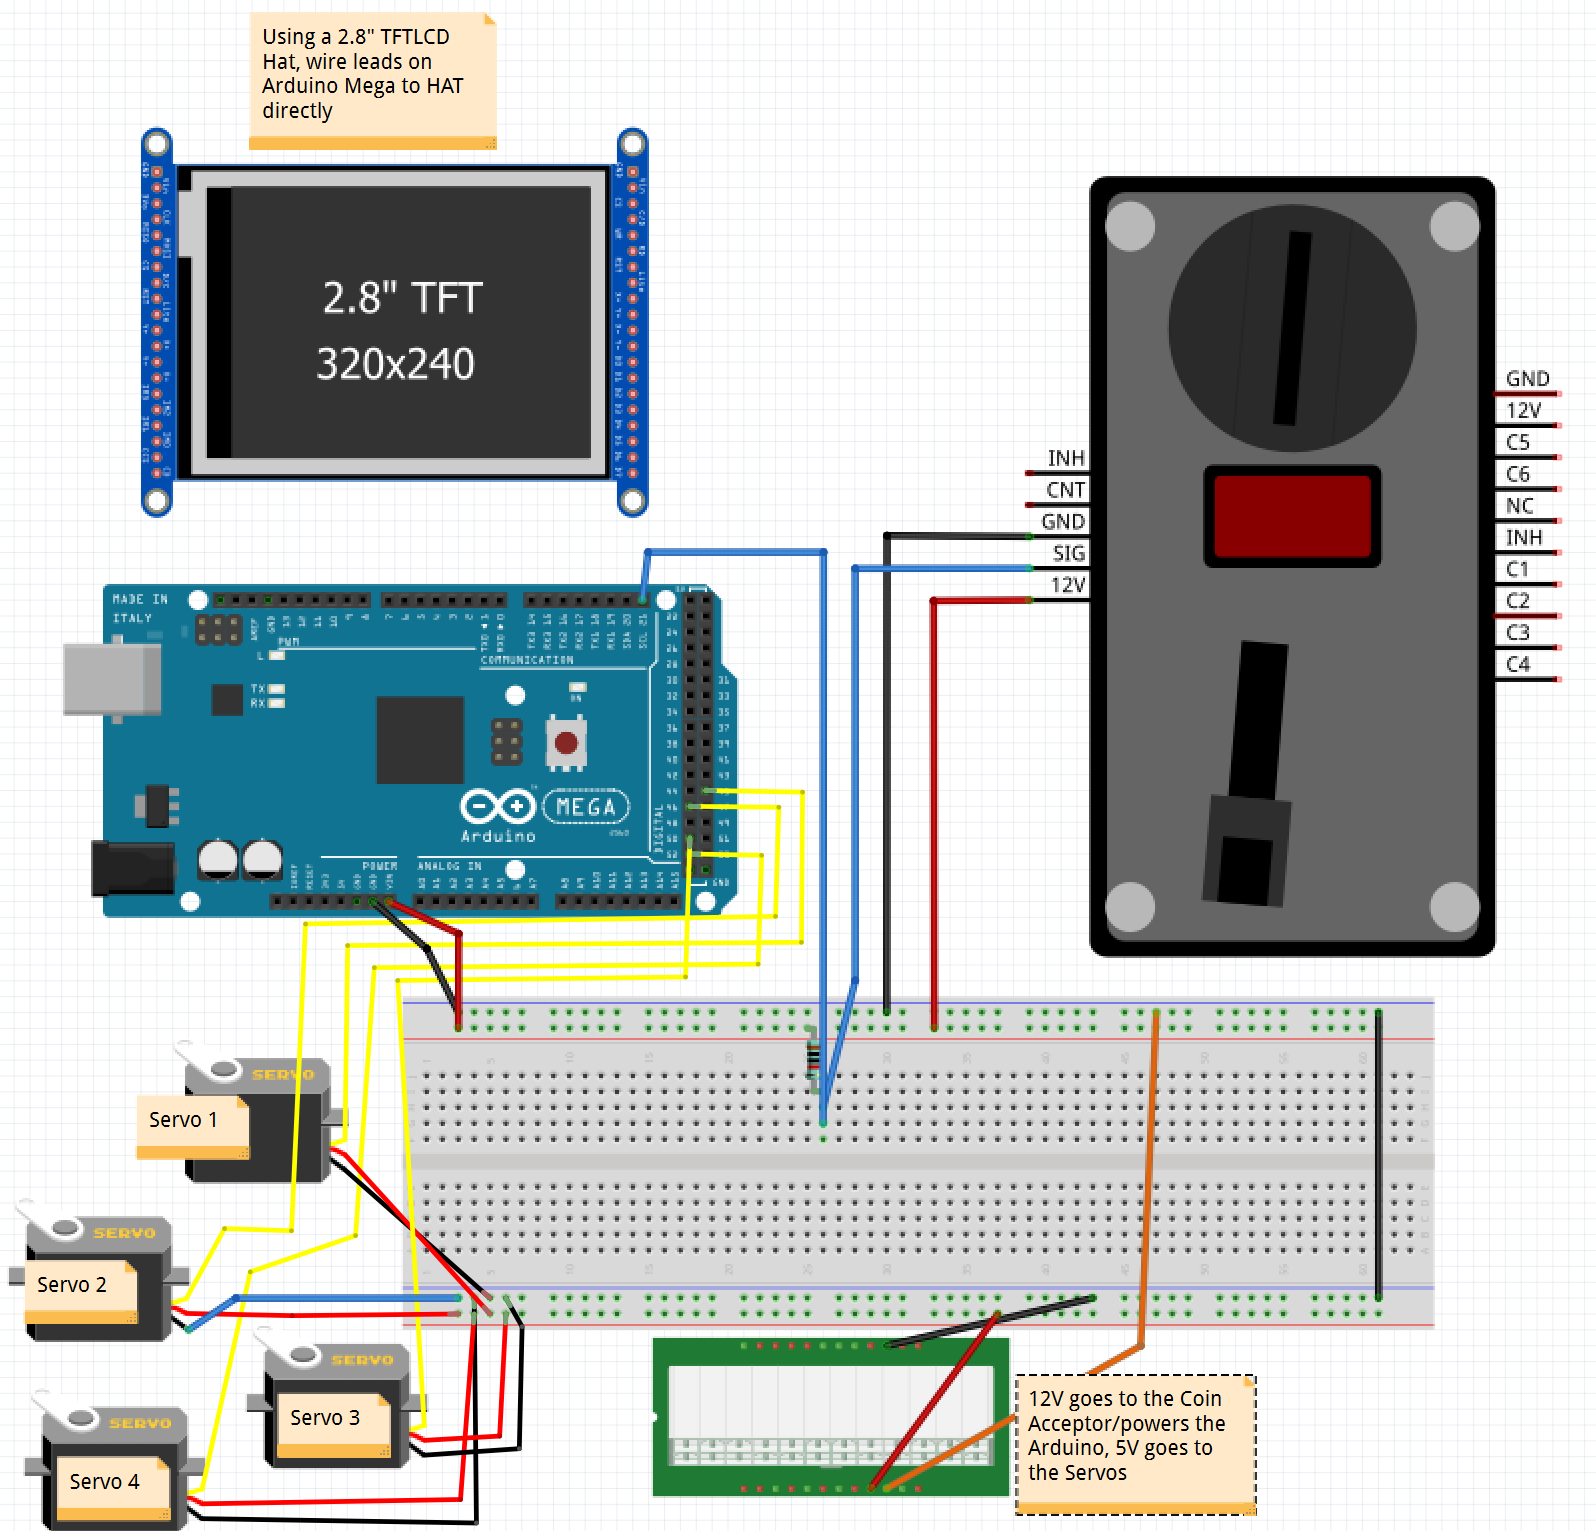
Next we are going to wire the Arduino Mega to the servos and coin machine and test it out. It's best to wire the entire system outside the Lazercut kit first to ensure that everything works before stuffing it into the Vending Machine.
Before loading the code onto the Arduino Mega you are going to have to train your coin machine. A few individuals at Make created a great guide on how to do this.
You are also going to have to include a few libraries to get the TFTLCD working. We will need a Modified Adafruit TFTLCD library, the Adafruit GFX library, and the Touchscreen library. All these libraries can be downloaded by following the links below.
Finally you should be able to load the code into your Arduino Mega and test to make sure your coin machine works, and the servos work.
Step 3: Tying Everything TogetherFinally we just have to put everything into the Lazercut Vending Machine kit. There is plenty of space in the top left hand corner so I placed both my Arduino Mega and Breadboard there and fed the wires to the Servos through the hole in the top right hand corner.
I also placed the 3D printed LCD cover on the TFTLCD to clean up the look on the install.
Then place the candy in the vending machine and close everything up!


Comments
Please log in or sign up to comment.