


Hardware components | ||||||
_ztBMuBhMHo.jpg?auto=compress%2Cformat&w=48&h=48&fit=fill&bg=ffffff) |
| × | 1 | |||
| × | 1 | ||||
| × | 1 | ||||
I wanted to come up with a password sequence program for a future engineering project I will be putting together to use in a film production. The password is an 8-digit string. I needed the program to be able to accomplish these conditions:
1. If the user tries to type in and enter less than the required 8 digits, the program returns an invalid response and requests you try to enter the password again.
2. If the user tries to type in and enter more than the required 8 digits, the program will do nothing and instead wait for the user to either press the CLEAR or ENTER buttons.
3. If the user wants to clear what they have typed in without having to go through the process of entering an incorrect password in order to start from the beginning, they can easily press the CLEAR button to quickly start over again.
4. Once the password has been entered, the program will either accept the password and grant access, or reject the password and deny access.
After researching other program codes and learning about how functions and keypad integrations work, I was able to write up a fairly intermediate program that addresses these issues.
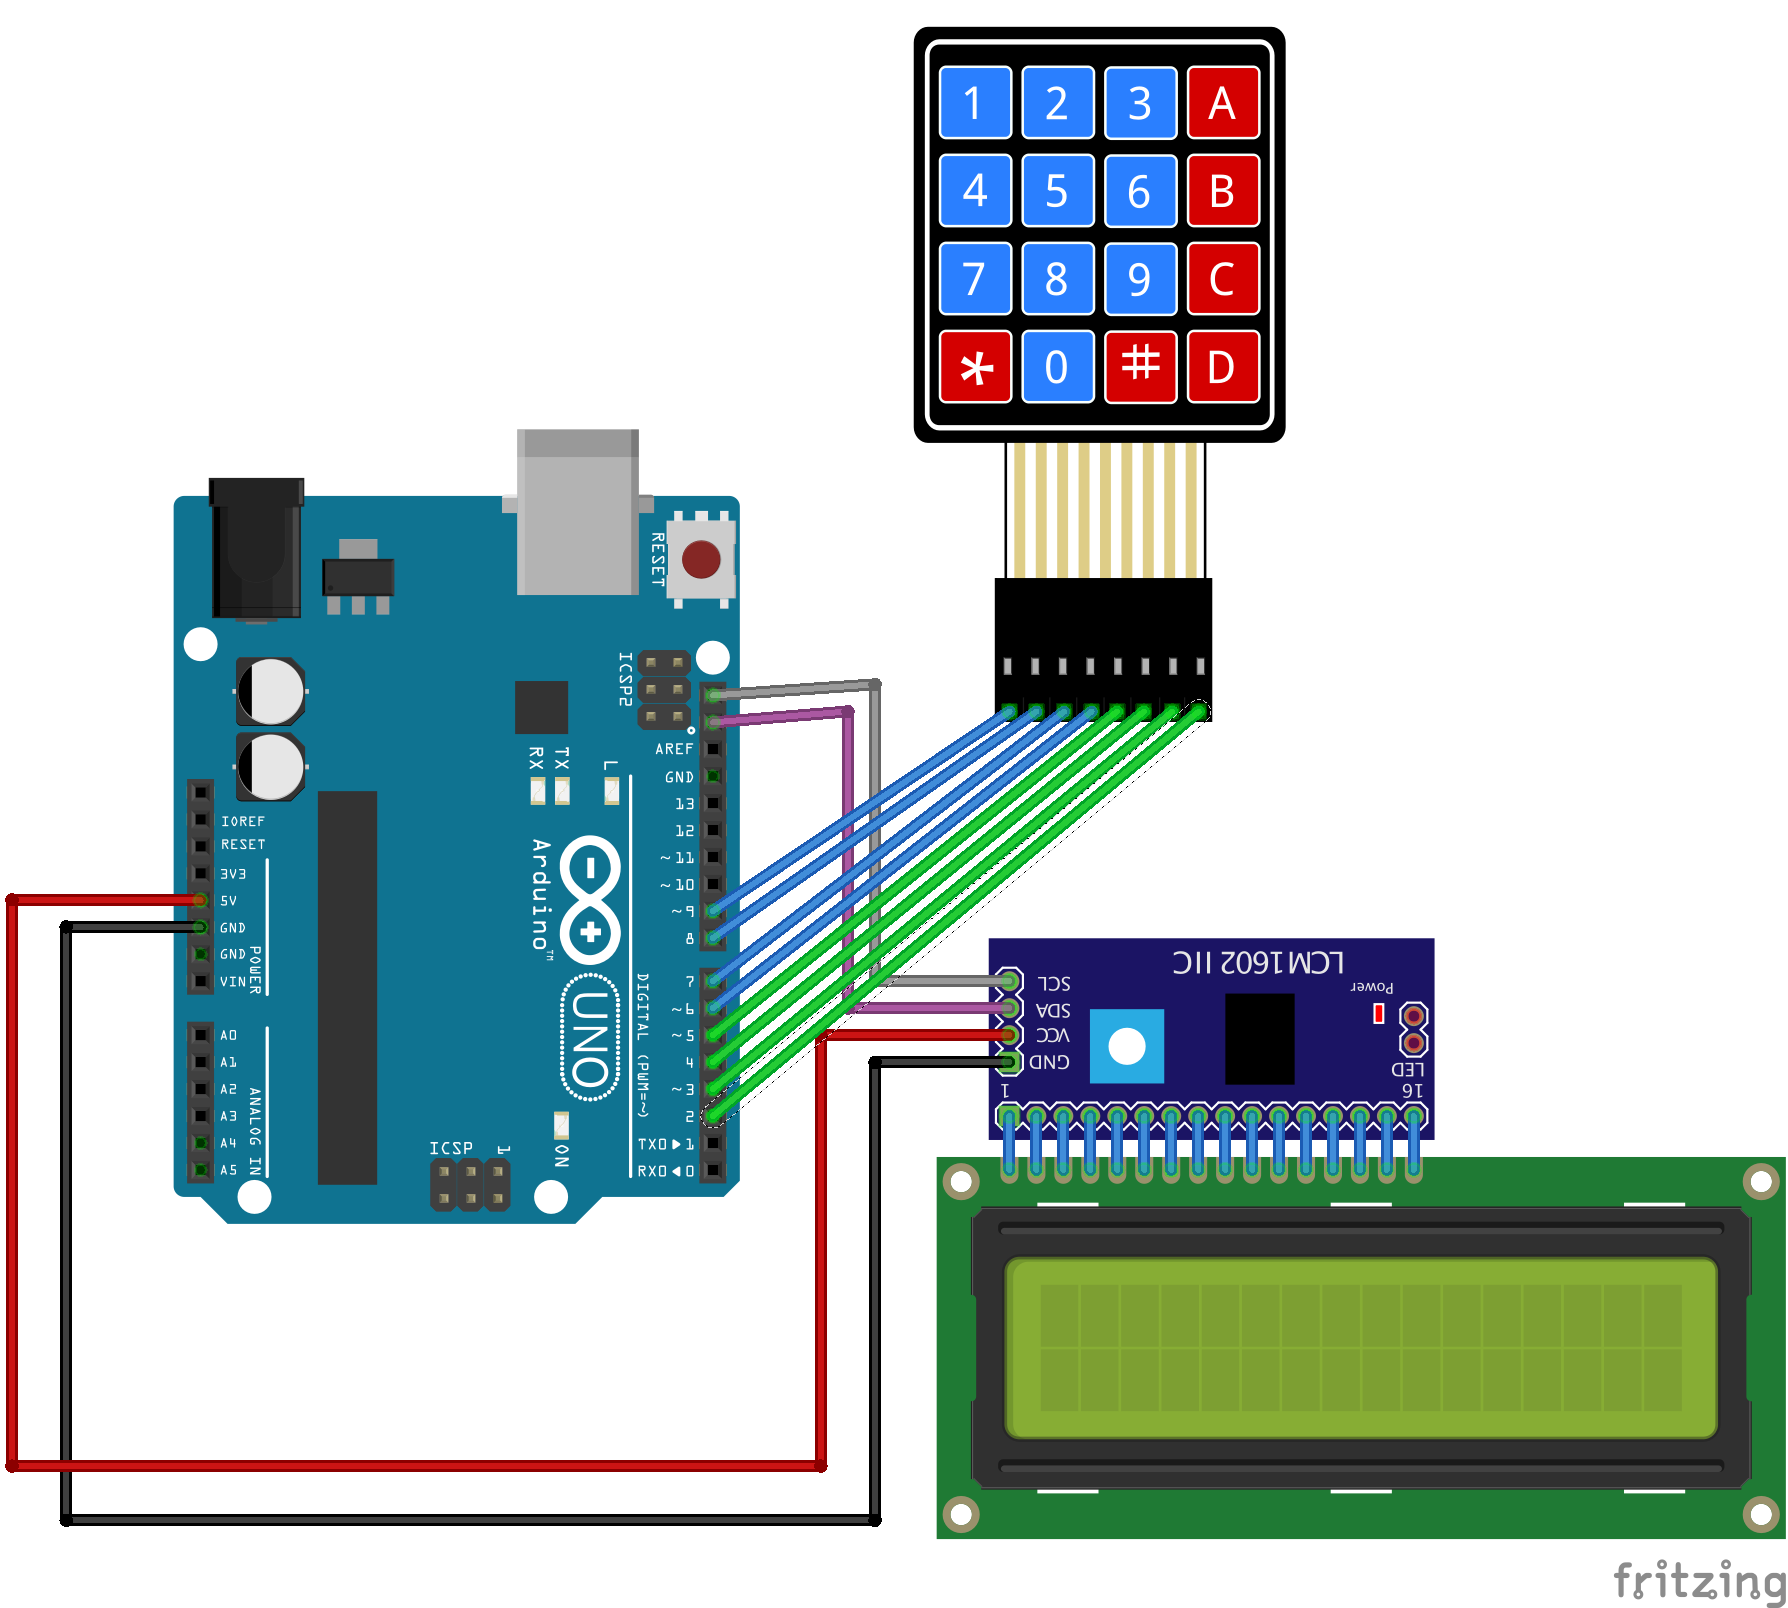
THE PROGRAMThe program makes use of three libraries: Keypad, Wire, and LiquidCrystal_I2C which need to be downloaded and installed before using this program.
The program allows you to modify the password input to what ever you desire and includes a couple of optional placeholder functions in case you wish to expand on the program.
There are also comments in the program code that describes what a particular line of code is and does.
The keypad setting in the code has been configured for a 4X3 keypad that has a "CLEAR" button in place of an "*"(asterisk) and an "ENTER" button in place of a "#"(hashtag).
You can use almost any keypad whether it be 4x3 or 4x4 but you will need to modify the "Keypad Configuration" section with the specifications that your keypad may have.
HOW IT WORKSWhen you enter an 8-digit password string, the moment you hit that 8th digit is when the program switches to another function that checks and compares the string to the master password string. This compare sub-function only accepts one of two key press options: CLEAR to clear the password string array and start the program over from the beginning, or ENTER which enters the password string into the compare code. The numbered keys are disabled in this function.
If the user input password string matches the master string, the programs returns an "ACCESS GRANTED" message. If the user input password string does not match the master string, the program returns an "ACCESS DENIED" message.
At any time, you may press the CLEAR button to run a function that clears all the array data and starts over from the beginning.
In the event the user tries to enter a password string that is less than 8 digits, the program will turn an "INVALID ENTRY" message and start the program over.
Have fun with this code, feel free to use it anywhere, modify it to your hearts' desire. ENJOY!!


Comments
Please log in or sign up to comment.