


Download the Glow Worm Luciferin firmware and flash it on your ESP8266 using your preferite flasher tool.
Please download the firmware from here.
You can download ESP Home Flasher from here.Note: Firmware is bundled in a.tar file, you can extract it using 7zip or similar, inside the tar you will find two binaries, FULL version is needed for MQTT and wireless support, LIGHT version can be used if you don't need MQTT or wireless support.
Step 2: Connect the LED Strip to Your MicrocontrollerCapacitor, resistance and logic level converter helps "stabilizing the circuit", there are many people who don't use those extra components.
You need to buy a power supply capable of powering all the LEDs you want. For 60 LEDs a power supply of at least 5V/3A it's recommended, for 120 LEDs you need a 5V/6A power supply, do your math here. A bigger power supply generally works better and runs less hot than a smaller one. Don't undersize the power supply.
Note: LED strip must be connected to the D1 pin.
Step 3: Put the LED's on the Back of the MonitorDouble sided tape is all you need for this step. It's easyer if you cut the strip in 5 parts,top row, left column, right column, bottom left, bottom right.
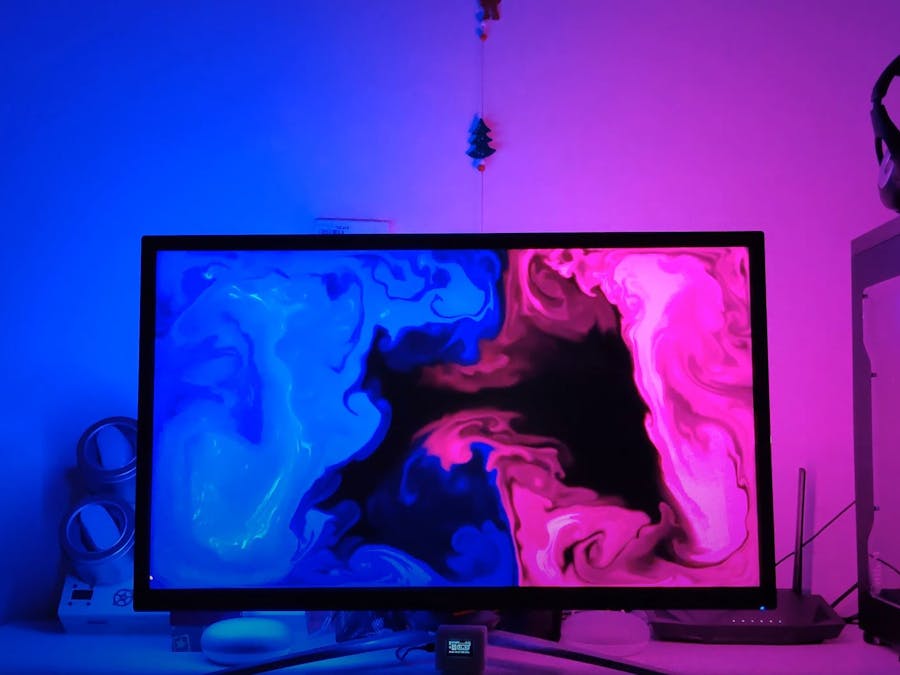
NOTE: If you want to use the automatically generated configuration, your first LED should be positioned in the bottom half of your monitor like shown in the image.
Step 4: Download and Install Firefly Luciferin PC SoftwarePlease download and install Firefly Luciferin on your PC, you can download it from here.
Once installed the software, start it and configure it via the graphical user interface. Defaults are good for most people.
Connect a USB cable to your ESP8266, double click the tray icon of the Firefly Luciferin software and enjoy your bias lighting system. If you don't want to connect a USB cable you need to continue reading the Wiki for MQTT/Wireless configuration.
Step 5: [OPTIONAL] Remote Control Using WiFi and MQTTLuciferin supports MQTT and can be controlled via a smartphone or via a PC remotely using a generic MQTT client.
Thanks to Arduino Bootstrapper,Glow Worm Luciferin firmware starts an access point for easy configuration via a mobile phone.
Please connect to the AP with your mobile, if you search for WiFi networks you will find your ESP device named LUCIFERIN, once connected go to http://192.168.4.1 and you will access a GUI where you can enter all the passwords without the needs of hardcoding them.
1) IP Address: The IP address that your ESP should use.2) SSID: Your Wifi SSID, the name of your Wifi.3) Wifi Password: Your Wifi password4) OTA Password: You can use this password to update Luciferin via wireless.5) MQTT Server IP: The IP address of your MQTT server.6) MQTT Server Port: The port of your MQTT server.7) MQTT Username: The username you use to login to your MQTT server.8) MQTT Password: Your MQTT password.
Please double check your input before clicking the 'Store config' button. If you enter wrong data you need to erase the ESP memory and reflash the firmware.
## Default topiclights/glowwormluciferin/set
## Turn ON/OFF the LED strip remotely, apply light effects.
{"state": "ON"}{"state": "OFF"}{"state": "ON", "effect": "rainbow"}
Those are the supported effects:GlowWorm, GlowWormWifi, bpm, candy cane, confetti, cyclon rainbow, dots, fire, glitter, juggle, lightning, noise, police all, police one, rainbow, solid rainbow, rainbow with glitter, ripple, sinelon, solid, twinkle
Step 6: [OPTIONAL] Home Assistant IntegrationThanks to the MQTT protocol Luciferin can be easily integrated into your preferred Home Automation systems.
- Create a `glow_worm_luciferin` folder inside your `conf` folder.
- Copy the ready to use package into your `glow_worm_luciferin` folder.
- Add the package to your configuration.yaml


Comments
Please log in or sign up to comment.