1. Raspian OS
This is the recommended OS for raspberry pi. You can also installed other OS from third party. Raspbian OS is a Debian-based OS. We can install it from the NOOBS installer. You can get the link:
2. PuTTY
PuTTY is an SSH and telnet client, developed originally by Simon Tatham for the Windows platform. PuTTY is open source software that is available with source code and is developed and supported by a group of volunteers. Here we are using PuTTY for accessing our Raspberry Pi remotely. You can download PuTTY here.
3. OpenCV
OpenCV (Open Source Computer Vision Library) is an open source computer vision and machine learning software library. OpenCV was built to provide a common infrastructure for computer vision applications and to accelerate the use of machine perception in the commercial products. Being a BSD-licensed product, OpenCV makes it easy for businesses to utilize and modify the code. The library has more than 2500 optimized algorithms, which includes a comprehensive set of both classic and state-of-the-art computer vision and machine learning algorithms. These algorithms can be used to detect and recognize faces, identify objects, classify human actions in videos, track camera movements, track moving objects and extract 3D models of objects.
1. Raspberry Pi
This is the latest version of Raspberry Pi. In this we have inbuilt Bluetooth and WiFi, unlike previously where we had to use a WiFi dongle in one of its USB port. There are total 40 pins in RPI3. Of the 40 pins, 26 are GPIO pins and the others are power or ground pins (plus two ID EEPROM pins). There are 4 USB ports, 1 Ethernet slot, one HDMI port, 1 audio output port and 1 micro USB port and also many other things you can see the diagram below. Also, we have one micro SD card slot wherein we have to insert a micro SD card with the recommended operating system installed. There are two ways to interact with your Raspberry Pi. Either you can interact directly through HDMI port by connecting HDMI to VGA cable and use a keyboard and mouse, or else you can interact from any system through SSH(Secure Shell). (For example in Windows you can interact from putty ssh.) Figure is given.
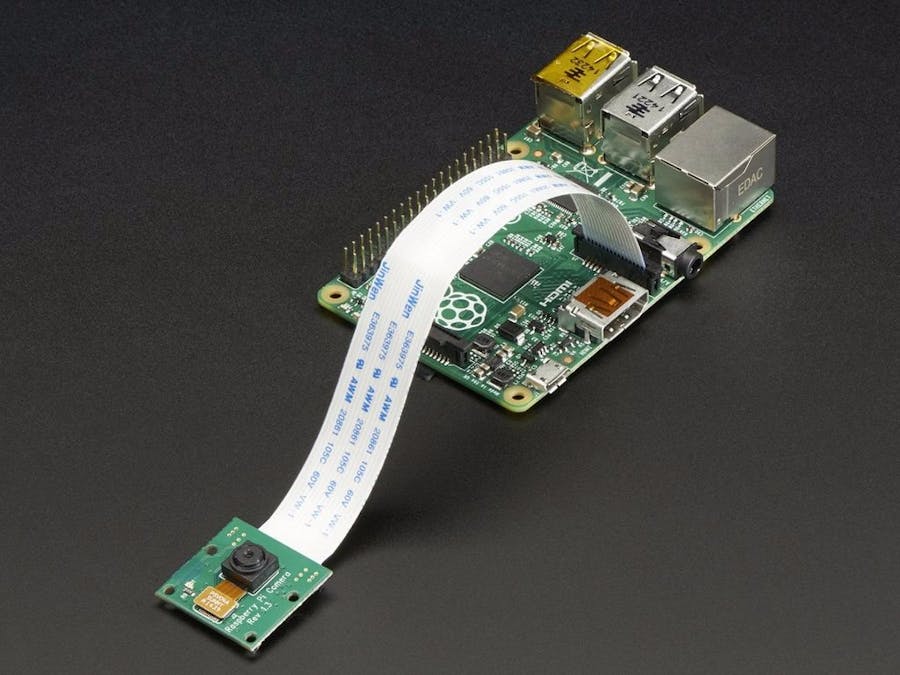
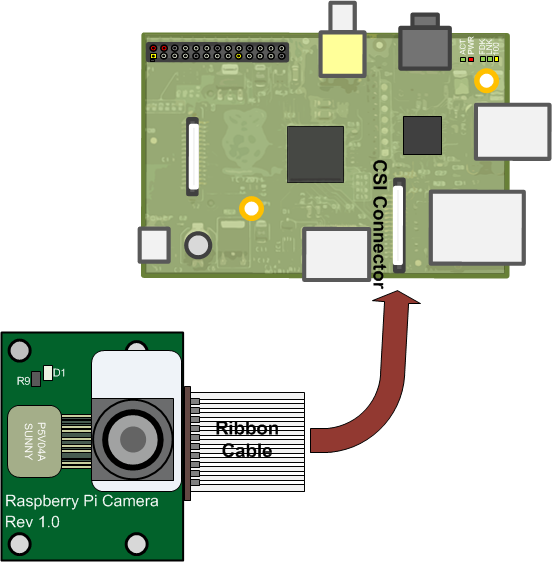
2. Raspberry Pi Camera
The Raspberry Pi camera module can be used to take high-definition video, as well as still photographs. It’s easy to use for beginners, but has plenty to offer advanced users if you’re looking to expand your knowledge. There are lots of examples online of people using it for time-lapse, slow-motion and other video cleverness. You can also use the libraries we bundle with the camera to create effects.
Here are the installation steps (in order):
sudo apt-get update
sudo apt-get upgrade
sudo apt-get install build-essential
sudo apt-get install cmake git libgtk2.0-dev pkg-config libavcodec-dev libavformat-dev libswscale-dev
sudo apt-get install python-dev python-numpy libtbb2 libtbb-dev libjpeg-dev libpng-dev libtiff-dev libjasper-dev libdc1394-22-dev
sudo apt-get install python-opencv
sudo apt-get install python-matplotlib
For face and eye detection you have to Configure Pi Camera. The steps to enable Pi Camera are given below.
After following these steps, you first want to check that the Camera is enabled with the command or by taking a picture. Here is the command:
sudo raspistill -o filename.jpg
If the camera is enabled successfully, then you'll get the picture in the same directory with the name filename.jpg. If you have any concerns regarding this project, feel free to comment us below or you can email us at info@deligence.com
And if you want to learn more about these types of project, feel free to visit our YouTube channel.


Comments
Please log in or sign up to comment.