- Raspberry Pi (and accessories)
Or you could all this by getting the Starter Kit or, if you already have a Raspberry Pi, you could get the Base Kit. In this tutorial we are using Raspbian for Robots, our version of Raspbian for the Raspberry Pi; it comes with all the software installed for using the GrovePi. If you don’t have the SD Card from Dexter Industries, you can install it for free by downloading it here.
In this project we’re going to show you how to build a custom Minecraft Controller. With some parts, the Raspberry Pi, and the GrovePi+, we will make a custom controller that automates some tasks and makes it easier and faster to build, destroy, and fly inMinecraft.
fYou can use the programming language Python to write custom programs that control the Minecraft world, build things with blocks, move your player around, and do some other tasks.
The MagPi recently wrote a great introduction to Minecraft on the Raspberry Pi here.
In this project, we wanted to automate three tasks:
- Building Big Blocks (blocks that are 5 x 5 x 5).
- Destroying Big Blocks: laying waste to areas that are 5 x 5 x 5 with the push of a button.
- Flying: we wanted to be able to zoom around our world in fast, and move really fast when we fly.
In order to make our custom controller, we are going to use the GrovePi+ as our controller. We will use the Python language to read the buttons and joystick on our controller. And the same program will read things like the position of Steve and place things like blocks. Finally we’ll build and decorate a nice control box for the project.
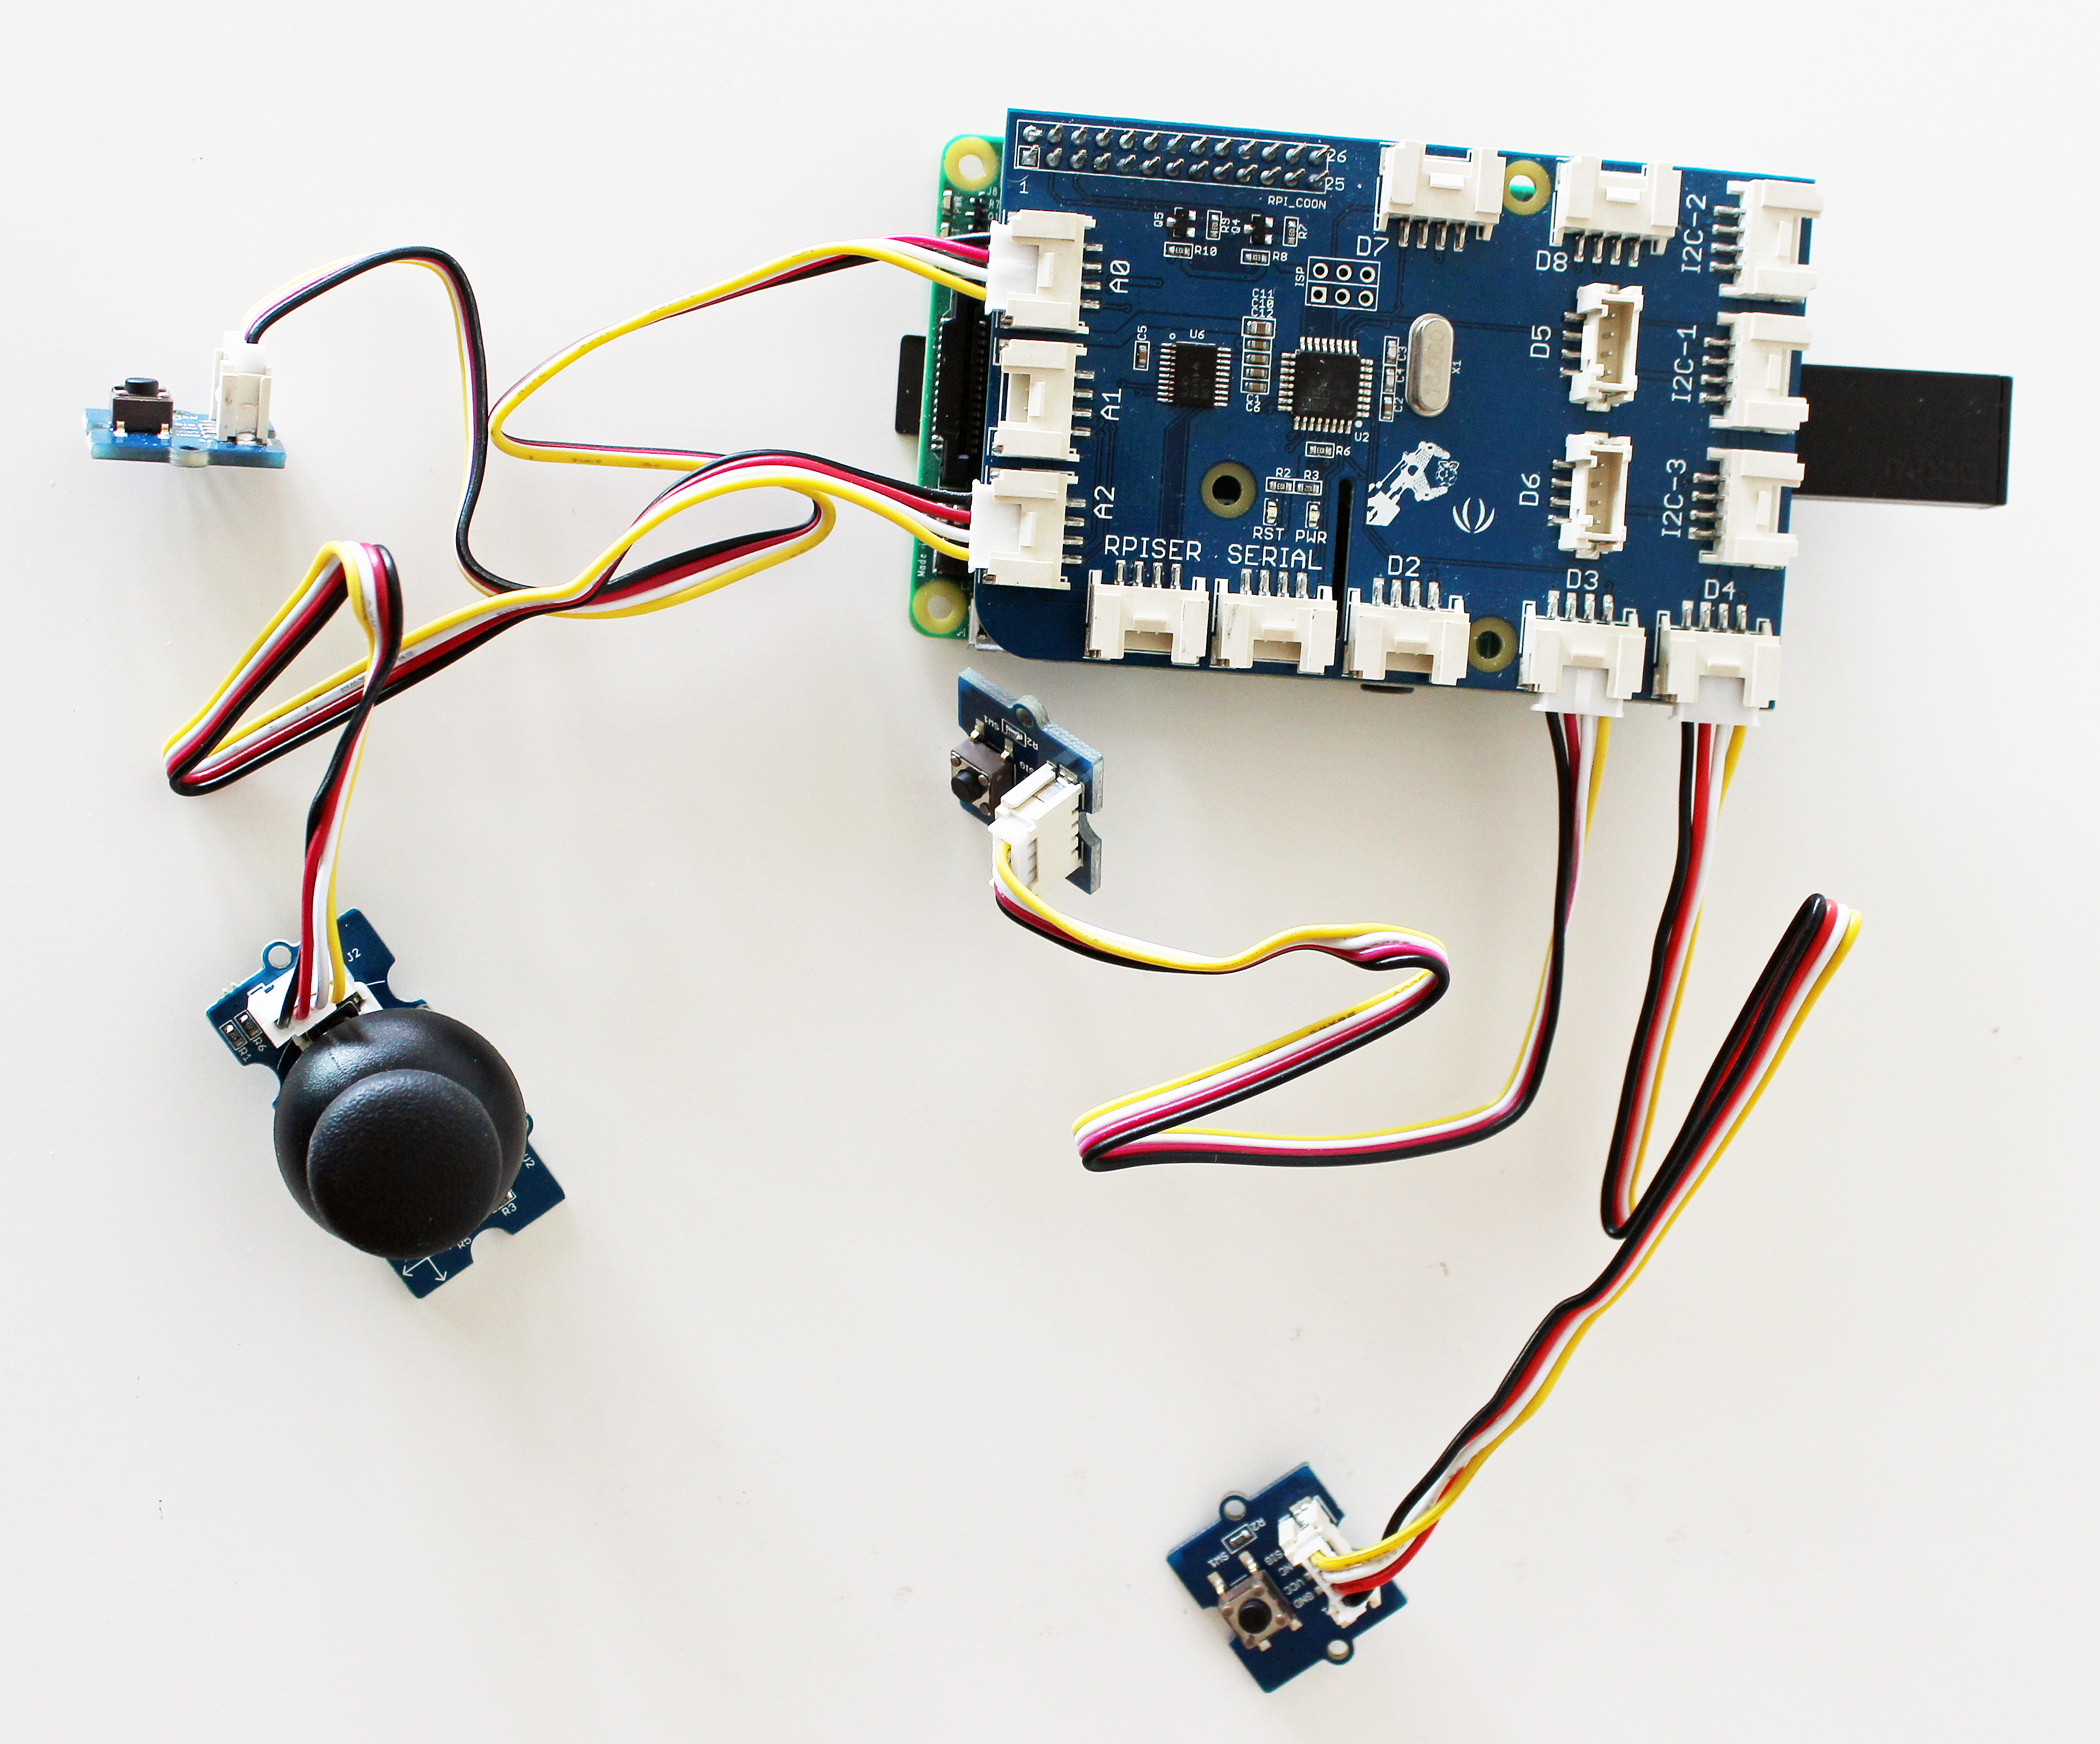
The Hardware SetupWe’re going to wire up the sensors to the GrovePi.
Prepare the hardware by wiring up the sensors to the GrovePi.
- Place the GrovePi on the Raspberry Pi.
- Connect a Button Sensor to port A0.
- Connect a Joystick to port A2.
- Connect a Button sensor to Port D3.
- Connect a Button sensor to Port D4.
For this project, we wanted to create a nice looking box. This part is totally optional, but will help you hold your sensors in place.
We used a small box that could fit the GrovePi and Raspberry Pi in it. Then we cut a small hole in the box for power and the HDMI cable, and we cut four small holes in the side, one for each sensor. Add the keyboard and mouse, and add your wifi dongle. We hold the grove sensors in place with short strips of wire, twisted behind inside the box.
Each of the sensors are mounted with twisted wire, or alternatively you can use twist ties.
We also placed a label next to our controllers to remember which controller does which: a label for “Build”, “Destroy”, and the “Fly” buttons. And also a label for our joystick.
We need to make a few updates to the Raspberry Pi.
Before we begin, we will need to install Minecraft on the Raspberry Pi, and a few updates to get it running. Open the command line and run the following commands:
sudo apt-get install minecraft-pi
sudo pip3 install python3-xlib
sudo pip3 install pyautogui
Now you should have all the tools installed you need to run Minecraft and interact with it in Python.
Running The SoftwareLet’s get the software and take a look at how it works.
Get the CodeFirst, let’s get the software from Github. If you’re using Raspbian for Robots, you can simply update your software. If not, to get the code, simply run the following commands in the command line:
cd ~ sudo wget
This should download the python program. We can open it in IDLE3 and take a look. On the Raspberry Pi Desktop, open Python 3 (IDLE).
Next, open Minecraft.
In Minecraft, select your world, or create a new world.
Finally, run the GrovePi-Controller.py program in IDLE. Keep Minecraft open while starting the IDLE program!
After running the IDLE program, you should see feedback coming from the IDLE screen. This is analog reading and button readings from the GrovePi+ controller!
You’re ready to use your custom Minecraft controller now!


Comments
Please log in or sign up to comment.