

Hardware components | ||||||
 |
| × | 1 | |||
 |
| × | 1 | |||
 |
| × | 1 | |||
| × | 1 | ||||
| × | 1 | ||||
| × | 1 | ||||
Software apps and online services | ||||||
 |
| |||||
| ||||||
| ||||||
| ||||||
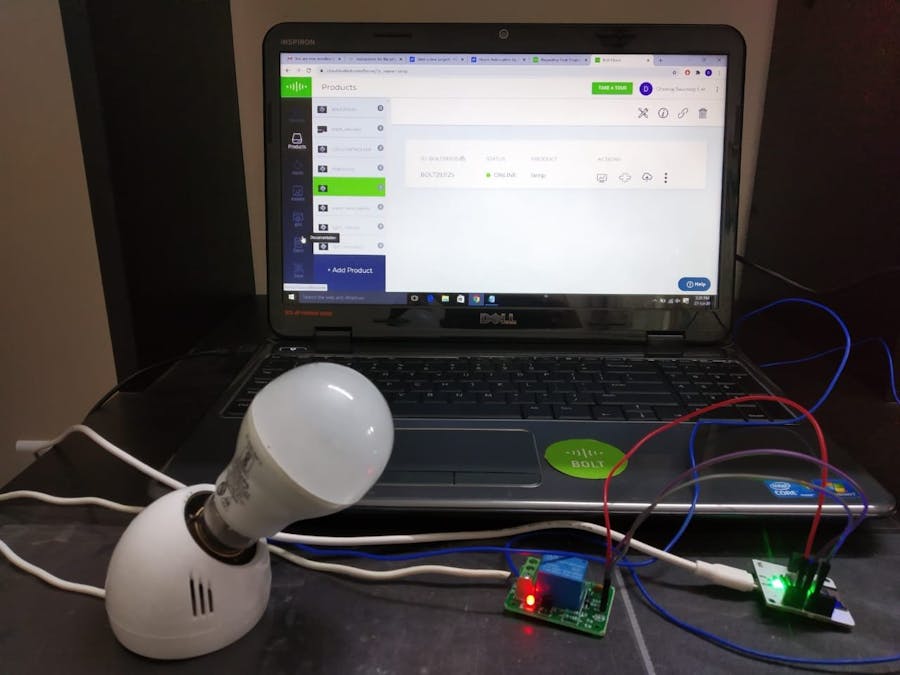
Controlling your room light by Google Assistant and Bolt mobile app!! How does it sound, amazing right!!
So here we are going to control the light by Google assistant voice control and your mobile is well using Bolt app. Thanks to IFTTT which provides this facility for creating our own applets and use them in google assistant to turn the light ON & OFF.
Step1: Login to your Bolt Cloud account
Link to Login to bolt cloud
Once you have logged into your bolt cloud account Next is to create a new Product.
Then select the options as the "output devices" & "GPIO" and name the product of your choice.
Then you have to link your product with your device.
Then configure your device and add code to it and save it with html extension.
Select any GPIO pin between 0-4.
I have selected GPIO "0" in my case and given the name as "light"
After completing the hardware configuration you have to write the code in code tab and save it in html extension. The code has been given below.
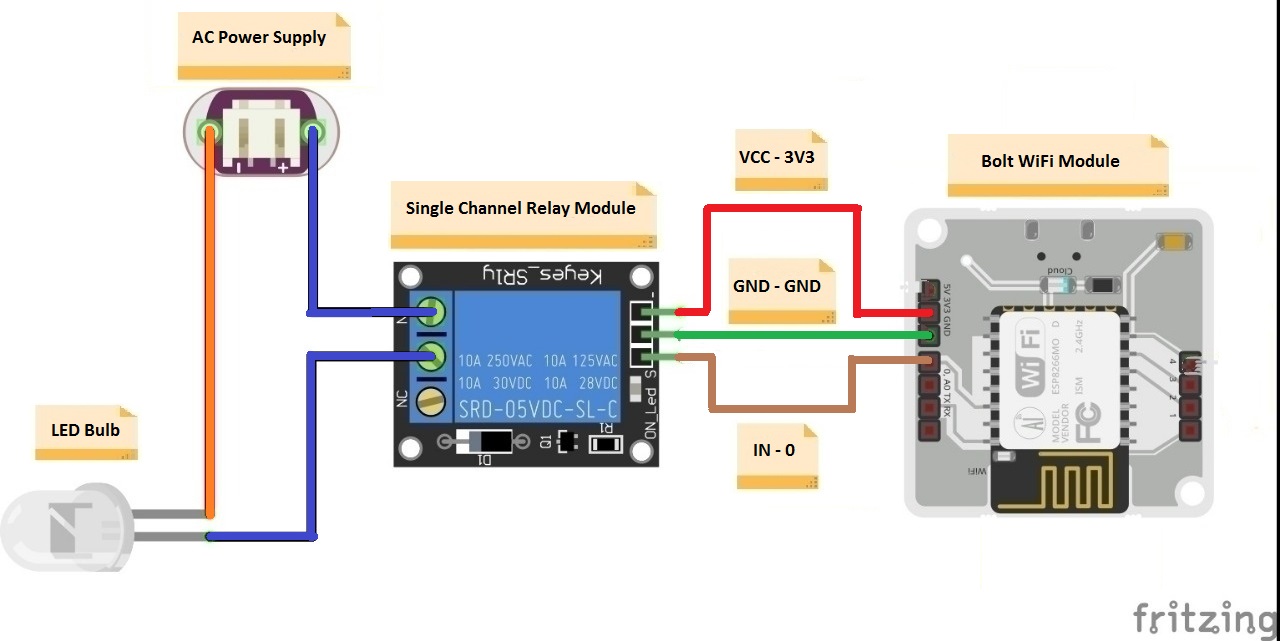
Step 2:Connections to be made1. Connect a wire from one end of the 2 pin plug to the bulb holder.
2 .Connect the other end of the 2-pin plug to NO (Normally Open) pin of the relay module.
3. Connect a wire from bulb holder to the COM (common) pin of the relay module.
4. Connect IN pin of relay module to any GPIO pins(0-4) of bolt module.(I have chosen pin "0")
5. Connect VCC pin of relay module to 3V3 pin of bolt module.
6. Connect GND pin of relay module to GND of the bolt wifi module.
Hurray! Now the connections are done we are ready to see the working of the project.
Step 3: Control the light by using Bolt app from mobile.1. Login to your Bolt app from mobile.
Fantastic! We have completed the first part of the project ie. to control the light from mobile using javascript. Now we shall see how to control the light using Google Assistant.
Principle Behind the project
The relay module is a separate hardware device used for remote device switching. With it you can remotely control devices over a network or the internet. So basically they are the switches that open and close the circuit electromechanically. This project involves the concept of API call(Application Programming Interface). API call turns the state of digital pin to HIGH or LOW. This in turn makes the relay module to make or break the circuit. Once the API call is activated and ON button is clicked then the state of the digital pin goes HIGH and relay module closes the circuit and the bulb starts glowing and when the OFF button is clicked state of the pin goes LOW and hence the relay module breaks the circuit and the bulb goes off.
Step 4:Using IFTTT for controlling the light by Google assistant
To log on to IFTTT the link is given below
Steps to turn On the LightClick on the Create trigger
Then select services as webhooks
The structure of the command :
https://cloud.boltiot.com/remote/API_KEY/digitalWrite?pin=PIN_NUMBER&state=HIGH/LOW&deviceName=DEVICE_ID
Here, you need to replace theAPI_KEY: API key which you've accessed from your bolt cloud.PIN_NUMBER: Pin Number is the number to which you've connected the IN pin of Relay Module to GPIO pin(0-4) of Bolt Module.HIGH/LOW: The high/low indicates to Turn ON/OFF the Light Bulb. HIGH : ON& LOW : OFFDEVICE_ID: The Device ID can be accessed from your bolt cloud dashboard
Choose the method as GET
Select the Content type as Application/json.
Finally click on Create action.
Review and Finish and turn on the notification when the applet runs
Steps to turn off the light:The process for turning off the light remains the same as turning on the light, but a small change is make the state=LOW, that is:
https://cloud.boltiot.com/remote/API_KEY/digitalWrite?pin=PIN_NUMBER&state=LOW&deviceName=DEVICE_ID
Excellent! Now we have built the project to control the light using Google Assistant.


Comments
Please log in or sign up to comment.