


Hardware components | ||||||
| × | 1 | ||||
| × | 2 | ||||
| × | 2 | ||||
| × | 3 | ||||
| × | 1 | ||||
| × | 2 | ||||
| × | 1 | ||||
 |
| × | 1 | |||
Software apps and online services | ||||||
 |
| |||||
Hand tools and fabrication machines | ||||||
 |
| |||||
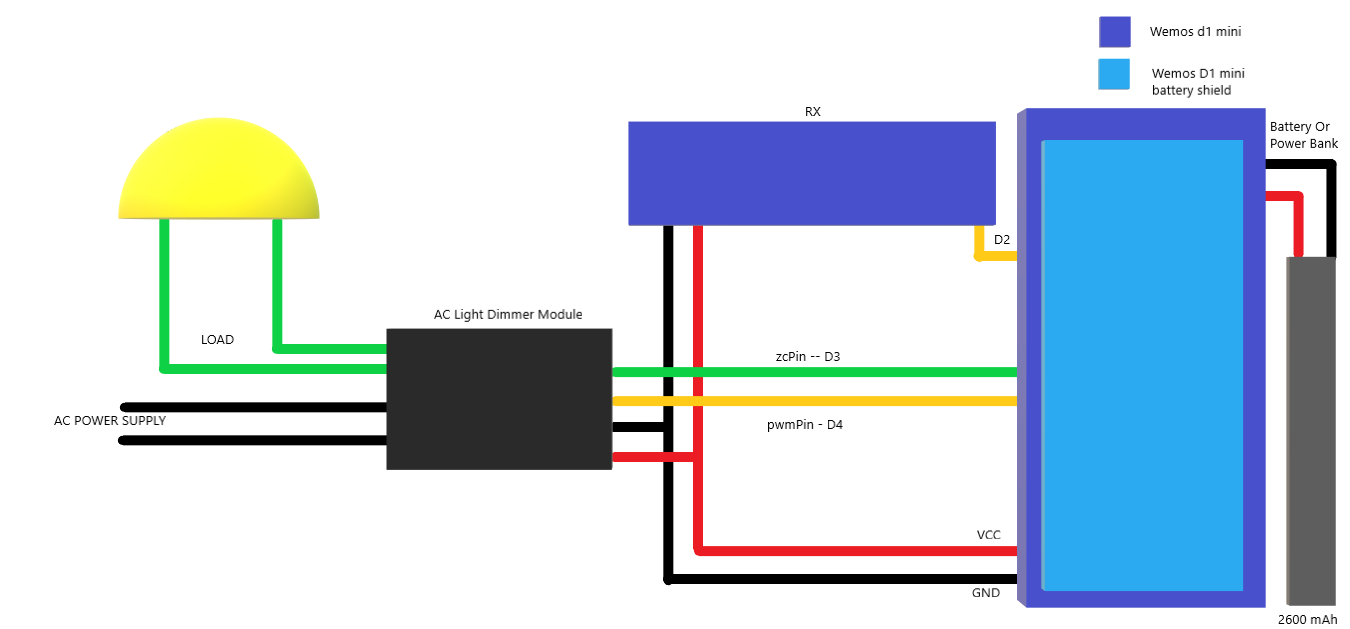
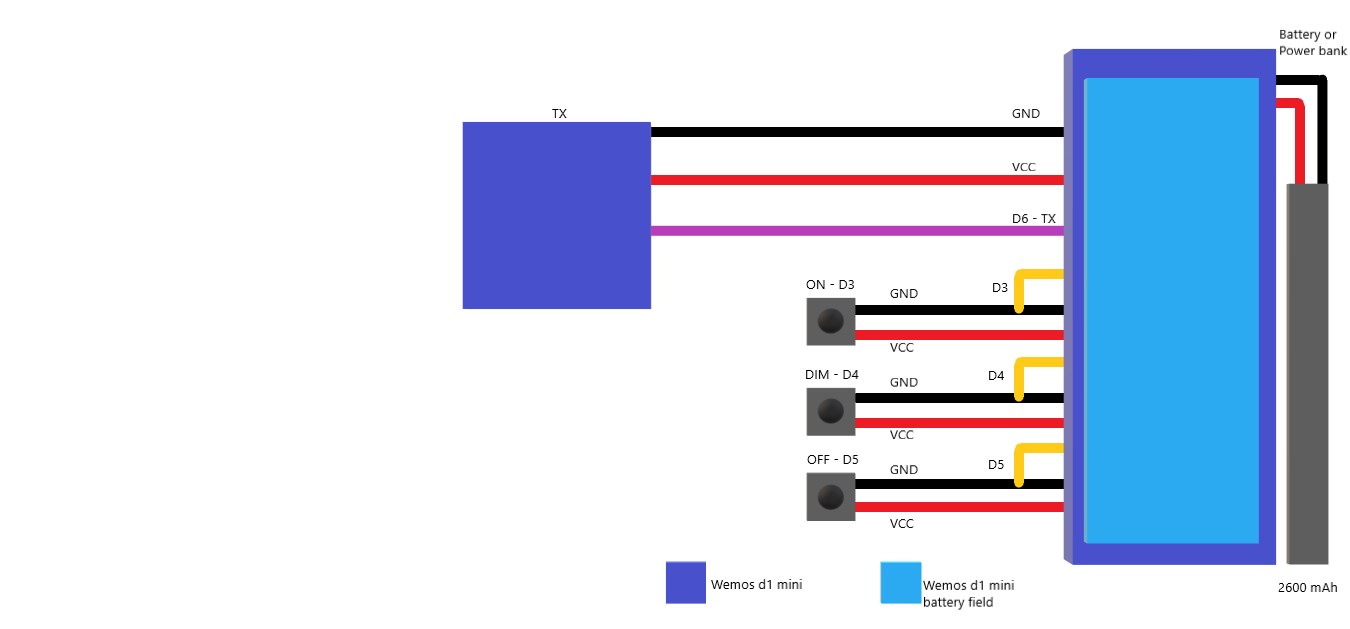
Using RF module, Wemos D1 Mini, Wemos D1 Mini battery shield, push button, AC light dimmer, power bank.
Just see diagram and code, you will definitely understand all this steps.
1. Adraxx 433Mhz RSI Wireless Transmitter Receiver ModuleThe 433MHz RF link kit is consisted of transmitter and receiver, popularly used for remote control.
Features
- Frequency: 433Mhz
- Modulation: ASK
- Receiver Data Output: High - 1/2 Vcc, Low - 0.7v
- Transmitor Input Voltage: 3-12V (high voltage = more transmitting power)
Usage
The popular link is like this: MCU -> Encoder -> Transmitter ------ Receiver -> Decoder -> MCU
PT2272(Encoder) and PT2262(Decoder) are optional, their existence is to
1) Avoid confusing when multiple RF links in range
2) Isolate disturbance.
You can integrate the encoding and decoding work to the MCUs on both side. Whenever there is no 433Mhz devices around, you may use it as direct cable connection.
2. Wemos D1 MiniFeatures
- 11 digital input/output pins, all pins have interrupt/pwm/I2C/one-wire supported(except D0)
- 1 analog input (3.2V max input)
- A Micro USB connection
- Compatible with MicroPython, Arduino, NodeMCU
Features
- Charging Voltage: max: 10V, recommend: 5V
- Charging Current: max: 1A
- Lithium Battery voltage: 3.3-4.2V
- Boost Power Supply: 5V (max: 1A)
Pins
D1 || mini Shield
5V || 5V(max: 1A) Power Supply
GND || GND
Ports
Port || Introduction
PH2-2.0MM (Port 1) || Connect to lithium Battery (normal 3.3-4.2V)
Micro USB (Port 2) || Charging port (normal 5V)
Green LED || lights when charging is completed
Red LED || lights when charging
J1 || setting max charging current, 0.5A or 1A.
J2 || Connect battery to A0


Comments
Please log in or sign up to comment.