[Edit: Jul. 9, 2021] The project has been improved, fixed and ported to platformio from ArduinoIDE. Issues from comments below should be already fixed.
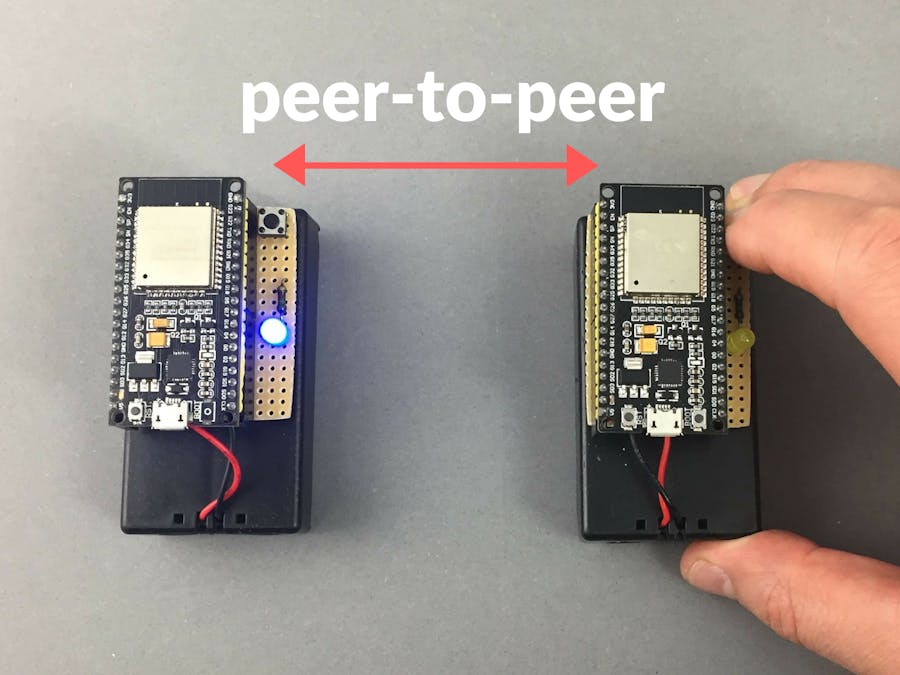
Typically connected projects has some kind of web or mobile UI. If you want to control one thing by another thing, espacially with a low latency and over the Internet that's quite hard to achieve. That is why I created this project. It's an Arduino framework template showing you how to connect two ESP32-based boards over the Internet, minimizing the latency with auto-recovery functionality in case of broken Wi-Fi connection or temporary power down of one of connected boards. The cool thing is that, it works if ESP32 boards are in the same Wi-Fi network and if are in separate networks. Even on different continents.
The template we are describing here can be a base for variety of cool interfaces to your ESP32-based projects, like:
- smart glove to control your RC car
- remote control for your smart home devices
- secure and private Wi-Fi key to your home (while connection is P2P, no 3rd party has access to encryption key)
- a really fast Internet button to your things
and much, much more.
Default functionality of the template is two-directional control of LEDs by buttons of oposite ESP32 boards. You can also treat this template as a Morse code Internet communicator :). Feel free to replace code to controll buttons and LEDs by any input/output operation you need.
How it works- ESP32 acts both as a HTTP server (based on
ESPAsyncWebServerlibrary) and HTTP client (based onAsyncTCP) - ESP32 automatically detects all peers in the same Husarnet VPN network
- when the button is pressed, HTTP request is sent to all other peers and turn the LED on
- when the button is released, HTTP request is sent to all other peers and turn on the LED off
Wi-Fi task is written to auto-switch to another Wi-Fi network if a current connection is broken. In the configuration section you can hardcode more than one Wi-Fi network credentials - that is a comfortable solution, because you don't need to reprogram your boards if you power them on in different locations.
Basically a Virtual LAN network between ESP32 devices is created thanks to these two lines:
Husarnet.join(husarnetJoinCode, hostNameX);
Husarnet.start();
Connection is also fully encrypted, secure, and private. It works not only in LAN, but also through the internet, because connection is powered by Husarnet - an open source P2P VPN client that is as lightweight as it works not only on normal computers but also on ESP32 microcontrollers. Husarnet helps only in establishing a connection over the internet and user data isn't forwarded by it's servers. Thanks to that latency is lower.
HTTP server// A dummy web server (see index.html)
server.on("/", HTTP_GET, [](AsyncWebServerRequest* request) {
request->send(200, "text/html", html);
});
// Send a GET request to <IP>/led/<number>/state/<0 or 1>
server.on("^\\/led\\/([0-9]+)\\/state\\/([0-9]+)$", HTTP_GET,
[] (AsyncWebServerRequest *request) {
String ledNumber = request->pathArg(0);
String state = request->pathArg(1);
digitalWrite(LED_PIN, state.toInt());
request->send(200, "text/plain", "LED: " + ledNumber + ", with state: " + state);
});- Connect push button between pin P0 and GND
- Connect LED diode and resistor in series between pin 27 and GND
- Connect battery to your ESP32-based board. In the project we use ESP32 devkit with a built-in LDO. Take a look at maximum input voltage level in case of your ESP32-based board to avoid damage.
Clone a project from a GitHub repo and follow these steps:
1. Open project
- Open a project folder from a Visual Studio Code with Platformio extension installed
2. Configure your project (ESP32-to-ESP32.ino file)
- Get your Husarnet VPN Join Code (allowing you to connect devices to the same VPN network)
You will find your Join Code at https://app.husarnet.com
-> Click on the desired network
-> Add element button
-> Join Code tab
- Place your Husarnet Join Code here:
const char *husarnetJoinCode = "fc94:b01d:1803:8dd8:b293:5c7d:7639:932a/xxxxxxxxxxxxxxxxxxxxxx- Add your Wi-Fi network credentials here:
// WiFi credentials
const char* wifiNetworks[][2] = {
  {"wifi-ssid-one", "wifi-pass-one"},
  {"wifi-ssid-two", "wifi-pass-two"},
}- If your ESP32 board is ESP32 TTGO T Display, then you can enable LCD/TFT display by line 14:
#define ENABLE_TFT 1 //tested on TTGO T Display- upload project to your ESP32 boards (the same code for all boards).
- power both ESP32 modules and wait about 15 seconds to allow your ESP32 devices connect to Wi-Fi network and establish P2P connection (works both in LAN and through the Internet).
And that's all! I hope you will like it. Would be happy to see your feedback.
Cheers!


_3u05Tpwasz.png?auto=compress%2Cformat&w=40&h=40&fit=fillmax&bg=fff&dpr=2)
Comments