I present to you the advance of the robot following lines that I have worked lately.
Components:
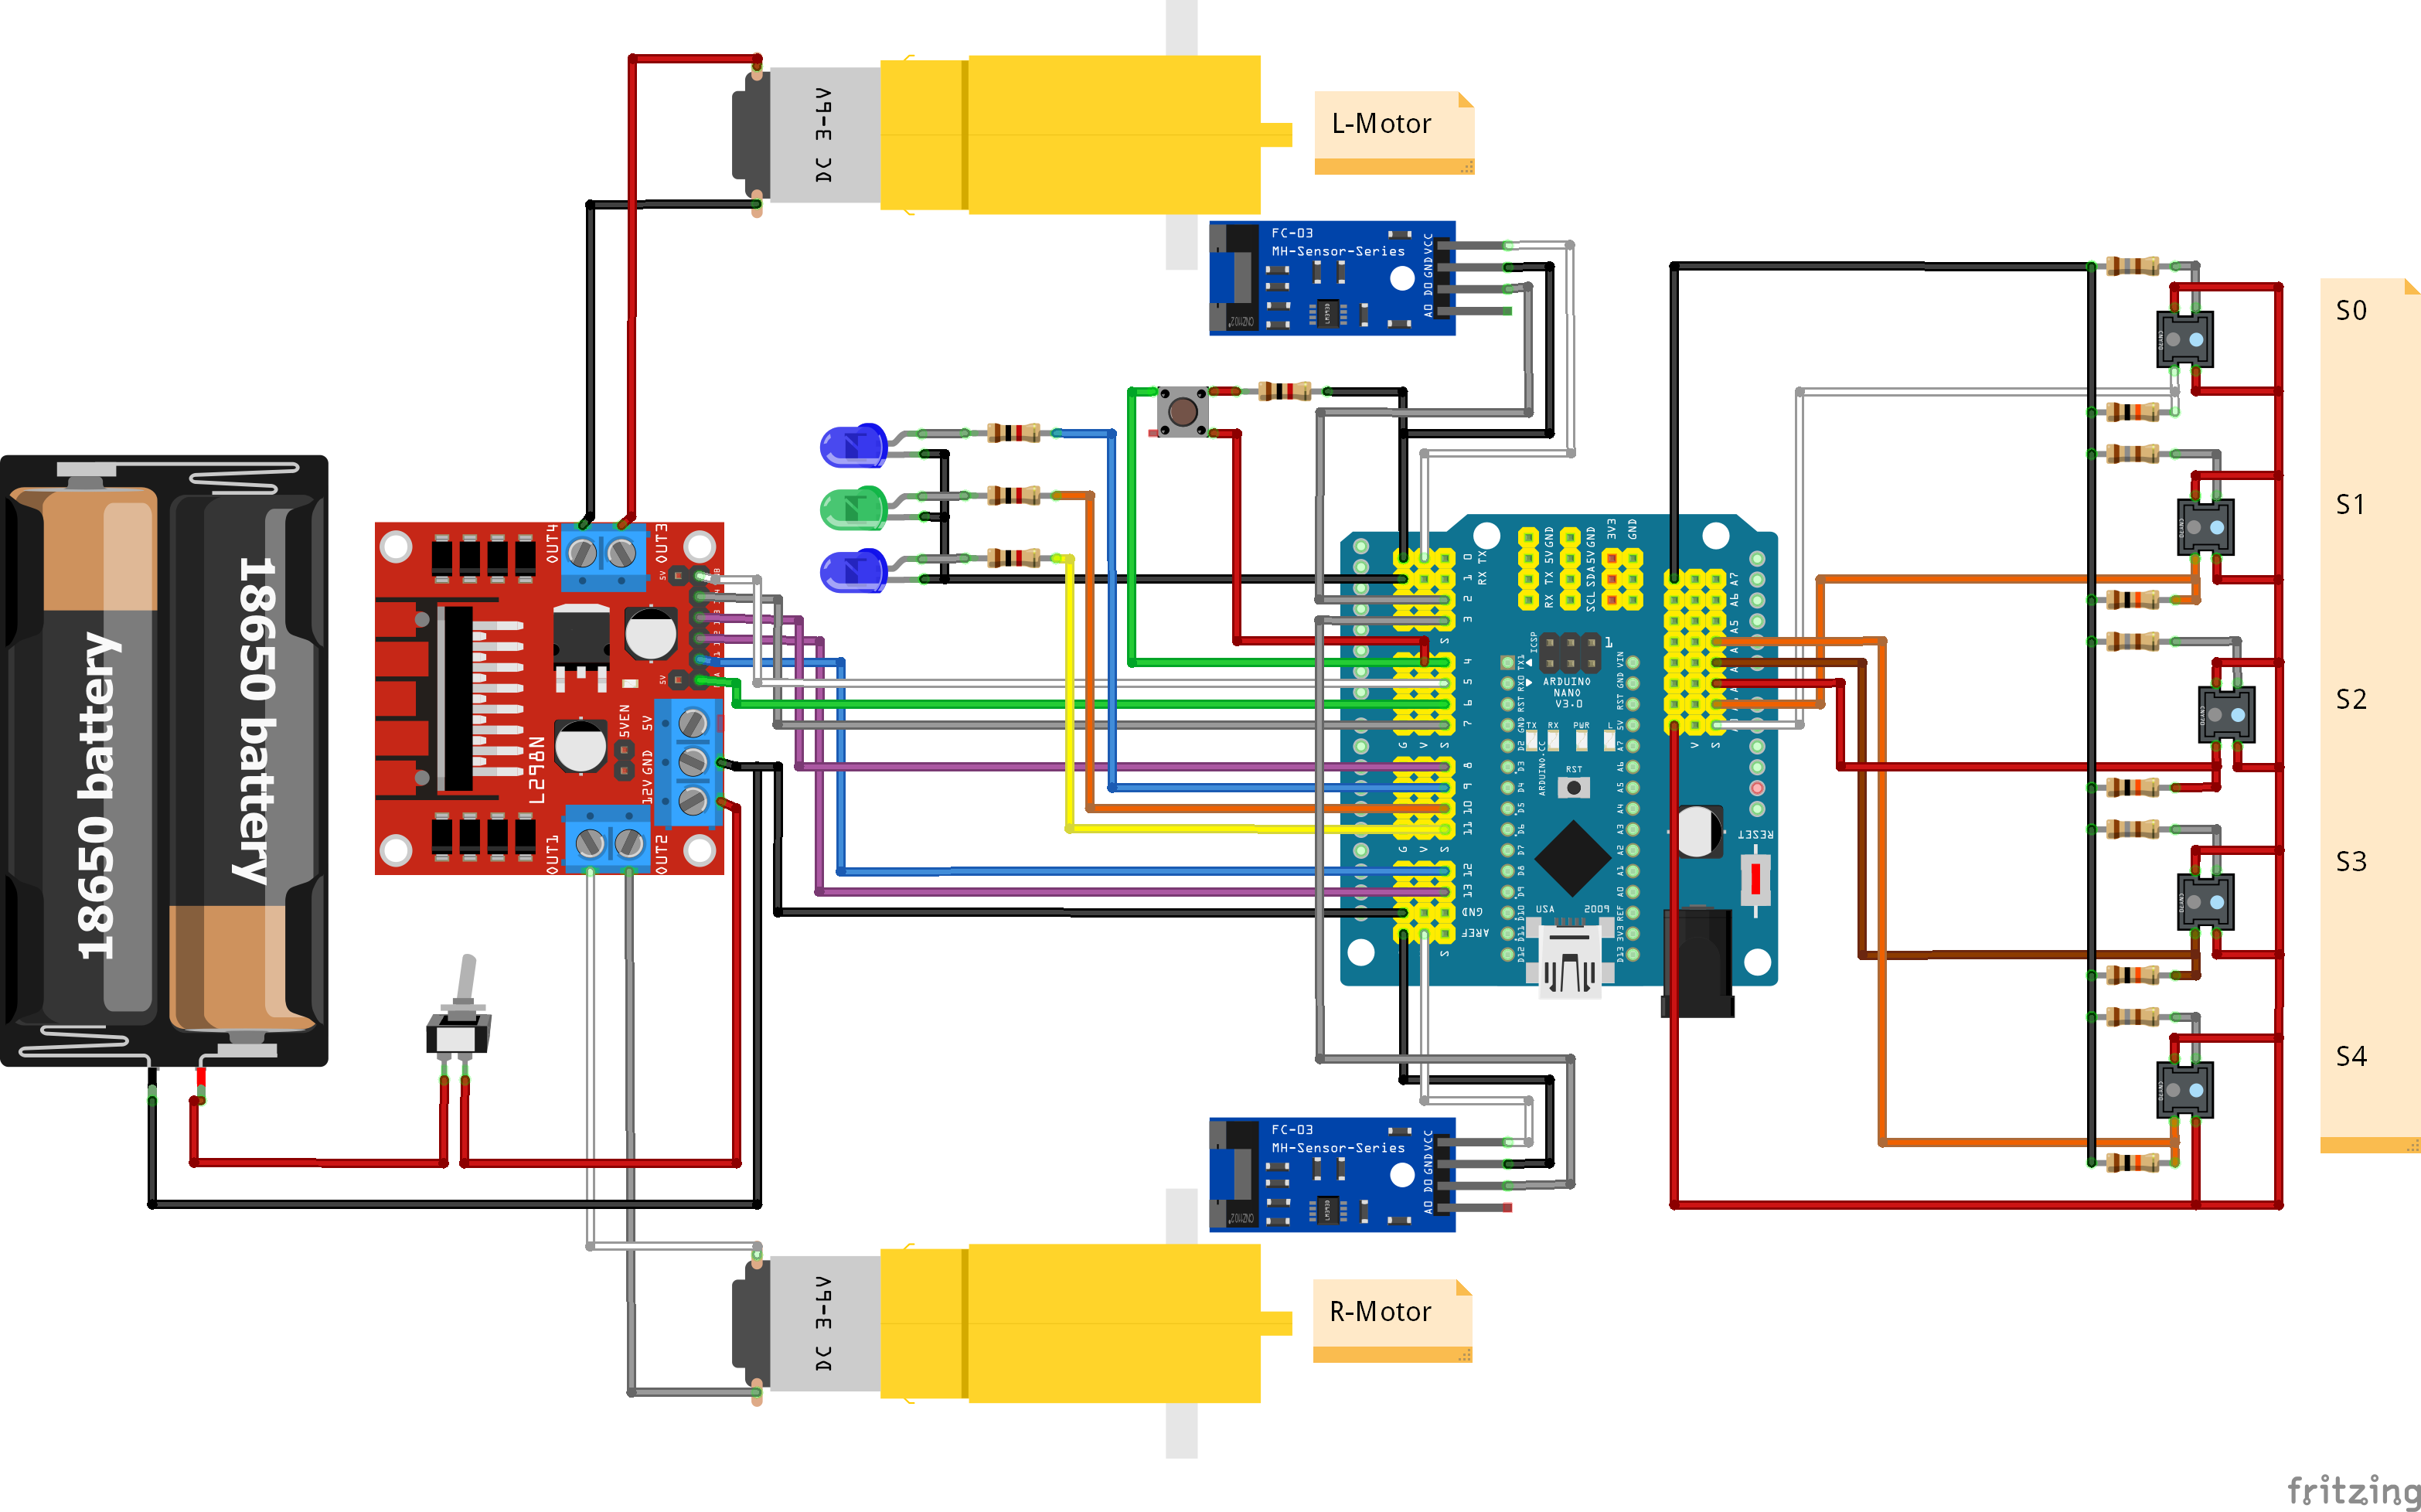
1 Arduino Nano
1 Arduino Nano Shield 5 CNY70 sensors
2 IR Sensors GP1A01 (Similar FC-03)
1 Driver L298N
2 Motors with gearbox and encoder
2 Batteries 3.7V 4200mAH 18650
1 18650 battery holder
1 5V USB charger
1 1P1T switch
1 Pushbutton
1 2-tier circular acrylic chassis
2 Wheels covered with eva foam
2 Sphere wheels
2 double-sided perforated breadboard
Some LEDs and SMD resistors and various connecting cables
This is one of the first functional tests, in which I included the use of the programming of the PID feedback algorithm in which at the moment I use the constants P and D.
Adjustments regarding speed control through RPM and activate the constant I are pending.
The sensors used five CNY70 and are read analogically. Initially it is necessary to calibrate the sensors for best performance (10 seconds).
CNY70 Datasheet: https://pdf1.alldatasheet.com/datasheet-pdf/view/252297/VISHAY/CNY70.html
The motors are powered by 2x3.7V 4200mAH 18650 batteries in series (7.4V) and for the control part (Arduino Nano) I use a 5V USB portable charger.
I include the physical design made in TinkerCAD
I have made some templates with which depending on the way they are placed, any size of track can be made. I have done 2, but the limit is imatination.
This is a special bonus, where I show the simulation of this same robot on Webot. The code used to control it virtually is based on the Arduino code used in the real robot. In the description of the video you can find access to information regarding the Webots platform, documentation and corresponding code. I hope you like it.


_3u05Tpwasz.png?auto=compress%2Cformat&w=40&h=40&fit=fillmax&bg=fff&dpr=2)
Comments