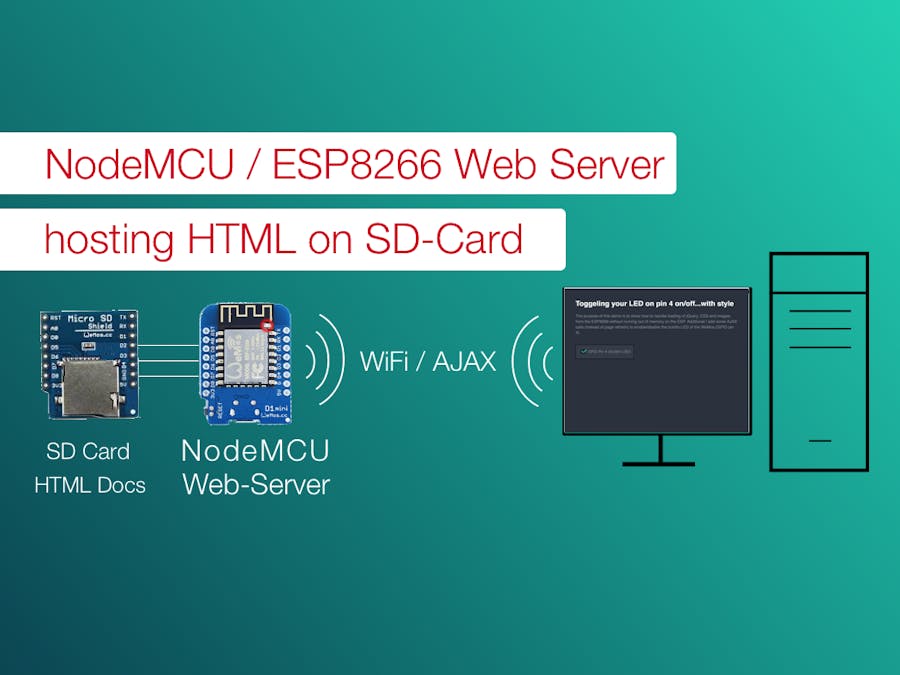
You can find a lot of examples on how to setup the NodeMCU as a web server with a simple and ugly web page turning a LED on/off via page refresh. The usability is bad and it is almost impossible to build a fancy, multi page application with a HTML5 UI for your IoT project. This example demonstrates how to turn the NodeMCU (ESP8266) into an access point (AP), and serve up web pages from the SD card with optional server side scripting.
I didn't find any working example using this feature to serve my web project direct from the SD card - so I built it myself. This allows me to serve web pages built with jQuery, CSS, JS, images, and common tools like GRUNT, Bower and IntelliJ. You have almost unlimited space for your web project, and you can easily update your NodeMCU just by replacing the SD Card.
Setup The File SystemFirst business, then pleasure. A little bit of preparation is required before you can host your web project on the NodeMCU:
- Flash the
nodemcu-firmwarewith FatFS and SPI support
- Install the tiny NodeMCU Webserver nodemcu-wampum
- Prepare the SD card with your web site
You must use the latest nodemcu-firmware with FatFS support. You can create your own firmware on the NodeMCU build server. At the moment (Sept. 2016) you must select the DEV branch to have FatFS support. Also select SPI and File for your build.
Settings on the build server: https://nodemcu-build.com/
There are a lot of descriptions out there how to flash your NodeMCU with a fresh firmware, so I can keep it short. Install the esptool via pip and upload your new firmware with this tool. Don't forget to select the correct serial port:
> sudo pip install esptool
> esptool.py --port /dev/tty.wchusbserial640 write_flash -fm qio -fs 32m 0x00000 ~/Downloads/nodemcu-dev-9-modules-2016-09-20-15-40-35-integer.bin
After you have updated your firmware you can download the code of the web server from the Github repository and upload it to the NodeMCU.
To work with NodeMCU or ESP8266 I recommend using the ESPlorer software - a Java-based GUI for easily uploading scripts to the ESP module. It supports sending individual commands, saving scripts to files, running script files, removing files. If a script named init.lua exists on the module, the firmware will automatically execute the script upon booting. This is how the web server is set to run.
- Select the correct serial port (for me it is the
/dev/tty.wchusbserial640)
- Select 115200 baud
- Press "
OPEN" to connect to your NodeMCU
After this you can select all files in the nodemcu-wampum/src/ directory and upload them to the NodeMCU. You can restart the NodeMCU now by pressing the "reset" button and the web server compiles all *.lua files during boot time for performance reasons.
Now you have a fully functional web server on your NodeMCU and you don't have to flash the firmware or upload new LUA scripts to the module. All your web projects files are hosted on the SD card.
Prepare the SD CardEither you download one of the demo projects on Github ( Basic or jQuery ) or you build your own web project. As you can see on the directory listing below the SD card has two mandatory folders
- html
- lua
The html folder can contains zipped files to reduce the file transfer size of the pages and libraries and the content is delivered as is. This is not required but helps for performance reasons. But during development you can store pure HTML or CSS files as well.
The lua directory contains dynamic pages written in LUA script. You can use these scripts as JSON-RPC endpoints for your jQuery AJAX calls to to read or write GPIO pins on the ESP8266 or sending eMails. Or you can create dynamic pages from PHP or JSP.
Directory Listing of my demo web project:
/Volumes/NO NAME/
/Volumes/NO NAME//html
/Volumes/NO NAME//html/assets
/Volumes/NO NAME//html/assets/css
/Volumes/NO NAME//html/assets/css/main.css.gz
/Volumes/NO NAME//html/assets/css/polaris
/Volumes/NO NAME//html/assets/css/polaris/polaris.css.gz
/Volumes/NO NAME//html/assets/css/polaris/polaris.png.gz
/Volumes/NO NAME//html/assets/css/polaris/polaris@2x.png.gz
/Volumes/NO NAME//html/assets/javascript
/Volumes/NO NAME//html/assets/javascript/dependencies.js.gz
/Volumes/NO NAME//html/index.html.gz
/Volumes/NO NAME//lua
/Volumes/NO NAME//lua/led_on.lua
/Volumes/NO NAME//lua/led_off.lua
Now you can run your project from the NodeMCU.
- Place the SD card into NodeMCU shield
- Switch on the NodeMCU
- Connect your PC to the WiFi network wampum-xxxxxxx
- Enter WiFi password "
theballismine"
- Open a Browser and enter http://192.168.111.1
You can see simple HTML5 UI with jQuery and some CSS and images. Update of the LED happens with a simple AJAX call.
I hope you enjoy this - feedback is always welcome.


Comments
Please log in or sign up to comment.