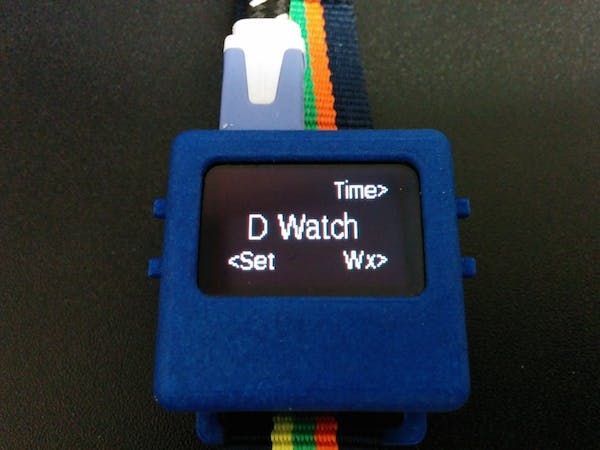
This is a simple extension of the O Watch sample code from this project.
It's a simple proof-of-concept to demonstrate the ease with which the O Watch can be customized and extended.
Prerequisites (What you'll need to get started)In addition to the O Watch (with Sensor) Kit listed below, you will also need the Arduino IDE installed on your computer. If you haven't already done so, I highly recommend you read the Getting Started with Arduino page as well as O Watch's Introduction to Arduino. These pages will walk you though downloading, installing, and configuring the Arduino IDE.
This project also requires the following Arduino Libraries:
- Adafruit_BMP280
- Adafruit_HMC5883
- Adafruit_Sensor-master
- SI7021-master
- Time-master
- TinyCircuits-TinyScreen_Lib-master
As with any Arduino library, unzip the archive file and place the resultant directory/folder in your Arduino/Libraries/ directory, then restart the IDE. The IDE won't use the new libraries until you do so! If you need a little more help, please read Installing Additional Arduino Libraries.
Putting it all togetherAt this point, you should be able to download/copy the program code (called a Sketch in Arduino) I've provided, compile it, and upload it to your O Watch.
Step 1. Launch the Arduino IDE and open a new sketch (File | New). There will be some default code automatically inserted – it's not needed, so go ahead and delete all of it, leaving a blank editor window.
Step 2. Copy the sketch code (D Watch v0.1) from the Code section below and paste it into the editor window. Save the sketch (File | Save As...), replacing the default name (based on the current date) with one that makes sense. How about DWatch_0.1 ?
Step 3. Set the current date and time in the code. The O Watch cannot determine the current date and time on its own, so look for the following two lines in the sketch:
  // Set the time and date. Change this to your current date and time.
  setTime(07,42,00,9,3,2016);    //values in the order hr,min,sec,day,month,year
and carefully edit it to reflect your local time and date, then re-save your sketch.
Step 4. Verify/compile your sketch. This sounds scary to new users, but is very important and not that hard once you've done it a couple of times. Look for the checkmark button at the to left of the IDE window and click it. The IDE will check your code for syntax errors and compile the code (make it ready for uploading to the O Watch). Pay very close attention to any error messages. They may sound confusing, but read them carefully – they will tell you exactly where the error is and what went wrong. If you don't understand the error message, google is your friend.
Step 5. Upload your sketch to the O Watch. Connect the O Watch to your computer using a USB cable, turn it on, and make sure the Arduino IDE recognizes both its board "TinyScreen+" and its Port (something like cu.usbmodem1411 on a Mac, or COM:3 on a PC, remembering that the numbers at the end may be different on your computer). Remember the checkmark button you used Step 4? Right next to it is an arrow pointing right — click on it to upload your sketch to the O Watch. After a few moments, the IDE will display a number of messages, ending with CPU Reset. Congratulations! You've successfully uploaded your sketch and it should be running.
Troubleshooting hint: If the IDE reports there is no device on cu.usbmodem1411 (or whatever port your O Watch is using), go to "Tools | Port:" and select any other port (it doesn't matter which one), wait a few seconds, and reselect the correct one.
After restarting, the setup menu will appear for a few seconds:
As you'll note, the Time and Set (time) buttons remain the same, but I've repurposed the lower right button to display the local temp and RH ("Wx").
The time screen is unchanged (for now):
The new Wx screen takes readings from the temperature and humidity sensors and displays them:
The temperature sensor (through its library) reports in Celsius by default, but the O Watch sample code included the simple C-to-F conversion. To add the Celsius reading, I simply copied the appropriate block of code, removed the conversion, and changed the cursor start point.
Obviously, there is nothing earth-shattering about this project — as I mentioned, this is a very simple extension of the O Watch code and it meant to be a proof-of-concept to show how this device can be customized in as little as 30 minutes by anyone who was able to install and run the O Watch sample code.
Next Step: Customize your watch!Ok, you've successfully downloaded, edited, saved, compiled, and uploaded your sketch — now comes the fun part!
You don't want your watch to say "D Watch" at startup, so find the line that reads display.print("D Watch v0.1"); and change it!
Don't like which buttons do what? Poke around in the code and change what they do.
How about a quick demo of TinyScreen's full-color graphics? That would be a great function for the upper left button!
It's not hard once you understand the basics of Arduino programming. Just remember that you must save, verify, and upload your code every time you make a change!
Are you going to make mistakes? Yep – and you'll learn something every time you do! Just remember to save your work and use Save As... to make a new version every time you reach a milestone. This allows you to go back to a version that you know works.
The most important step: Have Fun! "If you're not having fun, you're not doing it right!"


Comments
Please log in or sign up to comment.