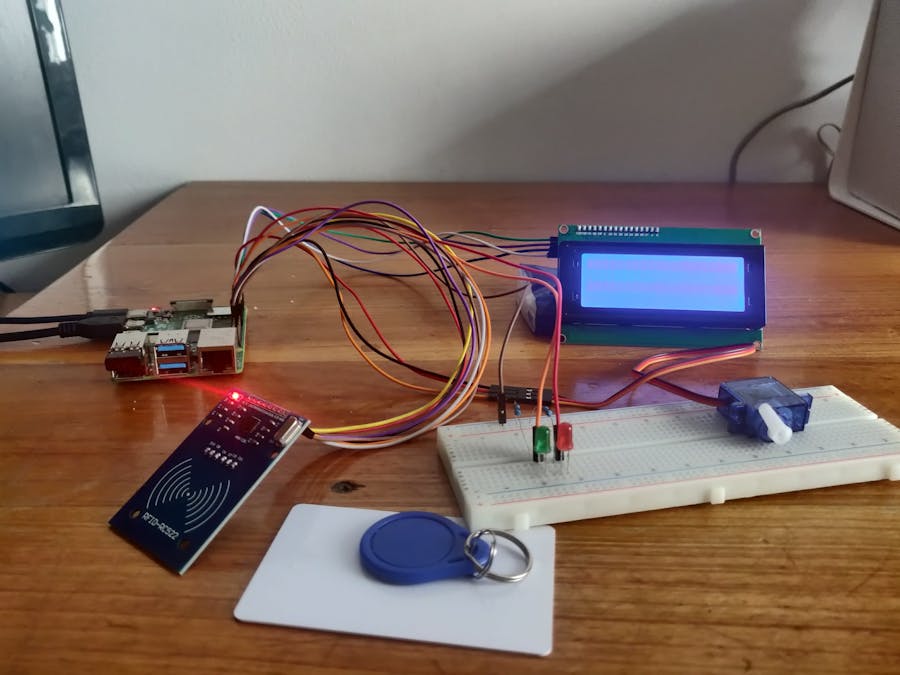
This project represents an easy to assemble system for those who want to keep track of all the persons entering in a building, or restrict certain individuals from breaching it. Both hardware and software are facile for common use, especially if you are not a tech specialist.
The LCD display takes the part of presenting the user with clear instructions regarding the proper way to use the app. At first it shows a default message saying "Waiting for card...", and after the RFID tag is near the RFID module, it displays a message corresponding with his access privileges.
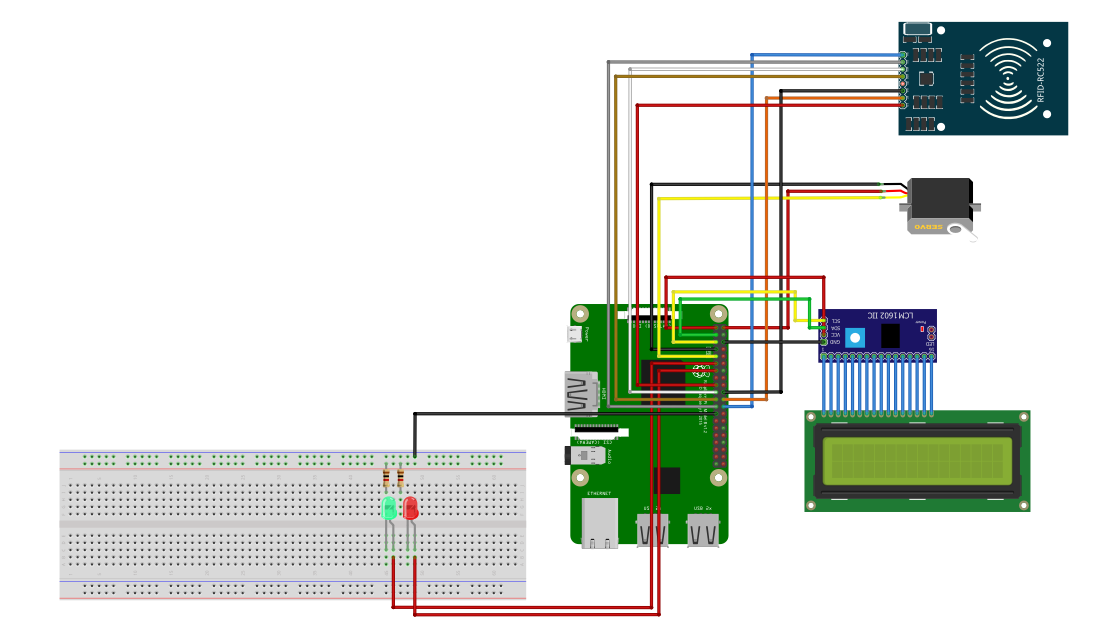
At the same moment the LCD displays a message, one of the two LEDs from the breadboard will begin to shine for a few seconds. If the user is allowed to access the system, the green LED will be on, followed by the activation of the servo motor. If the client is not allowed to enter the system, the red light will turn on. In order to minimize the number of pins used to operate the LCD display, an I2C module was connected, performing serial transmission.
The servo motor will turn 90 degrees clockwise for a 5 seconds if the user is allowed to pass. Then it will return to the initial position.
The system notifies an attempt to access the system in two ways. One of them requires the web server written in Flask to be on. When the attempt to access the system is made, the main application sends a HTTP POST request to the server, which saves the data in a JSON file. Meanwhile the webpage displayed to the client makes asynchronous calls for the data inside that file, and updates the table accordingly. This method allows the webpage to update its content without the need for a refresh.
The second way of notifying an attempt for access is through email. Just like the last method, when the user tag approaches the RFID module, an email is sent with the tag name, the access privileges and the time that attempt was performed. This method doesn't require the existence of another component.
The module used for controlling the LCD with the I2C interface was found in Denis Pleic repository.
InstructionsIn order to customize the system for your needs, you need to do the following:
- Download the source code from the Github repository attached below;
- Assemble the components just like in the schematic;
- Change the email address and server address in read.py;
- Change the server address in app.py;
To run the main app:
python3 main.pyTo run the Flask web server:
python3 app.pyNote: Those two python programs are designed to work independently of each other. The main app will continue to run even if the server isn't launched, prompting an error if the POST request was unsuccessful. The same principle applies to the server.


Comments
Please log in or sign up to comment.