


In part 1, we have constructed the basic hardware and firmware necessary to drive the LED strip using the nRF52832 BLE SoC. We have also setup the base environment necessary to change and upload the firmware to the nRF52832 on board of the development kit nRF52 DK.
In this part, we will add the Bluetooth Low Energy (BLE) mechanism into the firmware so that our LED strip can be controlled using devices equipped with Bluetooth LE, such as your newer Smart Phone. We will also create a simple iPhone App with a nice & beautiful color picker to make the LED shines in different colors. To do so, we will need to modify the firmware in Part 1 to add the BLE functionality as well as to write up an app on the iOS.
Bluetooth Low EnergyBluetooth Low Energy (BLE), also referred as Bluetooth Smart, is a technology available from Bluetooth 4.0 and above specialized for low power consumption and low cost communication while maintaining similar communication distance as the classic Bluetooth.
One obvious advantage of using Bluetooth instead of other similar low power consumption technologies such as Zigbee, Z-wave, etc., is because Bluetooth is built into most of our devices around us - our computers, our notebooks, SmartTVs, Set-top-boxes, Smart Phones and Tablets, etc.. It is practically everywhere.
In this project, we are going to set up our LED strip as a BLE Server providing 2 BLE Services - Device Information and our LED light service. I am using the standard GATT Service Profile for Environmental Sensing Service (0x181A) but you are free to choose your own. For details about GATT Services, you could refer to here.
There is also one characteristic provided by our GATT Service that allow us the write (with notification) the color we want to change the LEDs to, and to read back the color set before. Note that our current circuit has not designed to preserve the memory of the nRF52832 when powered off. Therefore, when the device is disconnected from its power source, the color setting will be lost permanently. It is left as an exercise to the reader to preserve this color next time the device is turned on.
nRF52832nRF52832 is a Bluetooth SoC equipped with a powerful 32-bit ARM® Cortex™ M4F processor on chip with 512kB flash and 64kB RAM, enough for a lot of hobby and industrial projects.
As you already know from Part 1, we don't really need much other than the nRF52832 and a level shifter in this project. The nRF52832 was carefully designed to minimize the external components required. In this part, the nRF52 DK is still preferred but you can always write the firmware to an external board like the one shown here for a smaller installation and freeing up the expensive development kit for future projects.
SoftdeviceSoftdevice is the Bluetooth stack used on the Bluetooth SoC from Nordic Semiconductor. Without the Softdevice, the BLE part will not work. In Part 1, we didn't yet require Bluetooth connectivity thus we did not touch anything about the Softdevice. In this part, we are going to use Bluetooth so we will need the Softdevice - the BLE functionality we are going to use in this part will be provided by this Softdevice. Therefore, before we flash our app on to the nRF52832, we will have to make sure we have first flashed the Softdevice.
The firmwareWe will modify our app firmware based on Part 1 by adding those parts that engage with a BLE Central (here it is going to be an app running on an iPhone). Our device will function as a BLE Peripheral and become a BLE Server in the process. Roughly speaking, a BLE Server provides the data and the client consumes the data. In our case, our LED strip provides the current color and also a service to set the LED color.
As you can see form our code repository, a few extra files were being added to those in Part 1, plus a few changes in other files.
The added files, including ble_service.h, ble_service.c, device.h were there to provide our BLE services and information. A BLE Central operating as a client will interact with these services and obtains information from them, or to write information to some of these. Functions provided in ble_service.c creates the corresponding BLE Services in our_service_init() for Device Information, and LED Color. The Characteristic for read/write of the LED color was created in our_char_add().
The main executable file main.c has also been modified to add various functions to prepare and initialize the BLE communications, as well as to handle events generated during different stages of BLE communication. This including Advertising, Connection/disconnection requests and Update of the values for the LED color.
The LED color pattern generator rainbow.c has also been modified to provide a new function setcolor() to set the LEDs' color. That is, in additional of displaying a rainbow pattern, rainbow.c can now set all LEDs to a single color. This function will be called when our BLE part received a write with a 32-bit RGB color value.
In order to show off a little bit and also serves as a confirmation that the LED strip is in good working order, I have added a short rainbow color show when the device is first powered on. The duration of the rainbow can be controlled by changing the value of the macro definition DEMO_PERIOD in config.h.
The function on_write() will be triggered every time the BLE stack received a GATT Write request, dispatched from within the BLE event handler on_ble_evt(). We verify it is trying to update the color of the LED by comparing the service handle to our LED Color characteristic handle which is stored inside the global variable m_our_service.char_handles.value_handle. This characteristic handle is returned to us by the Softdevice when we first created this characteristic by calling sd_ble_gatts_characteristic_add() using our BLE_UUID_RGBLED_CHARACTERISTC_UUID in service.h.
Once we verified the write request is to write a value to change the LED color, we store this value inside another global variable called m_rgb_color and set a global flag m_color_changed to indicate the value has been changed.
This flag will be picked up in the main loop and if set, invoke the function change_color() to change the LEDs color. This function will invoke the necessary functions in rainbow.c to initialize the LEDs, set the color, adjust the brightness so that the total current consumption stays within limit, turn them on and clean up before exit.
Before we flash our own firmware on the nRF52832, we will need to perform one extra flash this time to load the Softdevice. To flash the Softdevice, we just need to type make flash_softdevice and the Softdevice will be written to the SoC.
After flashing the Softdevice, we can then proceed to flash our application by issuing the command make flash, same as in Part 1. It will compile the software and flash it to the nRF52832 SoC.
Note that if you forgot to flash the Softdevice first, nothing would work even if you have executed the make flash command above. It is because our firmware now requires the presence of the Softdevice and if it is not there, it will stop working altogether.
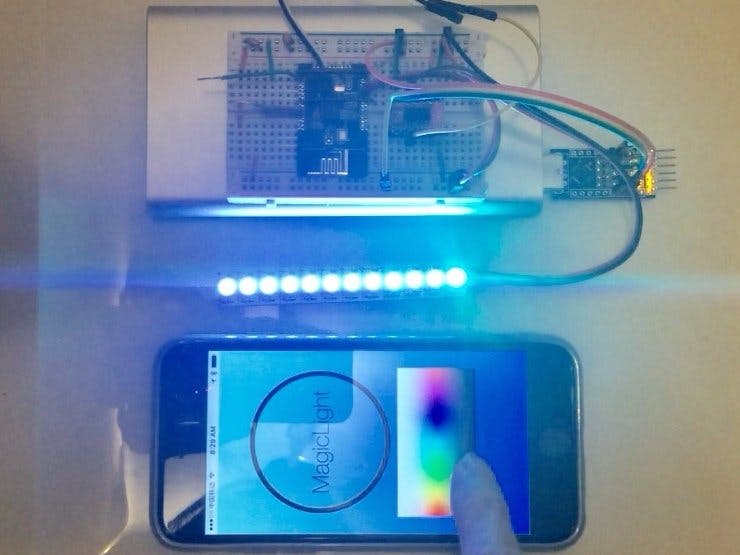
Testing it outOnce our app is flashed on the SoC, the app will start running. You should see a short rainbow shown on the LEDs and then the strip goes dark. The advertising LED on the nRF52 DK should also start flashing periodically each 1/2 second, indicating the SoC is in BLE advertising mode.
Since what we are using here is standard BLE technology, any device equipped with the right Bluetooth hardware can be used to connect to our LED strip and control the color and brightness of the LEDs. We can use some standard and free BLE testing tools (such as Punch Through (aka BLE Light), or the nRF Connect from Nordic Semiconductor) to test drive our LED strip. Download and install any one of those and you shall found our device listed in the results of the Bluetooth scan as MagicLight (if you have not changed the defaults, or if you have, the name you gave).
Simply connect to our device and you shall see 2 services - Device Information and another one listed either as 0x181A or Environmental Sensing service. Inside the Device Information service, you shall find the details we defined in device.h.
From within the other service you shall found our LED color characteristic with both Read and Write capabilities. That is, we can get the current value of this characteristic and we can also change it.
Writing a 32-bit integer to this characteristic will cause our LED strip to display the appropriate RGB color. The MSB (left most) byte will be ignored, and followed by Red, Green and Blue color values, with 0xFF being the brightest, i.e. (XXRRGGBB). For example, if you want to shine all the LEDs in full brightness, write to the characteristic the value 00FFFFFF. A value of 00FF0000 will give you a Red color, and 0000FFFF will give you a beautiful bright color in Cyan.
In order to give a better user experience and make our little project useful at home, we need an App, period.
While writing such an app is nothing rocket science like and the iOS SDK has already provided a very neat way to make use of the BLE features called Core Bluetooth, I did find a very great tutorial about BLE on Swift written by Evan K. Stone. Mr. Stone did a wonderful job of explaining in details from the basics of BLE to how one can construct an app written in Swift on the iOS.
For those that are new to Bluetooth LE and want to know more about how it works, how to build such an app easily on iOS or want to experiment more on iOS, this tutorial must not be missed.
With such great resource available for our learning, it is then logical to start our app based on the source code and materials provided in the tutorial.
The demo app was originally written to use with a BLE device called SensorTag from Texas Instrument. To use the app with our own device here, some modifications are then necessary. I have also removed those parts that serve no purpose in our project here and changed some of the variables' name so that they make sense in this project. Nevertheless, the main logic flow remains unchanged and you shall still be able to follow through the code when you go through the tutorial.
The followings are the major changes to the original demo app.
UUIDIn order to use the app with our project here, the UUIDs from the demo app must be changed. You can find all the necessary UUIDs that needed to be changed in Device.swift. Set them to whatever is defined in the firmware code inside your service.h where BLE_UUID_OUR_BASE_UUID, BLE_UUID_OUR_SERVICE_UUID, BLE_UUID_RGBLED_CHARACTERISTC_UUID were defined, There values shall correspond to the Swift variables MagicLightBaseUUID, MagicLightServiceUUID, LEDColorCharUUID respectively. You are supposed to use a different and unique BLE_UUID_OUR_BASE_UUID than mine, and if you are adding new services and characteristics, you will also need some extra UUIDs.
Note that in the Core Bluetooth, 16-bit UUID is used for only the known services, the Characteristic still require 128-bit UUIDs. When in doubt, turn on the debug function by setting debug to true in ViewController.swift. You shall see the scan results of the services and their corresponding UUIDs. Just copy & paste the ones that you need into the above Swift variables and you are good to go.
iOS has provided a very easy way to make use of BLE via the Core Bluetooth framework. While there are the required setup and initialization works needed to be done, the one single important line that carries out our mission is:
ledcolorPeripheral?.writeValue(
The above single line writes the 32-bit RGB color value contained in the Data variable data via BLE to our LED strip to change its color.
All the necessary code required for the BLE communication and to provide the User Interactions are all in one place inside ViewController.swift.
To allow us to choose our favorite color easily in a user friendly way, I found a great color picker on StackOverflow provided by Joel Teply. It has all the elements I need to provide a very convenient way to select our own color on the iPhone including the ability to change the granularity of the color pixels and to display a full spectrum of color and brightness.
Putting this together with our project provides a great and easy way to select the color we want on our LED strip. All the code necessary to perform this is contained within HSBColorPicker.swift. It can be included as an extension to our ViewController so that whenever we touched the color pixels on the Color Picker, our ViewController will get notified and update the LED strip with the new color chosen.
The color returned from the Color Picker is a UIColor object. To use with our LED strip, we need to get back the RGB values. This can be easily done by extracting individual color out from its getRed() method, scale each of the individual colors from 0..1 into 0..255, then recombine them into a 32-bit integer. This mechanism is implemented in a method called rgb() as an extension to a UIColor object.
Lastly, we use a 4x1 byte array to hold the above RGB values and send them out to our LED strip as mentioned above. This is done inside the HSBColorPicker delegate by first creating a Data object of 4-bytes and then fill it up with our color values. This delegate method will be called every time we touched our Color Picker so in theory, the color change on the LED strip can be continuous as your finger swipe across the color picker. In practice, it is limited to how frequent the connection can be made via BLE and that is fixed in our firmware.
Even though our LED strip would likely powered by a USB wall adapter plugged to an AC supply, the iPhone is not. Therefore it is important to disconnect whenever our app is not in the foreground, and reconnect when it comes to live again. Here, we invoke the method disconnect() when our app is about to go to the background and we do this inside applicationWillResignActive() in our app delegate AppDelegate.swift.
To reconnect to the LED strip when the app become active again, we invoke the method handleDisconnectButtonTapped() which will trigger the necessary actions to reconnect to our LED strip, and we do this inside applicationDidBecomeActive() in the app delegate. On iOS, to reconnect to a previously connected peripheral is very easy, just resume the scan by calling the CentralManger's method scanForPeripherals() which is exactly what handleDisconnectButtonTapped() will do at the end.
We have built a simple application on the nRF52832 that drives a strip of WS2812b LEDs in Part 1, and added the remote control functionalities using Bluetooth Low Energy which allow us to use a smartphone equipped with Bluetooth LE to control the color and brightness of the LEDs. We know what Softdevice is for and how to flash it to the Bluetooth SoC. We have also written an iOS application that gave us a much more user friendly experience to set the color, and we are able to use Core Bluetooth to write this color to our LED strip and make it shine with the new color chosen.
Notes about ColorYou may discovered that after a few experiments with the color values, the color gave off from the LEDs were a bit off and lean towards the blue side. This is because our eyes has different response to the Red, Green and Blue lights emitted from the LEDs. In additional to the LEDs' own color emission characteristics, the color we perceive will be slightly different than expected from their absolute RGB combinations. You will need to color calibrate the LEDs in order to make the color to be more close to the color displayed on your iPhone (which is unsurprisingly already color calibrated). Color calibration is the task to create a matching curve for use with all RGB values on the LEDs so that they translate into the true color as perceived by our eyes. Without this process, the color output from the RGB LEDs will not represent truly what we see.
Color calibration usually involves a reference color source (in this case it could be the color shown on the Color Picker on your iPhone), and adjust the RGB values sent to the LEDs so that they shine at the same color as on the reference source. Repeat this with all the colors need to be shown and record all these values into a mapping table. The next time a certain color was picked from the Color Picker, the table is referred to and the corresponding corrected RGB value is sent to the LED.

_3u05Tpwasz.png?auto=compress%2Cformat&w=40&h=40&fit=fillmax&bg=fff&dpr=2)
Comments
Please log in or sign up to comment.