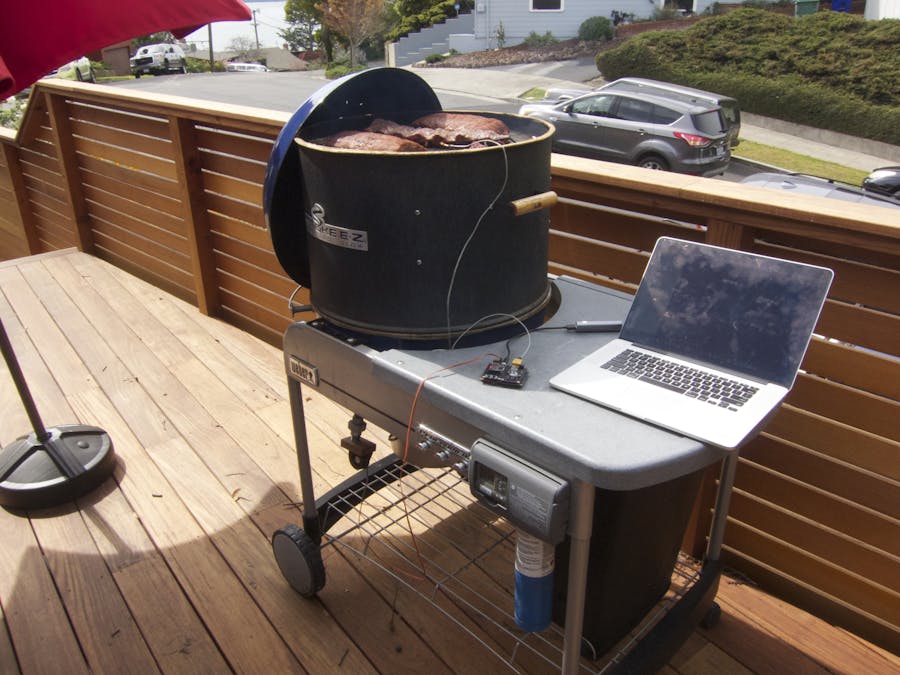
Barbecue may be the world's oldest cooking method. Cultures all over the world have barbecue in one form or another, united by their common use of heat and smoke. One of my favorite styles is American Southern BBQ, which involves roasting meat at low temperatures for many hours in the presence of smoke.
Charcoal is an excellent fuel source for this type of cooking, but it can be difficult to maintain stable temperatures with charcoal for long periods of time. I built an automatic temperature controller for my charcoal grill to make that a lot easier.
Modulo
I built the controller using Modulo, a platform that I've been developing that makes it easy to build things with electronics. For more information about Modulo in general, check out modulo.co.
For this project, I used one Modulo base and four Modulo devices:
Controller - A microcontroller board that's programmable with the Arduino IDE. It can control the other Modulo devices and also has 6 I/O ports, each with Power, Ground, and an I/O pin.
Display - A full color OLED display that shows the current temperature and graphs it over time.
Knob - A rotary encoder and push button for setting the target temperature and adjusting parameters. The Knob also has an RGB LED, but I didn't use it in this project.
Thermocouple Interface - An amplifier for a Thermocouple probe, which makes it possible to measure the high temperatures present inside the BBQ.
To avoid running an extension cord or leaving my laptop outside, I powered it all with a small USB battery pack. It worked great and ran for well over 8 hours on a single charge!
Physical Construction
The temperature is controlled with a small blower fan. The fan controls the amount of oxygen that gets to the charcoal, an effective way to regulate combustion. The fan needs only +5V power and a pulse-width modulated signal, which the Modulo Controller can easily provide from one of its 6 I/O ports.
I drilled a hole through the side of the grill and used plumbing parts and a block of wood to mount the fan. My grill also has a SmokeEZ, which gives it more space for smoking, but you can definitely make great BBQ without it.
Programming
The Modulo Arduino library makes it easy for controller code to communicate with the devices that are connected to it. You simply create an object for each module that you're using.
ColorDisplayModule display;ode>ThermocoupleModule thermocouple;ode>KnobModule knob;
Then you can easily access the modules through methods on the objects. For instance, by getting the thermocouple's temperature.
double temp = thermocouple.getTemperatureF();or write the temperature to the display:
display.clear()ode>display.print("Temperature: ")ode>display.print(temp);ode>display.refresh();
You can check out the full code for this project at the bottom of this page.
Results
I tested the system by BBQing pork spare ribs and beef back ribs. At first the controller needed some parameters to be tweaked and minor bugs to be fixed, but after an hour or so it was dialed in and kept a steady temperature for the remainder of the cook. Though it seemed to work well, I think I should probably "test" it again soon. ;-)
Interested in learning more about Modulo or this project? Check out the modulo website or shoot me a message!


Comments
Please log in or sign up to comment.