Hackster is hosting Hackster Holidays, Ep. 6: Livestream & Giveaway Drawing. Watch previous episodes or stream live on Monday!Stream Hackster Holidays, Ep. 6 on Monday!
El Condor
Published

Streaming Internet Radio Based on Raspberry Pi

Streaming Audiostreams from the internet using a Raspberry Pi and HiFiBerry AMP+ and a custom LCD and 6 button interface.

IntermediateWork in progress2 hours21,341
Streaming Internet Radio Based on Raspberry Pi

Things used in this project

Hardware components

Raspberry Pi 3 Model B
×1
HiFiBerry AMP+
×1
Resistor 10k ohm
Resistor 10k ohm
×4
Pushbutton switch 12mm
SparkFun Pushbutton switch 12mm
×6
Standard LCD - 16x2 White on Blue
Adafruit Standard LCD - 16x2 White on Blue
×1
Single Turn Potentiometer- 10k ohms
×1

Software apps and online services

Raspbian
Raspberry Pi Raspbian
Python

Hand tools and fabrication machines

Soldering iron (generic)
MultiMeter

Story

Read more

Schematics

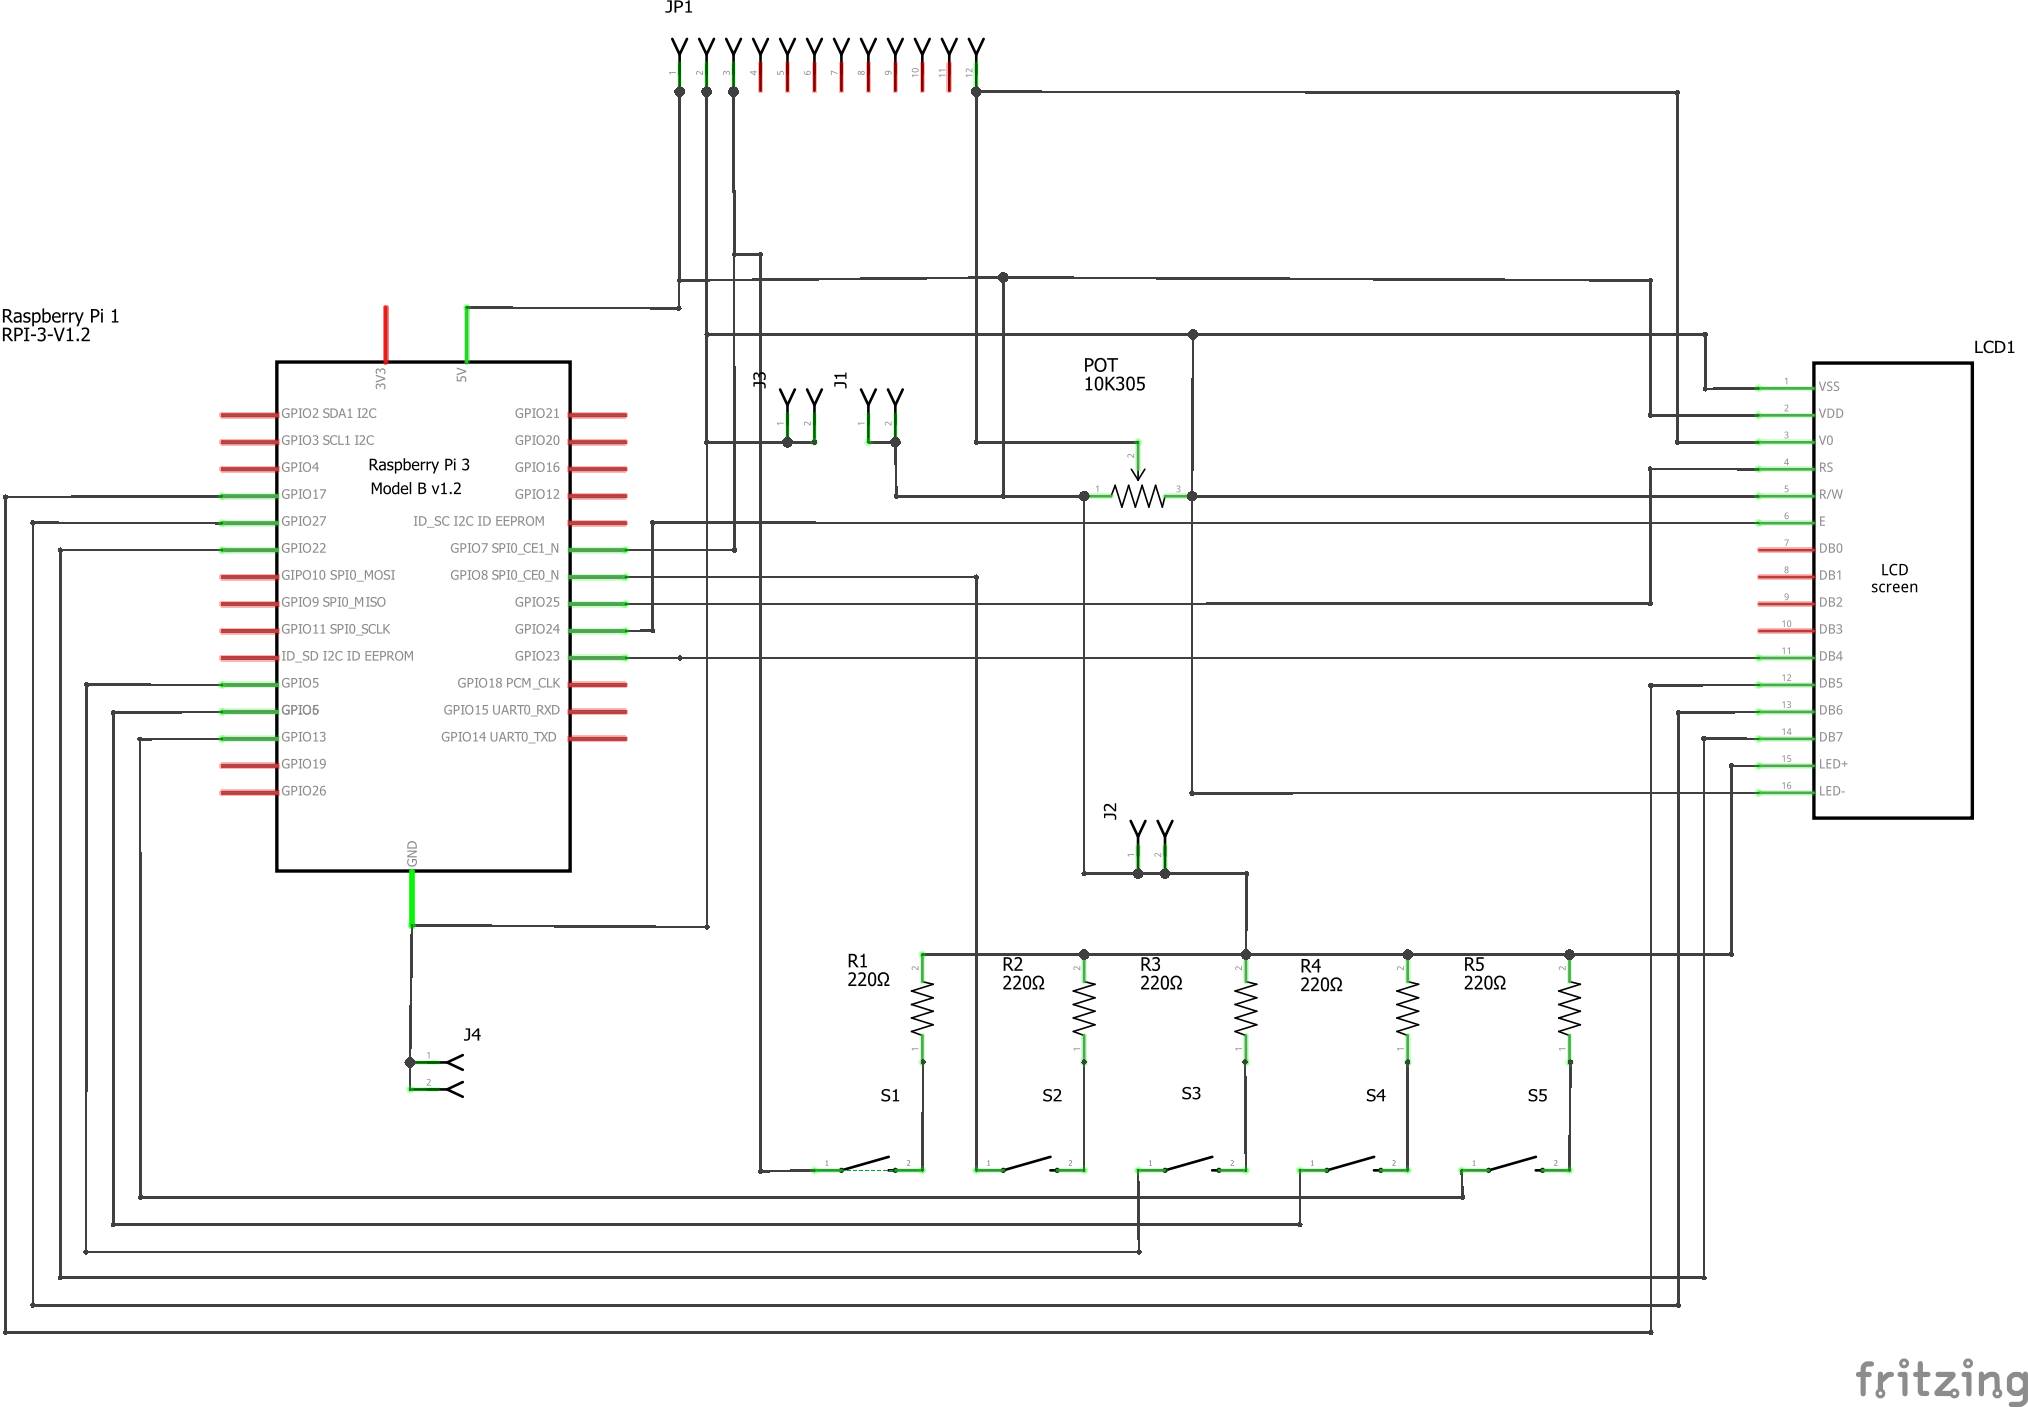
Electronic schematic

Electronic blueprint

Design

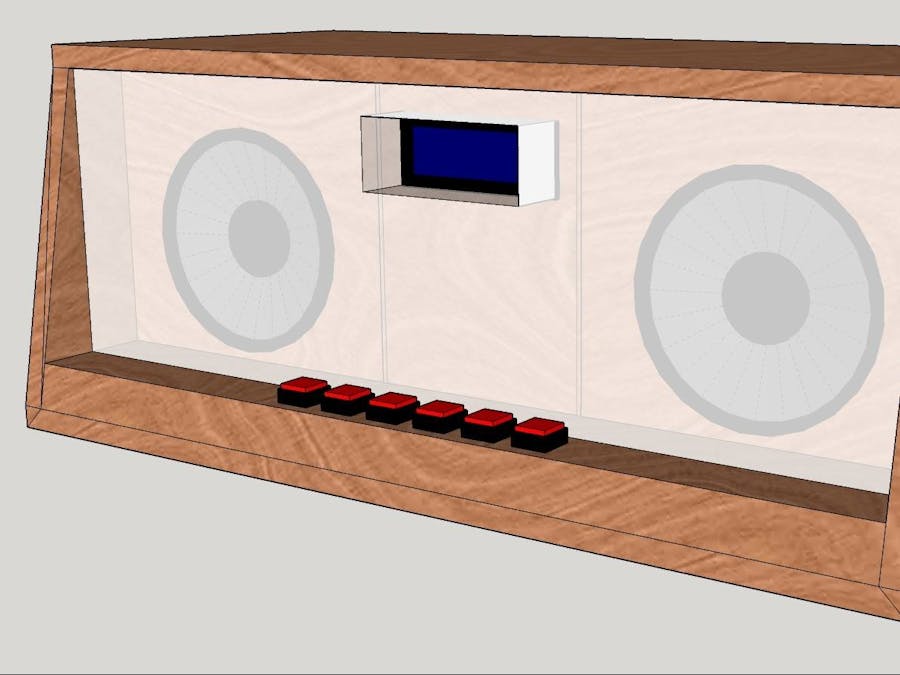
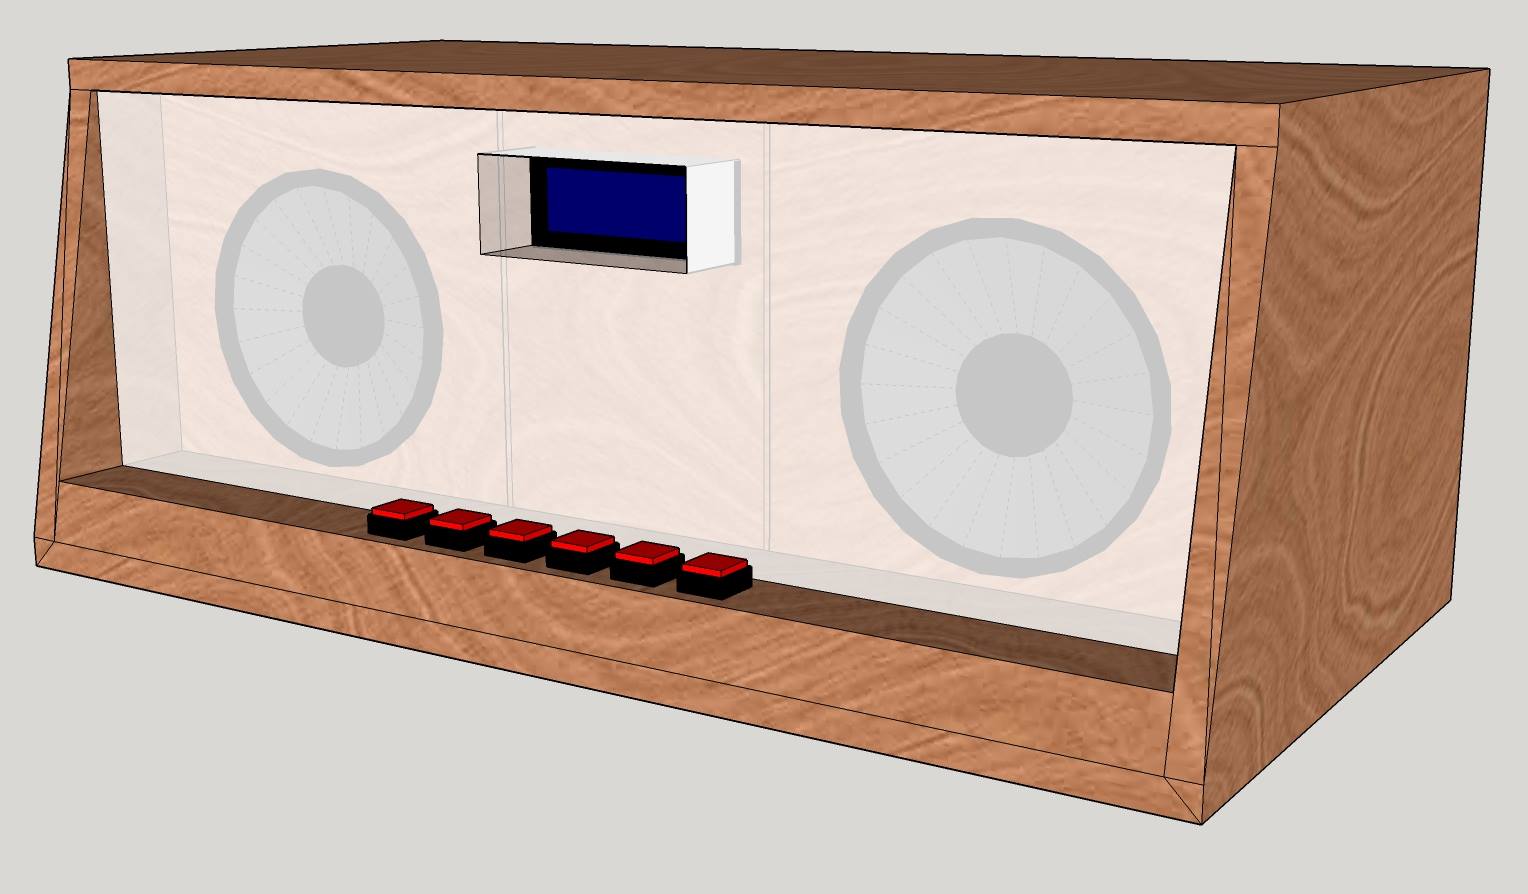
SketchUpp design for the actual radio. Went for a kind of retro look. :o)

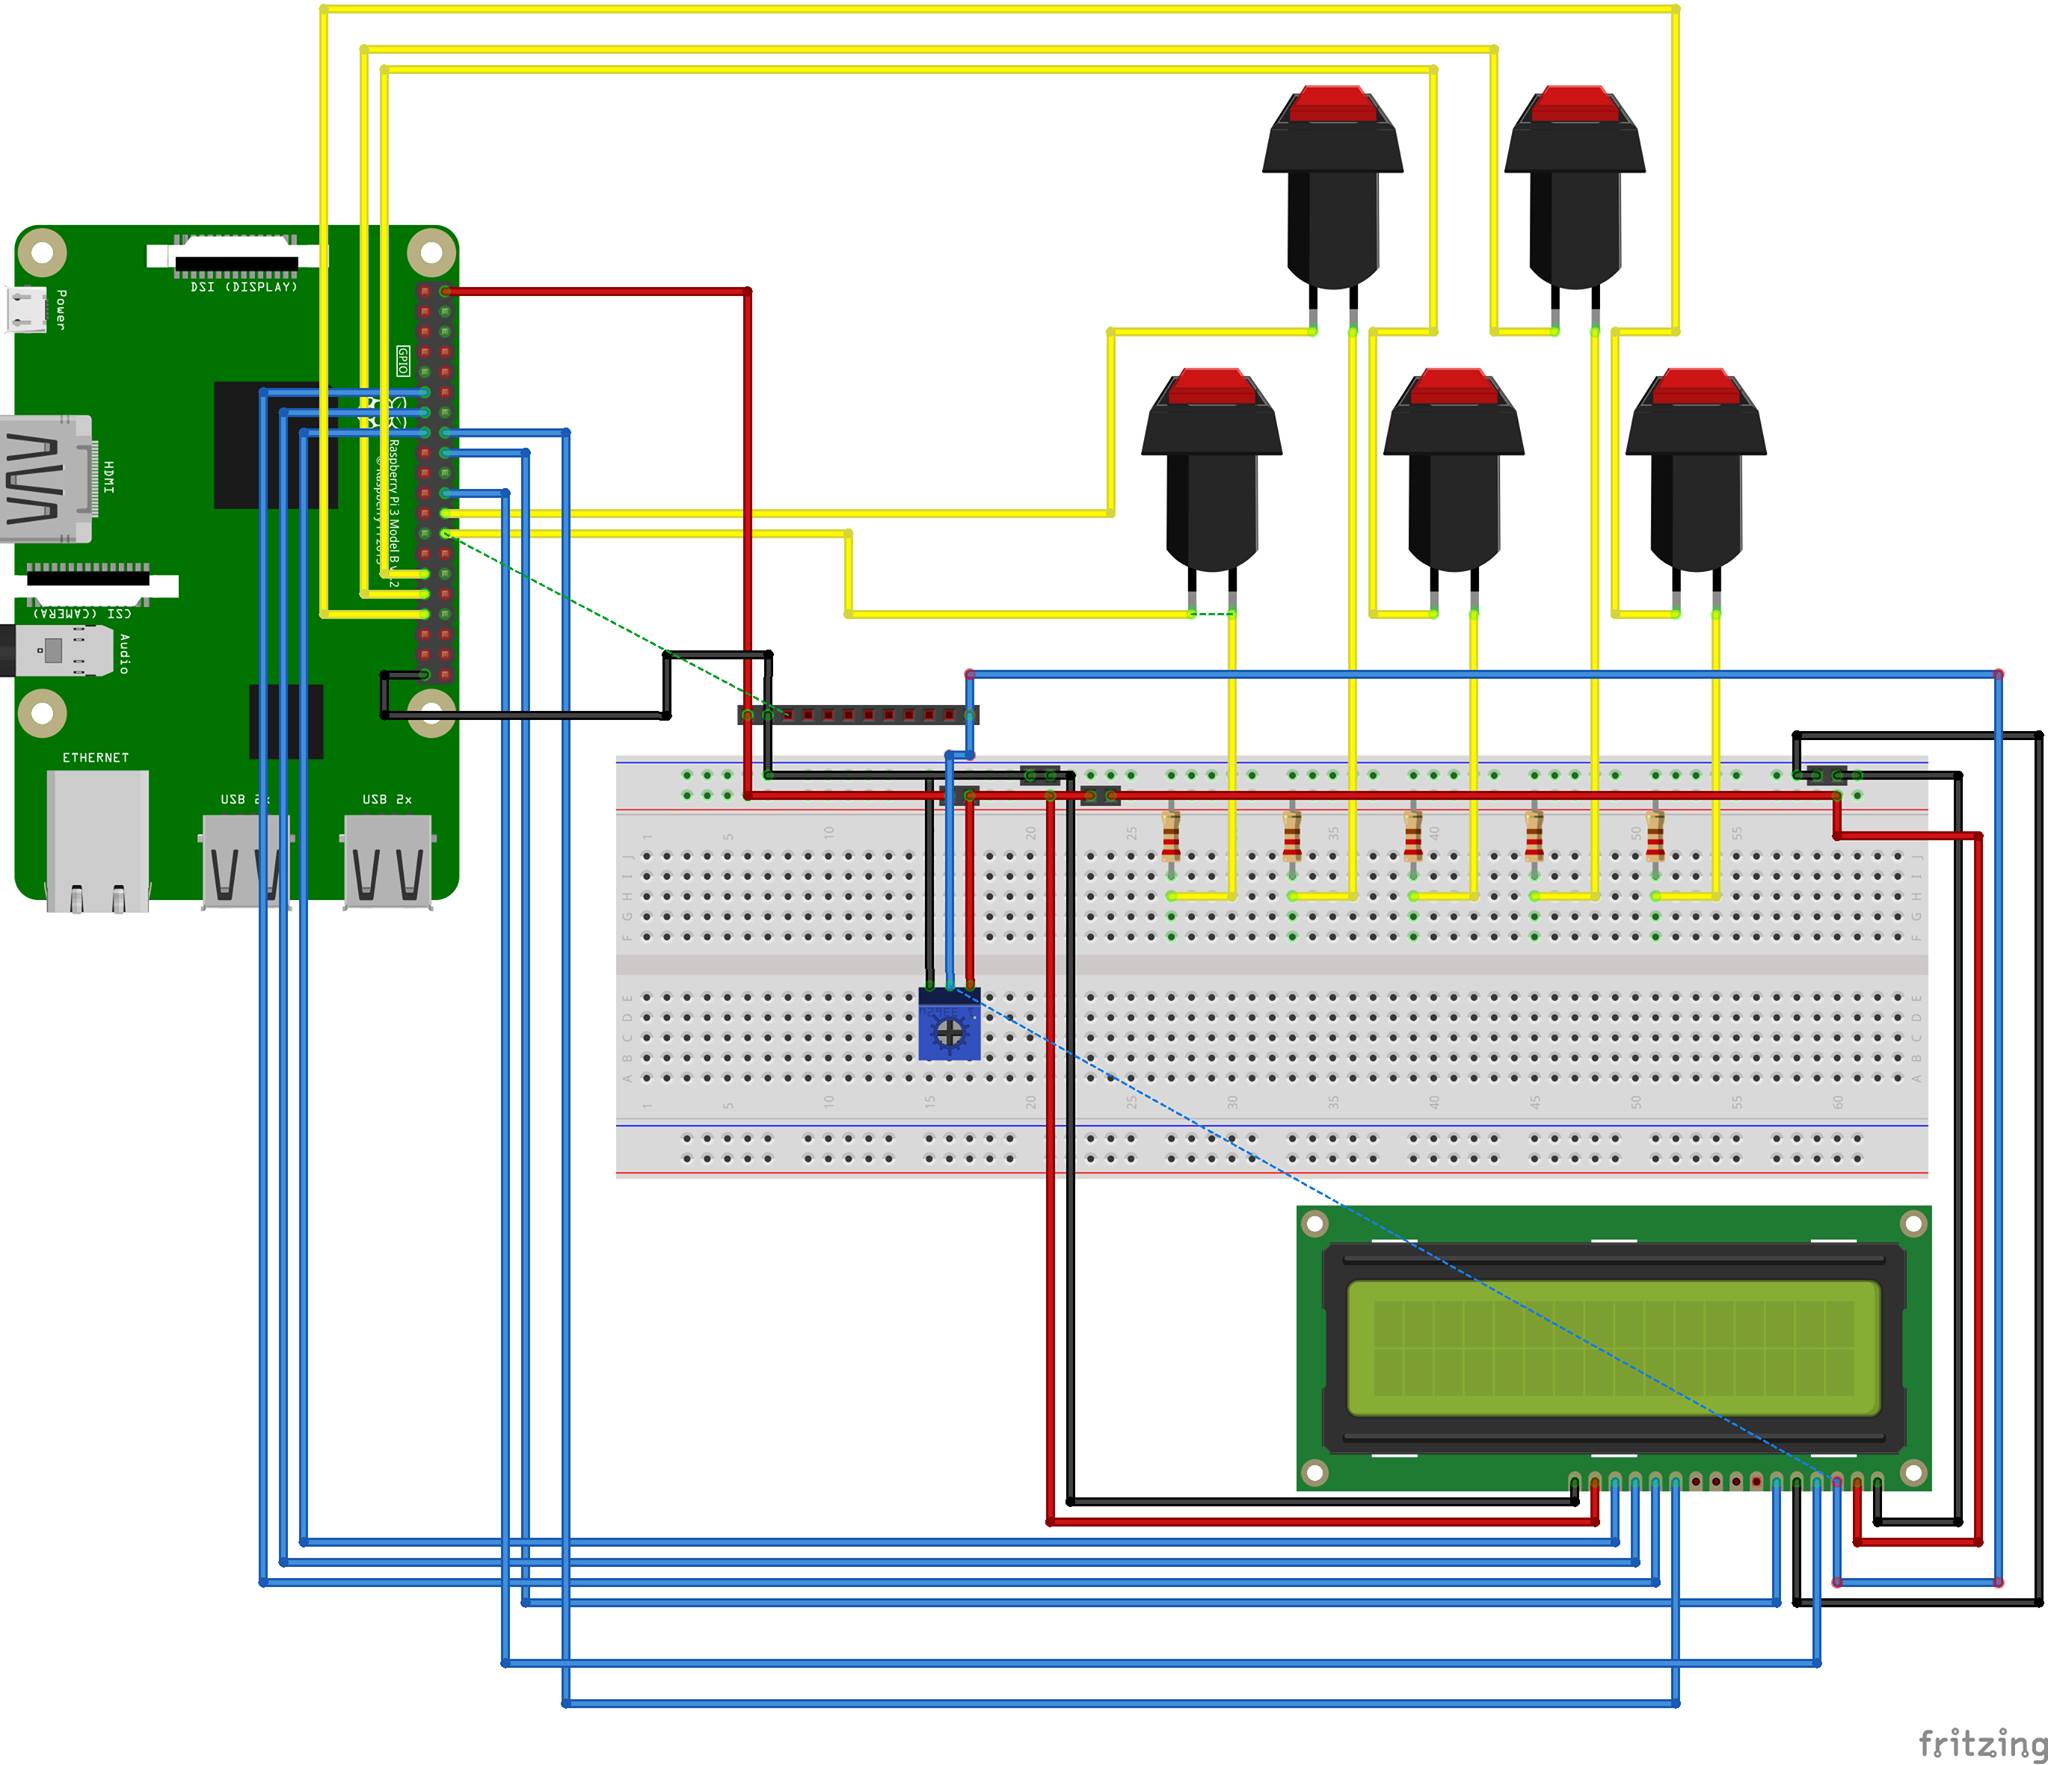
Breadboard view

How to set the electronics up on a breadboard

Code

Core Radio firmware

Python
This is the python script that is being used to drive the actual radio. It leverages MPC and MPD service and player to actually play the audio stream. At this point access to the SHH terminal is needed to add and remove radio stations and the idea is to create a webinterface to do that. Not yet implemented.
The initial code used the main while loop to check for button presses with if statements. I rewrote that code to use interrupts. This is a little lighter on the Pi.
#!/usr/bin/python
#
# Script for Raspberry Pi Internet Radio
# 
# Author: Kyle Prier
# Site: http://wwww.youtube.com/meistervision
# 
# LCD author : Matt Hawkins
# Site   : http://www.raspberrypi-spy.co.uk/
#
# Rework: Solino C. de Backlight
# Added functionality for Volume UP and DOWN, Shutdown
# Added interrupts for reading buttons
#
# Date   : 26-03-2017
#

# The wiring for the LCD is as follows:
# 1 : GND
# 2 : 5V
# 3 : Contrast (0-5V)*
# 4 : RS (Register Select)
# 5 : R/W (Read Write)       - GROUND THIS PIN! We do not want the LCD to send anything to the Pi @ 5v
# 6 : Enable or Strobe
# 7 : Data Bit 0             - NOT USED
# 8 : Data Bit 1             - NOT USED
# 9 : Data Bit 2             - NOT USED
# 10: Data Bit 3             - NOT USED
# 11: Data Bit 4
# 12: Data Bit 5
# 13: Data Bit 6
# 14: Data Bit 7
# 15: LCD Backlight +5V
# 16: LCD Backlight GND (Red, Optional)
# 17: LCD Backlight GND (Green, Optional)
# 18: LCD Backlight GND (Blue, Optional)

# import
import RPi.GPIO as GPIO
import time
import os
import alsaaudio
import LCDLib
import sys

# Create Audio Object
mixer = alsaaudio.Mixer()
mixer.setvolume(50)
currentvol = mixer.getvolume()
currentvol = int(currentvol[0])

# GPIO Setup

# Define GPIO for Radio Controls
NEXT = 8
PREV = 7
VOLUP = 6
VOLDOWN = 5
SHUTDOWN = 13

GPIO.setwarnings(False)  # Mute warnings
GPIO.setmode(GPIO.BCM)  # Use BCM GPIO numbers

GPIO.setup(NEXT, GPIO.IN, pull_up_down=GPIO.PUD_DOWN)  # Next Channel button
GPIO.setup(PREV, GPIO.IN, pull_up_down=GPIO.PUD_DOWN)  # Previous Channel button
GPIO.setup(VOLUP, GPIO.IN, pull_up_down=GPIO.PUD_DOWN)  # Volume Up
GPIO.setup(VOLDOWN, GPIO.IN, pull_up_down=GPIO.PUD_DOWN)  # Volume Down
GPIO.setup(SHUTDOWN, GPIO.IN, pull_up_down=GPIO.PUD_DOWN)  # Bring OS down

#Initialize display
LCDLib.lcd_init()

#define volume function
def change_volume(volume):
	global currentvol
	if (currentvol <= 100) and (currentvol >= 0):
	    LCDLib.lcd_init()
	    newVol = currentvol + volume
	    mixer.setvolume(newVol)
	    currentvol = mixer.getvolume()
	    currentvol = int(currentvol[0])
	    displayvolume = "Volume: " + str(newVol)
	    LCDLib.lcd_display("",1,displayvolume,2,"",1,"",1)
	    time.sleep(2)
	    LCDLib.lcd_clear()
	    display_current_station()

def display_current_station():
	f = os.popen("mpc current")
	station = ""
	for i in f.readlines():
	    station += i
	# Send some text
	LCDLib.lcd_display(station,1,"",2,"",1,"",1)

def callback_next(channel):
	os.system("mpc next")
	time.sleep(1)
	os.system("mpc play")
	display_current_station()
	
def callback_prev(channel):
	os.system("mpc prev")
	time.sleep(1)
	os.system("mpc play")
	display_current_station()

def callback_volup(channel):
	change_volume(5)

def callback_voldown(channel):
	change_volume(-5)

def callback_shutdown(channel):
	LCDLib.lcd_display("",1,"System shutting down!",2,"",1,"",1)
	time.sleep(2)
	GPIO.cleanup()
	os.system("sudo shutdown -H now")
	sys.exit(0)

GPIO.add_event_detect(NEXT, GPIO.RISING, callback=callback_next, bouncetime=300)
GPIO.add_event_detect(PREV, GPIO.RISING, callback=callback_prev, bouncetime=300)
GPIO.add_event_detect(VOLUP, GPIO.RISING, callback=callback_volup, bouncetime=300)
GPIO.add_event_detect(VOLDOWN, GPIO.RISING, callback=callback_voldown, bouncetime=300)
GPIO.add_event_detect(SHUTDOWN, GPIO.RISING, callback=callback_shutdown, bouncetime=300)

#Main program block
def main():
	LCDLib.lcd_display("Raspberry Pi", 2, "Internet Radio", 2, "by", 2, "Solino de Baay", 2)
	time.sleep(4)
	os.system("mpc play")
	while 1:
		LCDLib.lcd_clear()
		display_current_station()
		time.sleep(20)

if __name__ == '__main__':
    main()

LCDLibrary

Python
The initial code had all the LCD driving code incorporated in the setup. There was, however, a lot of code repetition. I refactored the LCD code out of the original script into a library which abstracted all the LCD calls into one simple function that can be called from the main program.
The LCD's are prone to have timing issues and you may need to fidget with the timings for the E_PULSE and E_DELAY variables. If you have questions or improvements to the code, let me know.

The eventual plan is to rewrite the main program to use the AdaFruit LCD Library which seems to be more comprehensive and contains a lot more functionality.
#!/usr/bin/python
#
# Script for Raspberry Pi LCD Library
# 
# Author: Solino de Baay
# Site: http://wwww.de-baay.nl
# 
# LCD author : Matt Hawkins
# Site   : http://www.raspberrypi-spy.co.uk/
#
# Date   : 09/02/2017
#

# The wiring for the LCD is as follows:
# 1 : GND
# 2 : 5V
# 3 : Contrast (0-5V)*
# 4 : RS (Register Select)
# 5 : R/W (Read Write)       - GROUND THIS PIN! We do not want the LCD to send anything to the Pi @ 5v
# 6 : Enable or Strobe
# 7 : Data Bit 0             - NOT USED
# 8 : Data Bit 1             - NOT USED
# 9 : Data Bit 2             - NOT USED
# 10: Data Bit 3             - NOT USED
# 11: Data Bit 4
# 12: Data Bit 5
# 13: Data Bit 6
# 14: Data Bit 7
# 15: LCD Backlight +5V
# 16: LCD Backlight GND (Red, Optional)
# 17: LCD Backlight GND (Green, Optional)
# 18: LCD Backlight GND (Blue, Optional)

#import
import RPi.GPIO as GPIO
import time
import os

#GPIO Setup
GPIO.setwarnings(False)  # Mute warnings
GPIO.setmode(GPIO.BCM)  # Use BCM GPIO numbers

# Define GPIO to LCD mapping
LCD_RS = 25
LCD_E  = 24
LCD_D4 = 23
LCD_D5 = 17
LCD_D6 = 27
LCD_D7 = 22

#Configure GPIO Pins
GPIO.setup(LCD_E, GPIO.OUT)  # E
GPIO.setup(LCD_RS, GPIO.OUT) # RS
GPIO.setup(LCD_D4, GPIO.OUT) # DB4
GPIO.setup(LCD_D5, GPIO.OUT) # DB5
GPIO.setup(LCD_D6, GPIO.OUT) # DB6
GPIO.setup(LCD_D7, GPIO.OUT) # DB7

# Define some device constants
LCD_WIDTH = 20    # Maximum characters per line
LCD_CHR = True
LCD_CMD = False
 
# Timing constants
E_PULSE = 0.00010
E_DELAY = 0.00010

# Send text
def lcd_display(line_1, style_1, line_2, style_2, line_3, style_3, line_4, style_4):
  arguments = locals()
  for x in xrange (1, 5):
    outstr = "line_" + str(x)
    outstyle = "style_" + str(x)
    outlcd = "LCD_LINE_" + str(x)
    if outlcd == "LCD_LINE_1":
      outlcd = 0x80
    elif outlcd == "LCD_LINE_2":
      outlcd = 0xC0
    elif outlcd == "LCD_LINE_3":
      outlcd = 0x94
    elif outlcd == "LCD_LINE_4":
      outlcd = 0xD4
    stylex=int(arguments[outstyle])
    lcd_byte(outlcd, LCD_CMD)
    lcd_string(arguments[outstr], stylex)

def lcd_clear():
  lcd_byte(0x01,LCD_CMD)

def lcd_init():
  # Initialise display
  lcd_byte(0x33,LCD_CMD) #initialize display 1
  lcd_byte(0x32,LCD_CMD) #initialize display 2
  lcd_byte(0x28,LCD_CMD) #Function Set 4-bit 2 line 5x7 dots
  lcd_byte(0x0C,LCD_CMD) #Display on  
  lcd_byte(0x06,LCD_CMD) #Entry mode
  lcd_byte(0x01,LCD_CMD) #Clear display   
 
def lcd_string(message,style):
  # Send string to display
  # style=1 Left justified
  # style=2 Centred
  # style=3 Right justified
 
  if style==1:
    message = message.ljust(LCD_WIDTH," ")  
  elif style==2:
    message = message.center(LCD_WIDTH," ")
  elif style==3:
    message = message.rjust(LCD_WIDTH," ")
 
  for i in range(LCD_WIDTH):
    lcd_byte(ord(message[i]),LCD_CHR)
 
def lcd_byte(bits, mode):
  # Send byte to data pins
  # bits = data
  # mode = True  for character
  #        False for command
 
  GPIO.output(LCD_RS, mode) # RS
 
  # High bits
  GPIO.output(LCD_D4, False)
  GPIO.output(LCD_D5, False)
  GPIO.output(LCD_D6, False)
  GPIO.output(LCD_D7, False)
  if bits&0x10==0x10:
    GPIO.output(LCD_D4, True)
  if bits&0x20==0x20:
    GPIO.output(LCD_D5, True)
  if bits&0x40==0x40:
    GPIO.output(LCD_D6, True)
  if bits&0x80==0x80:
    GPIO.output(LCD_D7, True)
 
  # Toggle 'Enable' pin
  time.sleep(E_DELAY)    
  GPIO.output(LCD_E, True)  
  time.sleep(E_PULSE)
  GPIO.output(LCD_E, False)  
  time.sleep(E_DELAY)      
 
  # Low bits
  GPIO.output(LCD_D4, False)
  GPIO.output(LCD_D5, False)
  GPIO.output(LCD_D6, False)
  GPIO.output(LCD_D7, False)
  if bits&0x01==0x01:
    GPIO.output(LCD_D4, True)
  if bits&0x02==0x02:
    GPIO.output(LCD_D5, True)
  if bits&0x04==0x04:
    GPIO.output(LCD_D6, True)
  if bits&0x08==0x08:
    GPIO.output(LCD_D7, True)
 
  # Toggle 'Enable' pin
  time.sleep(E_DELAY)    
  GPIO.output(LCD_E, True)  
  time.sleep(E_PULSE)
  GPIO.output(LCD_E, False)  
  time.sleep(E_DELAY) 

Credits

El Condor

El Condor

1 project • 17 followers
Aspiring artist with a side-job as an IT Admin. Part-time write, poët, tinkerer, inventor. Full-time dreamer.
Thanks to Kyle Prier and Matt Hawkins.

Comments