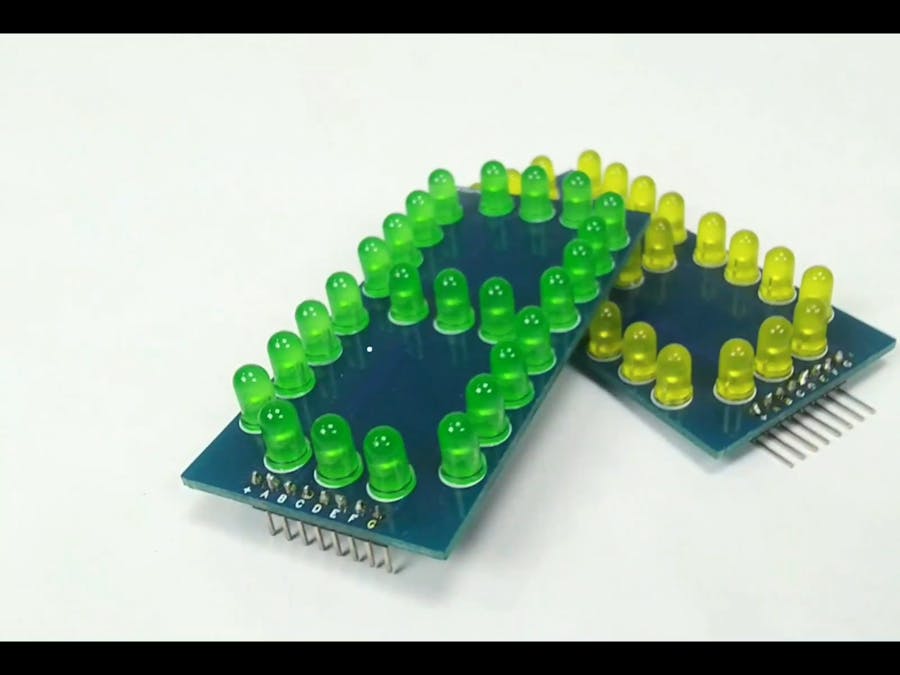
In this interesting project we will see how to create a DIY(Do it Yourself) 7 segment which is comparably larger than the traditional 7 segment available in the market.
Before diving into the DIY 7 segment let’s first understand about What is a 7 segment is and how it works.
What is 7 Segment?A 7 Segment display is nothing but a combination of LED’s in segments. In a 7 Segment display there are 7 segments named as A, B, C, D, E, F & G.
A typical 7 Segment may be of Common Anode type or of a Common Cathode type.
Common Anode 7 SegmentIn a Common Anode 7 Segment all the anode of the segments are common or we can say all the anodes are internally connected. Instead of giving individual power supply(+ve) to all the segments we can give it to the common terminal. To make a segment on we have to give individual Negative supply.
Common Cathode 7 SegmentIn a Common Cathode 7 Segment all the cathodes of the segments are common or we can say all the cathodes are internally connected. Instead of giving individual power supply(-ve) to all the segments we can give it to the common terminal. To make a segment on we have to give individual Positive supply.
Design Your Own 7 SegmentNow we will see how you can design your own 7 Segment as per your convenience.
You can design your own PCB as per your requirement. Here we used an online tool to design our PCB.
Here is the 3D view of our Designed PCB.
Ordering PCB from JLCPCB
Ordering PCb from JLCPCB is quite simple and easy.
You just have to add your gerber file (max upto 6 layers), select layer and add to cart then checkout securely and the sum. That's it no your designed PCB is at your doorstep.
Soldering the LEDs on the PCB is quite easy. You need take care of one thing that there should not be any damage while doing.
Now our DIY 7 Segment is ready to use. Here we have designed two different color 7 Segments, you can design as per your requirement.
Now we will see how we can use our DIY 7 Segment with Arduino.
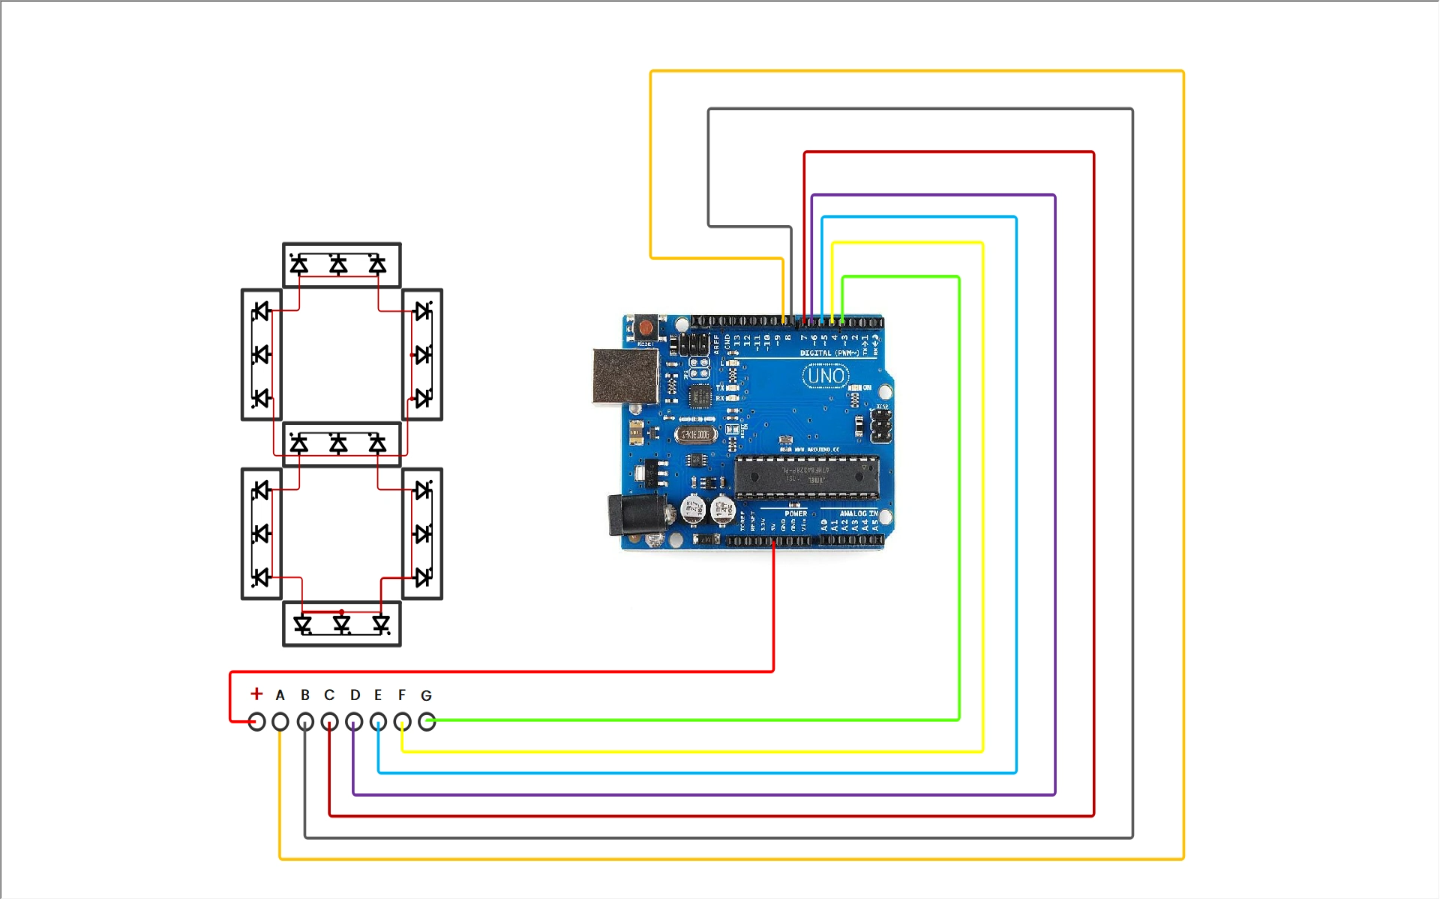
Circuit DiagramHere we have used a Common Anode 7 Segment so we connect the +5V pin of Arduino with the Common Pin of DIY 7 Segment. And all Other pins have been connected with the digital pins of Arduino. The circuit is also quite simple and easy to make.
WorkingWhen the circuit connection is completed upload a trial code of 7 Segments to the Arduino and Give power supply to the Arduino to make it ON.
In this article we saw how to make a DIY 7 Segment and design our own PCB. Stay tuned for more such projects….


_ztBMuBhMHo.jpg?auto=compress%2Cformat&w=48&h=48&fit=fill&bg=ffffff)


Comments
Please log in or sign up to comment.