This project shows how to build a car that is controlled by sound.
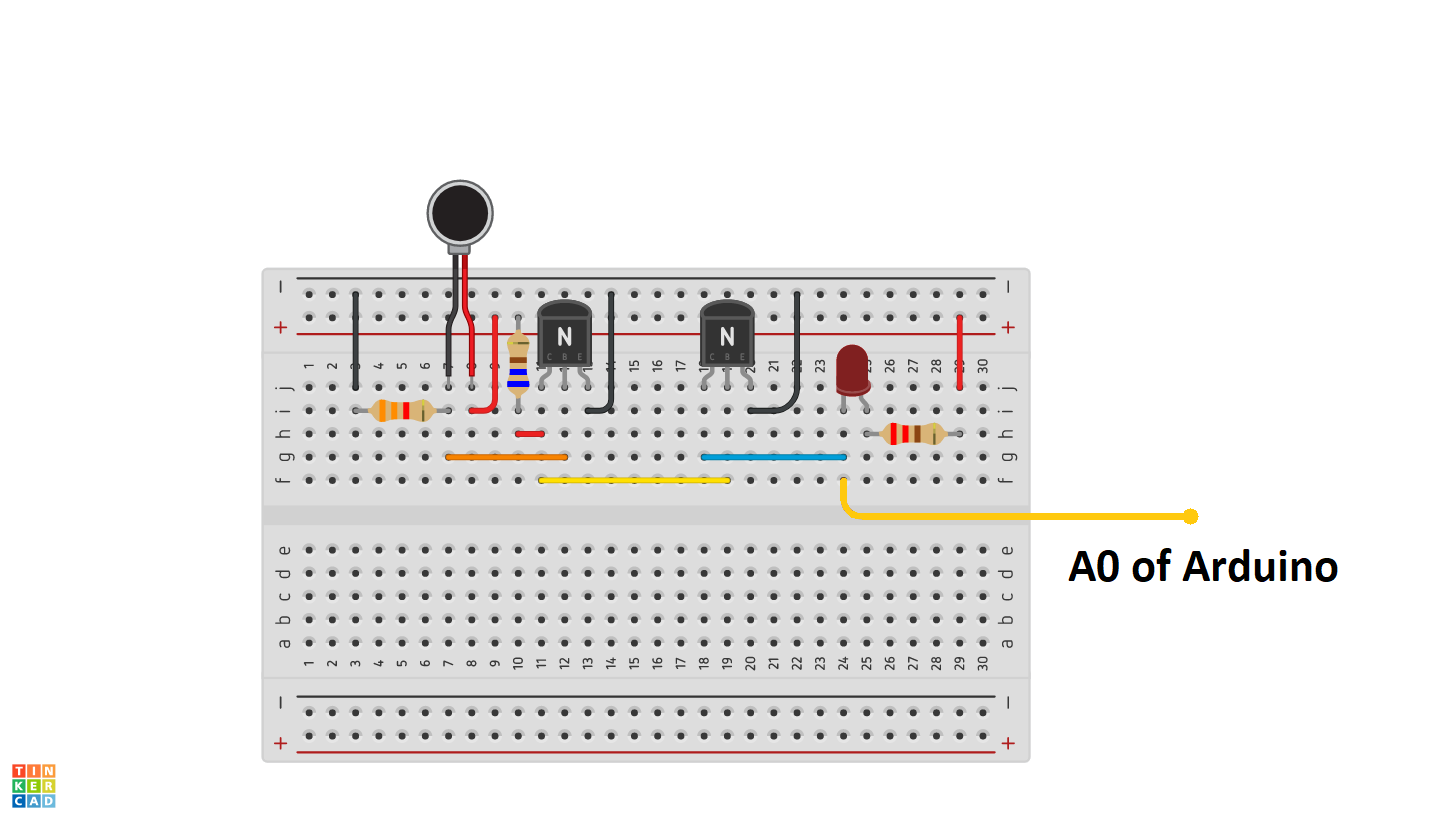
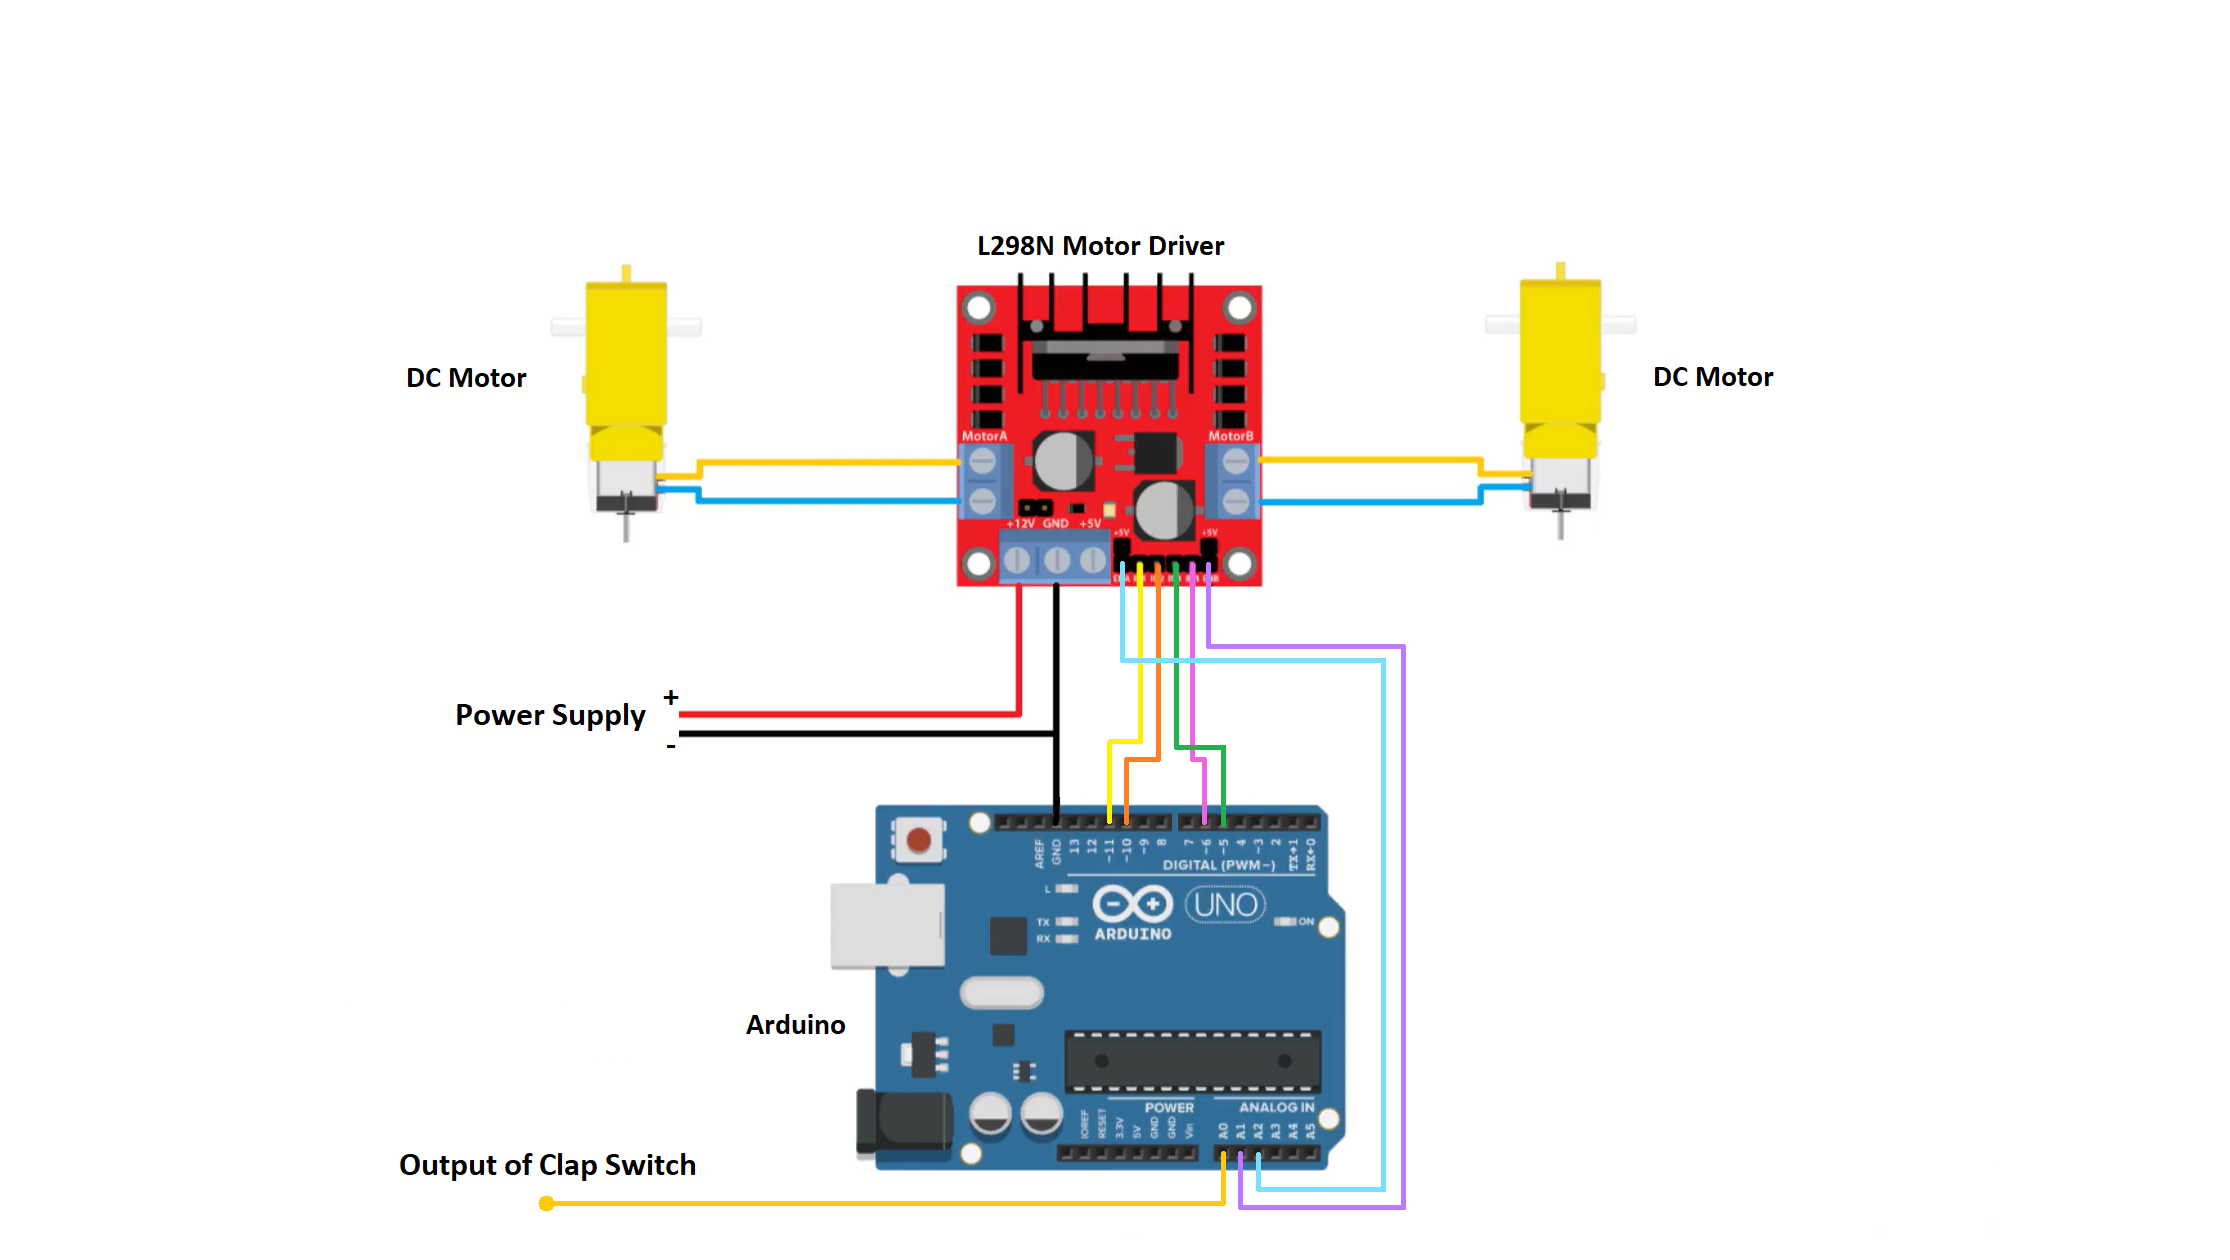
The project demonstrates how to assemble these components (through a schematic and a circuit diagram) and program the Arduino board to recognize sounds and use it to control the movement of the car.
By following the steps mentioned, you will have a fully functional car that can be controlled by clapping, whistling, or making other sounds. This exciting project is a great way to learn about electronics, programming, and robotics.
Watch this video for details:


_ztBMuBhMHo.jpg?auto=compress%2Cformat&w=48&h=48&fit=fill&bg=ffffff)


Comments
Please log in or sign up to comment.