Description
Jam ‘n’ Bread aims to bring people back to the dinner table and make mealtime a fun and social event again. Studies show that traditional family-style dinners are becoming less common in American households, despite their many benefits for family relationships. Even households that participate in regular group dinners, such as student co-ops, require a precise synchronization in timing between individuals to make them happen.
Inspired by the shared (if perhaps ephemeral) sense of togetherness that musicians experience when playing music together, Jam ‘n’ Bread introduces touch-sensitive instrumental sounds and lighting to tableware in order to encourage people to “play with their food,” take a break from their busy day, and enjoy a meal together.
Brainstorming
Sketches
Design Decisions
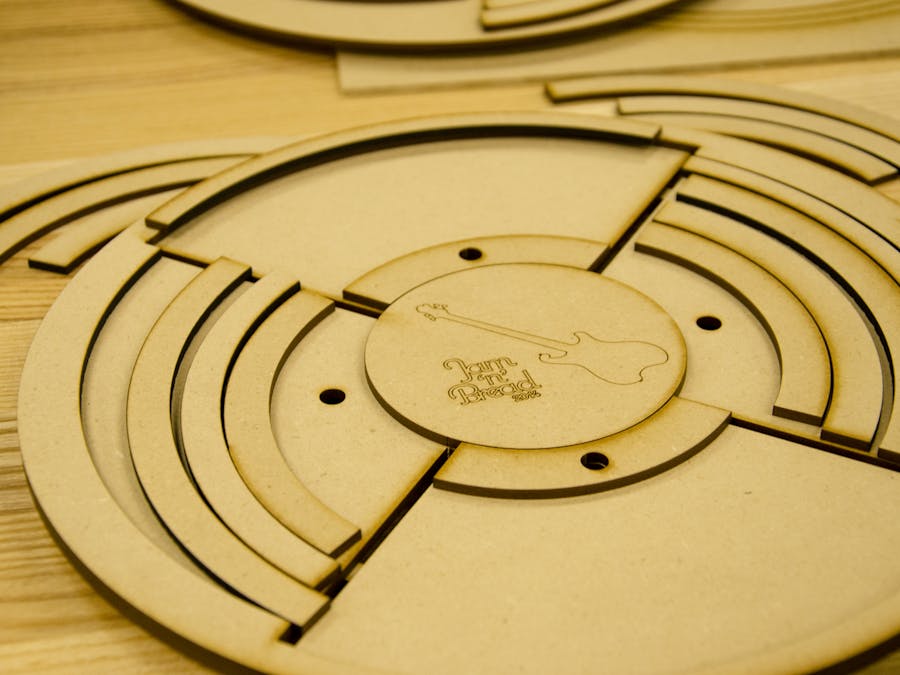
We decided to design our own plates using acrylic and plywood because we wanted our plates to appear in the same collection, but yet we wanted each plate to have their own unique style. Each plate has a unique engraving and instrument to encourage people to come together at the dining table.
The aesthetic of the plate is modeled after the design of a record. The arcs mirror the visual symbol for vibration or music.
We also purposely displayed the wires to show off the hardware embedded within the plate.
The plates are not wireless to encourage everyone to eat together in order for the plates to function.
Kitchen Research
Research
We visited a co-op to research cooking with a large environment of people. We found that while cooking in large groups, there are always a few people that aren't doing anything. They're basically in the way. We made a basic vegetable stir fry while listening to music in the background. Afterwards, we ate together. Through this experience, we realized that music could be a large part of the kitchen and dining together is difficult especially with the schedules of busy students.
Speaker Code
Capacitor Sensor Code
Capacitive Sensor + Piezo Drum Sensor
Laser Cut File
The Final Product
Jam 'n' Bread Demo
Assembly Demo
Process
Get all items in bill of materials.
Download the STL files and laser cut the wood.
Assemble wood (follow GIF).
For circuitry, poke the LED lights into the hole slits.
Put aluminum foil on the bottom and then connect long wires leading to them (which can later be hooked onto the microprocessor).
Wire the LED lights. Make sure all wiring goes through the neatly made hole slit. It is advised to also use electrical tape to organize wires together and to label them. For example, group all the ground LEDS together and mark them accordingly.
Depending on how many musical plates you want, hook these wires to (x) amount of microprocessors. If for example you have a Mega like we did, then one was sufficient for everything - sensing the touches and playing the sound.
Download the code (sound and sensor) and upload to the microprocessor. If you're only using one, combine the code and change up the IO pins.
Create the circuitry as shown in the schematic.
Jam and eat beets.
Construction
Assembly Sequence (without wiring)
The Wiring
Arduino Sound Schematic
Presentation Slides
Insights & Ideas
- Completely reinvent how we approached and tackled the problem. There are two ways about of going at this. First is we keep the capacitive sensing as our method of picking up touch. To make this more accurate for our next implementation, we would get rid of the "pretty wires" that may have caused one capacitance touch to influence all the others, use wire shielding, and ensure that all foil eventually reached Earth ground through a 100pf capacitance for additional stability. Second way is to drop the capacitive sensors and adopt new approaches. One in mind was using Piezo pick-up sensors and distribute them evenly. Then, use changes in frequency or time that each sensor data picks up in order to isolate and locate a position.
- Perhaps add a temporal element to our design. Allow the use of recording and playback. So for example on Thanksgiving day the plates will play music created from last Thanksgiving a year ago.
- An on/off switch is probably necessary. Also, a kids mode would be great. The idea would be that a parent can lock a plate from playing until the kid finishes eating all of his or her food.
- Improve sound of the speakers by getting better speakers and having an enclosure around it.
- Limit the hassle of wires by using PCB or using wireless communication to talk to a master node that plays the music.
- Change the interaction of the plates with the music. Instead of generating all the music from the plates, have music playing in the background and allow the plates to alter the ambient noise. This way you can control the music so that at the very worst it still sounds melodious.


_wzec989qrF.jpg?auto=compress%2Cformat&w=48&h=48&fit=fill&bg=ffffff)


Comments